The Invisible Characters are Word formatting entities, hidden by default. Master them to rule Word. Ignore them and you are just another Word user stumbling in the darkness.
Last week’s post covered how to display these invisible characters. If you’re not sure what the heck we’re talking about here, go back and read that post first.
Page and Column Break Invisible Characters
Chief among the invisible characters are the Breaks. Microsoft used to group all the breaks together in Word for Windows and still does on the Mac, even though their actual functions are very different. Let’s begin with the “safe” breaks, the ones that won’t wreck your document. These are the Page and Column Breaks, invisible characters #1 and 2.

The Page Break creates a new page immediately after it.
A Page Break is a special character that tells Word to start a new page. That’s all it does, it’s very straight-forward to use. Entering or deleting a Page Break will never screw up your document. This is the best way to create a new page.
Do not ever create a new page by typing a series of carriage returns. NEVER! EVER! The space taken by a series of carriage returns is a function of the specific font installed on your computer. Change fonts or move the file to a new computer and the carriage return space can easily change. The result is that your next page copy creeps on to the preceding page, or the new page starts with a blank line at the top. Not good. Just insert a Page Break and be done with it.
The Column Break starts a new column. In the last column on a page, it starts a new page.
Invisible character #2 is the Column Break. This is similar to the Page Break, but it creates a break to the next column and when you’re in the last column, a break to the next page. Inserting a Column Break in a 1-column layout has the same effect as inserting a Page Break.
Section Break Invisible Characters
Then we get into the Section Breaks. These are a different animal than the Page and Column Breaks and can wreck your formatting if not used with care. Section Breaks hold information for the preceding section such as margins, page layout and header & footer formatting. Deleting a Section Break forces the section that it ended to take on the formatting of the section after it. The Section Break at the end of the amalgamated sections is now in charge.
The Continuous Section Break creates a new section without creating a new page.
The most useful of the Section Breaks is the Continuous Section Break (invisible character #3). This creates a new section without creating a new page. A Continuous Break will automatically balance columns in the section it ends. It’s indispensable in fillable forms, since it marks the boundary between free-text and locked areas of the form. When you need to create an area with a different number of columns, reach for the Continuous Break.
This creates both a new section and new page immediately after it.
Invisible #4 is the Next Page Section Break. It’s also the most dangerous, because some users assume it’s equivalent to a simple Page Break. They insert them everywhere they want a new page and end up with dozens or hundreds of sections in their document. Then they wonder why their footers are messed up! Next Page Section Breaks should not be common. Use them to insert a landscape page in the middle of a portrait document, to create new chapters or other regular distinctive section formatting, or to format a different last page. Other than that, you probably shouldn’t be using them.
The Even and Odd Page Section Breaks create a new page and section with the corresponding header or footer type.
Then we have the Even and Odd Page Section Breaks (invisible characters #5 and 6). Once every 10 years you need these. They are used in conjunction with even and odd page headers/footers and don’t do much else. Their only function is to force an even or odd page header or footer where one would not naturally occur.
Paragraph and Anchor Invisible Characters
Now we move on to other invisible characters that have a more local scope: they only affect a small area of your documents. The most important of these is Invisible #7, the Paragraph Mark. Its function is analogous to the section breaks: the Paragraph Mark contains the formatting for the preceding paragraph. Delete it and the Paragraph Mark from the following paragraph takes over.
The Paragraph Mark holds the paragraph formatting for the paragraph it ends.
Paragraph Marks contain the default character formatting for the paragraph, plus all paragraph formatting such as indentation, line spacing, tabs, bullets and numbering
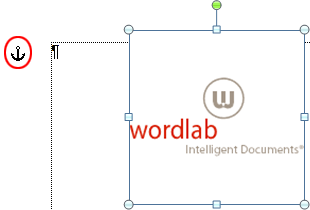
Paragraph Marks also serve as the character to which graphics, frames and text boxes are anchored. That brings us to invisible character #8, the Anchor. In Word, every item is either in the text string, or is anchored to the text string. The default anchoring is for the graphic to be positioned relative to the paragraph to which it is anchored. This makes for a very fluid document: when text is edited, the anchored pictures move around to stay close to their Anchors.
The Anchor shows to which paragraph mark a graphic or text box is anchored.
You can change the positioning to be absolute, so the graphic stays in the same position regardless of where the anchor is on the page. This does not eliminate the anchor! If the text moves to another page, the anchored graphic moves with it. It is not possible in Word to place a graphic on page 5 and have it stay there. It is always anchored to text and when the text moves, the graphic moves too.
By the same token, if the paragraph mark to which the graphic is anchored is deleted, the graphic will also be deleted!. This is why it’s so important to make those invisible characters visible. You really can’t see what you’re doing otherwise.
Bonus: the Bookmark Invisible Character
The square grey brackets show bookmarked text. Each Bookmark is named, to facilitate referencing it.
Today’s bonus invisible character is the Bookmark. Technically, this isn’t a character, it’s a range (an arbitrary subsection of a document similar to a selection). Bookmarks enable you to automatically relay information from one part of a document to another. One example is a document title that you also want to appear in the footer of each subsequent page. Select the title, insert a bookmark. Then, in the footer, insert a REF field. This field links back to the bookmark and always keeps the footer correctly updated. An easy fix that looks like magic to your clients. But you have to be able to see the bookmark!