Posted on by jkorchok- Updated on September 7, 2022
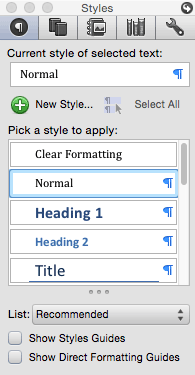
Are you managing styles in your Word documents? A hallmark of a professionally-created template is the appearance of the Quick Style Gallery. If I open a template and see this:
I realize the person who constructed the file doesn’t know better or doesn’t care. The clue are the 4 zombie styles on the right side. If you expand the gallery, you’ll see 8 more zombie styles. These 12 are automatically generated in every new installation of Word. Nobody uses them, they just clutter the interface. If you’re managing styles, you’ll make them disappear.
These 12 can’t be deleted, they are termed built-in styles and the Delete button is disabled in the style management dialog. But in Word for Windows, there is a Style Management panel called Recommended, where you can Hide them or optionally apply Hide Until Used. This last attribute keeps the style out of the Quick Style Gallery until the first time you apply it in a document, at which time it becomes visible.
But where is the Recommended panel in Word for Mac? Did someone Hide that too? No, it’s just not an option for Mac users. Microsoft left it out (speculate at will). But all is not lost: You can still manage style visibility on the Mac, you just have to do it with XML Hacking. New hackers should read XML Hacking: An Introduction and XML Hacking: Editing in macOS before trying these steps.
When you first open an Office XML field, the content is linearized and difficult to read. In BBEdit, apply Test>Apply Text Filter>run_tidy, an add-on script for BBEdit that you can download here. Voila! Readable XML!
Managing Styles with XML Editing
Word styles are stored in word/styles.xml and word/stylesWithEffects.xml. Word 2007/2008 reads styles.xml while Word 2010/2011 and later use stylesWithEffects.xml, so whatever changes you make, do them to both files. Word doesn’t always create a styleWithEffects.xml part, so if there isn’t one in your file, just edit styles.xml. Word’s built-in styles are in the w:latentStyles part. Let’s work on that first, then deal with custom styles.
The style order in the XML file has nothing to do with the order of styles in the user interface, so it’s best to search for them. Start with the Title style. The default listing looks like this: (You may see a somewhat different collection of tags from different Word versions.)
The Styles list: a good place to display occasionally-required typestyles.
To make this style disappear from the Quick Style Gallery, but still appear on the Styles list, just delete the w:qFormat="1" tag. If you want to remove a style not only from the Quick Style Gallery, but also from the master list of recommended styles, then don’t bother with w:qFormat="1", just remove w:semiHidden="0". Finally, to give the style the ability to remain on the Styles list, then be added to the Quick Style Gallery when it is first used, leave the other tags as is and change w:unhideWhenUsed="0" to w:unhideWhenUsed="1".
Besides the Title style, the other zombie styles you’ll probably want to remove are:
Subtitle Subtle Emphasis Emphasis Intense Emphasis Strong Quote Intense Quote Subtle Reference Intense Reference Book Title and List Paragraph
Another useful edit you can make to styles is to change the number beside w:uiPriority. Decreasing this number moves a style up the list, while increasing it moves it down. You may have noticed that editing w:uiPriority in the w:latentStyles has no effect on the position of Normal style. See Custom Styles below to solve this.
For all styles that have the same level number, they are displayed in alphabetical order. I usually rank them in the order they are likely to be used, with the body text and headings at the top, followed by bulleted, numbered and lettered styles. Often you’ll have styles that serve a function in a Word file, like unique styles that are referenced by StyleRef fields. If the user doesn’t need to apply a style, hide it. The simpler you make their interface, the fewer mistakes they can make.
The styles/stylesWithEffects XML parts contain a list of exceptions. There are many styles that remain invisible until you add an exception to the list. As an example, if you want to make the Body Text style to be at the left end of the Quick Style Gallery, you would first copy and paste the exception for Normal, then change the name to Body Text. The w:uiPriority=0 tag will ensure Body Text pops to the left end.
Managing Styles: Custom Styles
To manage custom and special styles, scroll down below the latentStyles section. Here you’ll see more verbose XML like this:
Here’s where you can change the order of Normal. Because this XML part comes after the Normal entry in latentStyles, it over-rides those settings. Any style set to 0 will appear to the left of Normal in the Style Gallery and above Normal in the Styles List.
Here’s what a custom style looks like:
<w:style w:type="paragraph" w:customStyle="1" w:styleId="Code">
  <w:name w:val="Code"/>
  <w:basedOn w:val="Normal"/>
  <w:uiPriority w:val="6"/>
  <w:qFormat/>
  <w:rsid w:val="00A12E2B"/>
  <w:pPr>
    <w:spacing w:after="0" w:line="240" w:lineRule="auto"/>
  </w:pPr>
  <w:rPr>
    <w:rFonts w:ascii="Bitstream Vera Sans Mono" w:hAnsi="Bitstream Vera Sans Mono"/>
  </w:rPr>
</w:style>
While you could edit all attributes of the style here, it’s easier to do through the user interface. But you can change the order, here set to 6.
Save the XML file. If you’re using BBEdit, you’re done. If you’re working with another editor, re-zip [Content_Types].xml plus the folders. Change the ending of the resulting Zip file to .docx and click on the Use .docx button when OS X asks. Open the file and check out the beautifully clean Quick Style Gallery, thanks to you managing styles!
This is a complex topic, so don’t feel bad if it’s hard to get working as expected. If you’re on a deadline, Brandwares can do this for you. Just email me at production@brandwares.com.
1:44 am
22 thoughts on “OOXML Hacking: Managing Styles”
Does this work with Word 2016 Mac?
I have followed the instructions precisely. And checked that the edits were saved.
But when I open the doc in Word nothing that changed. very strange.
Yes, styles work the same in all XML versions of Office. Use of some of the parameters is not very intuitive. I covered a few different things you could do, like hiding styles or changing their order. What is it that you’re trying to change about them? If you want, you can email me (production at brandwares dot com) the before and after versions, and I’ll take a look at them. This helps me refine my article to make it more useful.
I used your “w:uiPriority” tip and at first I didn’t quite work. My styles have a leading number code to put them in order, but they wouldn’t jump to the top when I assigned them to “1”. I noticed that many styles didn’t have a priority setting at all, so I just removed them entirely and voila! They’re now in numerical order. Thanks!
I use Strong and Emphasis on a regular basis and have even switched the keyboard shortcuts for Bold and Italic to use them. I also use (less frequently but at least once a week Title and Subtitle. I seldom deliberately use Normal. I generally manage my styles using the Manage Styles dialogs.
Hi Charles, Thanks for your comments. The Word for Windows user interface is a much easier way to manage styles. This article is primarily for Mac users, who don’t have that same facility. The user interface doesn’t allow reordering styles, so a hack is necessary.
Thanks so much for this set of instructions. However, I’m having some difficulties with getting Word to recognize the file once I retitle it a docx.
1. For some reason, when I change the docx to zip, the “Archive Utility” program processes to a .zip.cpgz file (so, I use the “Unarchiver” app).
2. Skipping all the actual xml editing, I immediately recompressed. I selected [Content_Types].xml plus three folders: customXml, docProps, and word (Note: there’s a fifth file present: _rels. I’ve tried selecting or not selecting, and neither way made a difference). I used the OS system “Compress 4 Items” feature to create a zip file.
3. I change the suffix of the zip file back to docx.
4. When attempting to open, MS Word notes that this is corrupt (“The file is corrupt and cannot be opened”).
At first I went through and made changes to the styles.xml file and thought I may have messed things up. But when I went through just these steps (making no adjustments), I received the corrupt file notice. Any suggestions that you or your readers may have are very welcome. Thanks!
macOS users do have a couple of hassles when editing XML. One issue is with the GUI version of the Archive utility, which doesn’t seem to rezip files in a way that Office can parse. Another problem is with the operating system needing to create an invisible .DS_Store file in every folder that is displayed in the finder. My article about editing XML in macOS may help. Editing in a program that can read and write zip files, like newer versions of BBEdit, sidesteps both issues and should solve your problems.
Thanks again for the great help. I struggled to get the coding to work, even with the information on the “editing XML in macOS” article. However, that article pointed to the ability in BBedit to directly open docx files without unzipping/zipping. That process was simple, and I now have a fully customized Word doc. Thank you!
On a related issue, the instructions above on reflowing Markup>Tidy are outdated. The most recent versions of BBedit do not support Tidy. The good news is that another wonderful person built a quick plugin that emulates that process very nicely: https://gist.github.com/ideabucket/5231db1261ed0f15bd59
At first I was confused, I thought you had left some steps out, but I found the missing material in the May 2016 update to the “XML Hacking Editing in macOS” article.
It’s working pretty well. The tip to BBEdit was brilliant. Yes, I was able to get my qFormat/Quick Format list down to just four items, although I can’t seem to make Title go away.
I changed the UI priority of Body Text, which I use rather than “Normal”, to 0, but it stays at the right end of the Quick Format List and stays way down in the Styles Pane as well. And when I open the file with Word 14.7.7, I can see that it still says Priority=100.
As Joe noted, the Markup > Tidy option is gone and the newer Markup > Utilities > Format… seems to only work one line at a time. I still had all the style names stacked up on a single, very huge line.
To remedy that, I added a line break wherever the original had >< as the delimeter between styles. Maybe that's why I'm not resetting the Body Text priority. Do you think?
Sorry for the delayed response, I had to do a little research. I’ve revised the article as a result. The styles.xml is read by Word 2007/2008. There is an similar part for later versions of Word called stylesWithEffect.xml. You should make identical revisions to both files to ensure you get the same styles display in all version.
I wrote to Bare Bones Software, the company behind BBEdit. The Markup>Utilities>Format… command is intended for use with HTML documents rather than XML. They sent me a script that I added to the installation that does a somewhat better, but not perfect job (it adds line breaks after every space in addition to between >< pairs). Here is their contact page, if you ask for the XML tidy formatting script, they’ll send it for free.
Thanks so much for your comments, I’ve used them to update the post. Word doesn’t always create a stylesWithEffects part. In that case, just edit styles.xml.
Changing the uiPriority number in the latentStyles section doesn’t change the order if the style is also in a later section that over-rides latentStyles. This is the case with Normal style, which appears in both places. For special styles like Normal and custom styles, I’ve added steps for setting the uiPriority number. Please see the last section of the revised post.
Why can’t Microsoft and it’s gazillions of people working and gazillions of dollars do this for MAC USERS. Hey, I know you have a vendatta and it’s all very high school, but my money is a green as anyone else’s. It is absolutely ABSURD that mac users aren’t able to organize the styles in the ribbon.
I agree. Here is a suggestion in the Word for Mac User Voice forum that asks for the same feature. Adding your vote will make it more likely that Microsoft will program this into a future version: Reorder styles in the Quick Style list
I’m trying to make a new bullet list style in Word but it seems that after I create a new style, it won’t show up in the styles list panel even when I have it set to show all styles. My coworker claimed there is a limit to the number of list styles in Word. I’m not sure I believe him but is that true?
My issue is that for one part of our doc, we want to have all the text indented 2.5 inches to the right for a table. While this is fine for most text, it screws up bullets as word isn’t smart enough to have bullets wrap at the original tab+offset distance… or at the least it doesn’t seem smart enough so I figured I’d need to define a new bullet list where everything is offset an additional 2.5”.
While I know I can do a manual adjustment by sliding the word wrap thingie on the ruler, I’d prefer for something to be more hard coded into a style.
Custom list styles do not appear in the Styles Pane. Instead, they appear in the Paragraph>Multilevel List dropdown under the List Styles section. There is no limit to the number, but practically speaking, no template is going to have more than 4 or 5 list styles.
You’re using the wrong approach with the table. Use Table Properties>Table>Text wrapping to force text to wrap around the table. Then you don’t need to define a style with an indent, the ordinary bullet style will work.
I am having the table forcing the text to wrap but when bullets wrap back around to additional lines, they don’t wrap correctly. All the non-bulleted copy wraps perfectly around the table so their styles do not need modifying—but the bullets try to wrap back around to the 0.25″ indent at th beginning of the line. But because the table is covering that space, the secondary bullet lines wrap right under the bullet instead of being indented in 0.25″ to the right of the bullet. I wish I could post a picture to show you what is happening. maybe i can somehwat illustratit it with just text…
this is happening:
[_____] •text text text
[_____] text text text
instead of this:
[_____] •text text text
[_____] text text text
weird. it stripped out all “unnecessary/extra spaces.” let me try that again
this is happening:
[_____] •text text text
[_____] text text text
instead of this:
[_____] •text text text
[_____] –text text text
(for that last line, pretend the text neatly left aligns to itself and not the bullet point. i used dahses instead of spaces since the comment app seems to remove them)
I have a Word-related paragraph styles Q but did not know where else to put it so I hope you see it here. Since 2015 or so, I have been using custom shortcut keys in my employers’ Word template for specific paragraph styles (PC only). They all worked fine up until 2019 or so when I started noticing that sometimes, some shortcut keys would work and others wouldn’t.
But as all the shortcut keys are defined together in the same normal.dotm file, I found this to be super weird. At the time, no one else was reporting this issue so I let it slide as a personal inconvenience but as of last week, the error is popping up for multiple users. The styles that have the most erratic consistency (sometimes they work, sometimes they don’t) are the ones that use Alt+1 (for Heading1) thru Alt+9 (Heading9) as their shortcuts. I maybe thought Word had began using these for other shortcuts but if that was the case, why would they work part-time?
Then, I did a search for these shortcut keys to see if other concurrently running apps had them reserved, but I couldn’t identify any programs I have installed that use Alt+1 thru Alt+9 to create a conflict so I was wondering if perhaps you had seen this before. Our other shortcuts, defined in the same normal.dotm file, such as Alt+S, Alt+A and Alt+H all work still. Just the Alt+1 (thru +9) doesn’t work part of the time.
If the solution to this issue is simply choosing a different shortcut key combination, I am fine with that but want to make sure that is necessary (and that I don’t run into this same issue with a different combination of buttons) before I try to train our organization’s 6+ years of muscle memory. Do you have any suggested shortcut key combinations for Headings1 thru 9?
(I also tried to post this to the Microsoft community board but it was taken down without a reason provided). So thank you in advance if you see this and reply!!
Brilliant! Very satisfying to be able to edit the order of the presentation of custom styles without recourse to using a PC! It has taken me an hour, to follow your instructions (Mac), and I am pretty happy. It is a horrible conference paper template which was originally done (well) in 1999. I’d love to repurpose some of those pesky built-in styles, to reduce the number of styles overall, but that is too hard for our conference presenters, apparently. They all have to be Custom Styles starting with CONF. Sigh. Thank you very much for sharing this very, very, helpful series of posts. Megan.
Subscribe to the Best Practices blog and get a free copy of our new Control Control add-in. This is the easiest way to create the same modern form controls that are in Word for Windows. Enter your real email and hit Subscribe in the right-hand column of this page. You’ll receive the add-in and installation instructions within 3 days.


Does this work with Word 2016 Mac?
I have followed the instructions precisely. And checked that the edits were saved.
But when I open the doc in Word nothing that changed. very strange.
Yes, styles work the same in all XML versions of Office. Use of some of the parameters is not very intuitive. I covered a few different things you could do, like hiding styles or changing their order. What is it that you’re trying to change about them? If you want, you can email me (production at brandwares dot com) the before and after versions, and I’ll take a look at them. This helps me refine my article to make it more useful.
I used your “w:uiPriority” tip and at first I didn’t quite work. My styles have a leading number code to put them in order, but they wouldn’t jump to the top when I assigned them to “1”. I noticed that many styles didn’t have a priority setting at all, so I just removed them entirely and voila! They’re now in numerical order. Thanks!
That sounds like the old days when the only way to order styles was by their name. I’m glad you got it working!
Thank you for the article. I think I will link to it in http://addbalance/usersguide/styles.htm
I use Strong and Emphasis on a regular basis and have even switched the keyboard shortcuts for Bold and Italic to use them. I also use (less frequently but at least once a week Title and Subtitle. I seldom deliberately use Normal. I generally manage my styles using the Manage Styles dialogs.
Hi Charles, Thanks for your comments. The Word for Windows user interface is a much easier way to manage styles. This article is primarily for Mac users, who don’t have that same facility. The user interface doesn’t allow reordering styles, so a hack is necessary.
Thanks so much for this set of instructions. However, I’m having some difficulties with getting Word to recognize the file once I retitle it a docx.
1. For some reason, when I change the docx to zip, the “Archive Utility” program processes to a .zip.cpgz file (so, I use the “Unarchiver” app).
2. Skipping all the actual xml editing, I immediately recompressed. I selected [Content_Types].xml plus three folders: customXml, docProps, and word (Note: there’s a fifth file present: _rels. I’ve tried selecting or not selecting, and neither way made a difference). I used the OS system “Compress 4 Items” feature to create a zip file.
3. I change the suffix of the zip file back to docx.
4. When attempting to open, MS Word notes that this is corrupt (“The file is corrupt and cannot be opened”).
At first I went through and made changes to the styles.xml file and thought I may have messed things up. But when I went through just these steps (making no adjustments), I received the corrupt file notice. Any suggestions that you or your readers may have are very welcome. Thanks!
macOS users do have a couple of hassles when editing XML. One issue is with the GUI version of the Archive utility, which doesn’t seem to rezip files in a way that Office can parse. Another problem is with the operating system needing to create an invisible .DS_Store file in every folder that is displayed in the finder. My article about editing XML in macOS may help. Editing in a program that can read and write zip files, like newer versions of BBEdit, sidesteps both issues and should solve your problems.
Thanks again for the great help. I struggled to get the coding to work, even with the information on the “editing XML in macOS” article. However, that article pointed to the ability in BBedit to directly open docx files without unzipping/zipping. That process was simple, and I now have a fully customized Word doc. Thank you!
On a related issue, the instructions above on reflowing Markup>Tidy are outdated. The most recent versions of BBedit do not support Tidy. The good news is that another wonderful person built a quick plugin that emulates that process very nicely: https://gist.github.com/ideabucket/5231db1261ed0f15bd59
At first I was confused, I thought you had left some steps out, but I found the missing material in the May 2016 update to the “XML Hacking Editing in macOS” article.
It’s working pretty well. The tip to BBEdit was brilliant. Yes, I was able to get my qFormat/Quick Format list down to just four items, although I can’t seem to make Title go away.
I changed the UI priority of Body Text, which I use rather than “Normal”, to 0, but it stays at the right end of the Quick Format List and stays way down in the Styles Pane as well. And when I open the file with Word 14.7.7, I can see that it still says Priority=100.
As Joe noted, the Markup > Tidy option is gone and the newer Markup > Utilities > Format… seems to only work one line at a time. I still had all the style names stacked up on a single, very huge line.
To remedy that, I added a line break wherever the original had >< as the delimeter between styles. Maybe that's why I'm not resetting the Body Text priority. Do you think?
Anyway, thanks for a useful article.
Sorry for the delayed response, I had to do a little research. I’ve revised the article as a result. The styles.xml is read by Word 2007/2008. There is an similar part for later versions of Word called stylesWithEffect.xml. You should make identical revisions to both files to ensure you get the same styles display in all version.
I wrote to Bare Bones Software, the company behind BBEdit. The Markup>Utilities>Format… command is intended for use with HTML documents rather than XML. They sent me a script that I added to the installation that does a somewhat better, but not perfect job (it adds line breaks after every space in addition to between >< pairs). Here is their contact page, if you ask for the XML tidy formatting script, they’ll send it for free.
I’m using Word 16.16 and I don’t see styleswitheffects.xml at all. And changing uiPriority numbers doesn’t seem to have any effect for me.
Thanks so much for your comments, I’ve used them to update the post. Word doesn’t always create a stylesWithEffects part. In that case, just edit styles.xml.
Changing the uiPriority number in the latentStyles section doesn’t change the order if the style is also in a later section that over-rides latentStyles. This is the case with Normal style, which appears in both places. For special styles like Normal and custom styles, I’ve added steps for setting the uiPriority number. Please see the last section of the revised post.
Why can’t Microsoft and it’s gazillions of people working and gazillions of dollars do this for MAC USERS. Hey, I know you have a vendatta and it’s all very high school, but my money is a green as anyone else’s. It is absolutely ABSURD that mac users aren’t able to organize the styles in the ribbon.
I agree. Here is a suggestion in the Word for Mac User Voice forum that asks for the same feature. Adding your vote will make it more likely that Microsoft will program this into a future version: Reorder styles in the Quick Style list
Hi John,
I’m trying to make a new bullet list style in Word but it seems that after I create a new style, it won’t show up in the styles list panel even when I have it set to show all styles. My coworker claimed there is a limit to the number of list styles in Word. I’m not sure I believe him but is that true?
My issue is that for one part of our doc, we want to have all the text indented 2.5 inches to the right for a table. While this is fine for most text, it screws up bullets as word isn’t smart enough to have bullets wrap at the original tab+offset distance… or at the least it doesn’t seem smart enough so I figured I’d need to define a new bullet list where everything is offset an additional 2.5”.
While I know I can do a manual adjustment by sliding the word wrap thingie on the ruler, I’d prefer for something to be more hard coded into a style.
Any insights or suggestions?
Custom list styles do not appear in the Styles Pane. Instead, they appear in the Paragraph>Multilevel List dropdown under the List Styles section. There is no limit to the number, but practically speaking, no template is going to have more than 4 or 5 list styles.
You’re using the wrong approach with the table. Use Table Properties>Table>Text wrapping to force text to wrap around the table. Then you don’t need to define a style with an indent, the ordinary bullet style will work.
I am having the table forcing the text to wrap but when bullets wrap back around to additional lines, they don’t wrap correctly. All the non-bulleted copy wraps perfectly around the table so their styles do not need modifying—but the bullets try to wrap back around to the 0.25″ indent at th beginning of the line. But because the table is covering that space, the secondary bullet lines wrap right under the bullet instead of being indented in 0.25″ to the right of the bullet. I wish I could post a picture to show you what is happening. maybe i can somehwat illustratit it with just text…
this is happening:
[_____] •text text text
[_____] text text text
instead of this:
[_____] •text text text
[_____] text text text
weird. it stripped out all “unnecessary/extra spaces.” let me try that again
this is happening:
[_____] •text text text
[_____] text text text
instead of this:
[_____] •text text text
[_____] –text text text
(for that last line, pretend the text neatly left aligns to itself and not the bullet point. i used dahses instead of spaces since the comment app seems to remove them)
Hi John,
I have a Word-related paragraph styles Q but did not know where else to put it so I hope you see it here. Since 2015 or so, I have been using custom shortcut keys in my employers’ Word template for specific paragraph styles (PC only). They all worked fine up until 2019 or so when I started noticing that sometimes, some shortcut keys would work and others wouldn’t.
But as all the shortcut keys are defined together in the same normal.dotm file, I found this to be super weird. At the time, no one else was reporting this issue so I let it slide as a personal inconvenience but as of last week, the error is popping up for multiple users. The styles that have the most erratic consistency (sometimes they work, sometimes they don’t) are the ones that use Alt+1 (for Heading1) thru Alt+9 (Heading9) as their shortcuts. I maybe thought Word had began using these for other shortcuts but if that was the case, why would they work part-time?
Then, I did a search for these shortcut keys to see if other concurrently running apps had them reserved, but I couldn’t identify any programs I have installed that use Alt+1 thru Alt+9 to create a conflict so I was wondering if perhaps you had seen this before. Our other shortcuts, defined in the same normal.dotm file, such as Alt+S, Alt+A and Alt+H all work still. Just the Alt+1 (thru +9) doesn’t work part of the time.
If the solution to this issue is simply choosing a different shortcut key combination, I am fine with that but want to make sure that is necessary (and that I don’t run into this same issue with a different combination of buttons) before I try to train our organization’s 6+ years of muscle memory. Do you have any suggested shortcut key combinations for Headings1 thru 9?
(I also tried to post this to the Microsoft community board but it was taken down without a reason provided). So thank you in advance if you see this and reply!!
This disappearance of your post was most likely accidental. Please post your question to answers.microsoft.com, as it is off-topic here.
Brilliant! Very satisfying to be able to edit the order of the presentation of custom styles without recourse to using a PC! It has taken me an hour, to follow your instructions (Mac), and I am pretty happy. It is a horrible conference paper template which was originally done (well) in 1999. I’d love to repurpose some of those pesky built-in styles, to reduce the number of styles overall, but that is too hard for our conference presenters, apparently. They all have to be Custom Styles starting with CONF. Sigh. Thank you very much for sharing this very, very, helpful series of posts. Megan.