Let’s start hacking some XML with a simple project: setting the default table text size. This article assumes you have read the introduction and have a suitable text editor installed. Mac users should also read XML Hacking: Editing in OS X.
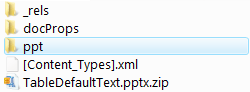
When you insert a new table in PowerPoint, the default table text size is 18 points. Using XML hacking, we can set this to whatever point size the designer prefers. You can also set the text to appear in all caps. Following the previous post’s instructions, add .zip to the file ending and unzip the file. Look for the ppt folder and open it:

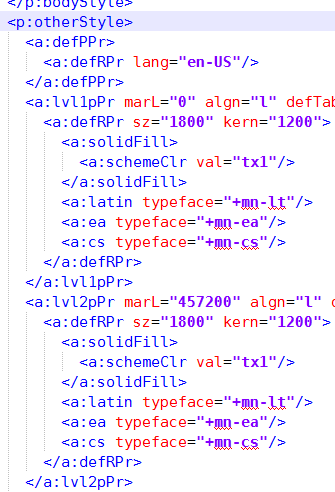
In the ppt folder is another folder called slideMasters. If your sample presentation is typical, it has only one Slide Master, so you won’t be surprised to find that typically slideMasters contains only one file, called slideMaster1.xml. Open this file in your text editor and reformat the XML to make it readable (XML Tools>Pretty Print in NotePad++, or Markup>Tidy>Reflow in BBEdit). Scroll down to near the end, looking for a tag called <p:otherStyle>. This is the section that formats default text in miscellaneous objects, like tables:

Within the otherStyle section, the 4th line starts with <a:lvl1pPr. Then the 14th line begins with <a:lvl2pPr. Each of these 10-line sections formats a different text level, with the 4th line starting the first and the 14th beginning the second level. A handy, if terse, reference to all the parameters is shown here. Not all of these are actually used in the context of a table. As one example, there are a:spcBef and a:spcAft for setting space before and after, but this is ignored by PowerPoint in a table. PowerPoint pays attention to the font size, the left margin, line spacing, alignment and whether it’s all-caps, small caps, bold and/or italic.
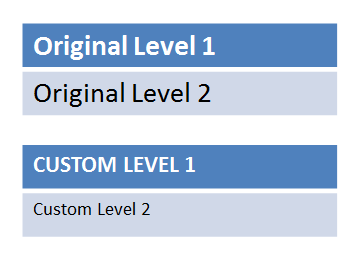
The font size is set by this line: <a:defRPr sz="1800" kern="1200">. sz=1800 is the font size in hundredths of a point, so 1800 gives us the default 18-point size. Since this is the first level that might well be used for table headings, you could set it to something like 1450 to get a 14.5 point result.
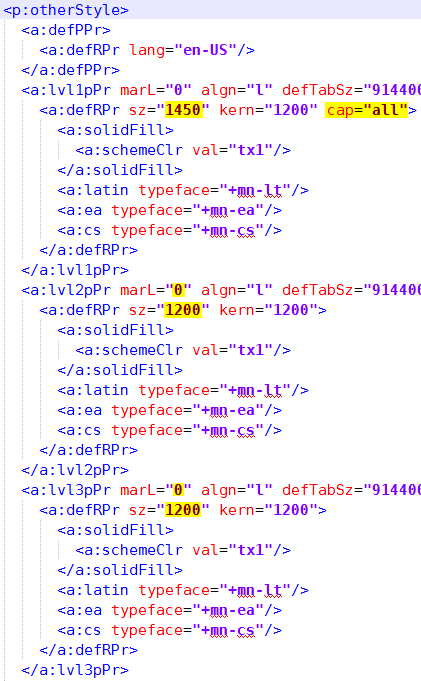
Since this first level can be used for headings, let’s make it all-caps while we’re at it. Edit the line to read <a:defRPr sz="1450" kern="1200" cap="all">. Done! (Please note, this can be used for headings, but the user must still use the Home>Increase List Level command to set the actual level of text for each section of the table. In PowerPoint 2016 for Mac, the command is called Indent More.)
Now proceed to the second level and set its point size. Something like <a:defRPr sz="1200" kern="1200">
Other useful attributes for <a:defRPr> include cap="small" for small caps, b="1" for bold and i="1" for italics. In addition, spc="400" adds enough tracking to make 10pt text have about 1 character width between each pair. This latter parameter can be positive for wider spacing or negative to crunch text together.
Scroll down a little further: you’ll notice that there are 9 levels, though in a table you’ll probably only use the first 2 or 3. In typical Microsoft style, each level is indented further than the preceding one. Compare level 1 with level 2:
<a:lvl1pPr marL="0"
<a:lvl2pPr marL="457200"
marL is the left margin. The units of measurement here are EMUs: English Metric Units. This is an invented measurement system that allows easy conversion between English and Metric. suffice it to say that 457200 EMUs is 1/2". When I modify this section, I set all 9 levels to marL="0". I also set all lower levels to the same point size as the lowest designed level, level 2 in our example. That way, if a user keeps changing to a lower text level, the formatting remains the same.
Text alignment can also be set using the algn parameter. The useful settings are l (left), r (right), ctr (centered), just (justified), and dist (text is widespaced to evenly fill cell width). Of course, if you’re setting these, marL should be set to 0. The simplest way to experiment with these parameters is to set the styles in the main text placeholder of the Slide Master (the larger slide at the top of the slide master list). Then unzip the presentation, open ppt/slideMasters/slideMaster1.xml and examine the <p:bodyStyle> section. The <p:otherStyle> section uses exactly the same syntax, so if you need bullets or unusual spacing in a table, you can set up <p:otherStyle> to do it.
Here’s what the final file should look like, with the changes highlighted:
What You Can’t Do
Each level definition includes references for Latin (a:latin), East Asian (a:ea) and Complex Script (a:cs) fonts. In similar Style parts like bodyStyle, you can replace +mn-lt with the name of a font so set that level in a non-theme font. But in the otherStyle part, PowerPoint completely ignores these entries, so much so that you can delete the three lines and PowerPoint will open the file without raising an XML error. This indicates that the program doesn’t even try to read those values. You also can’t specify different colors for different text levels in this XML part.
Fortunately, you can set fonts and colors for parts of the table in the custom table style, a completely different XML part from the otherStyle section of the slide master. For more about table styles, please see the articles linked to below.
This gets asked a lot, but the answer is no: you cannot set vertical cell/row alignment or cell margins in default taxt table text or a table style. It would have been possible given the OOXML spec, Microsoft just didn’t bother.
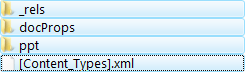
When you’re finished editing, save and close the file. In a folder window where you can see all the unzipped files, select the folders _rels, docProps and ppt, plus [Content_Types].xml:

Zip them into a file that ends with the same file ending as the original presentation, usually .pptx. Open in PowerPoint, insert a table and test your new default font sizes. Please note, assigning these styles makes them available to the whole table, but to access them you still need to use Increase List Level, same as in an ordinary text placeholder. Unfortunately, there’s no way to automatically assign <a:lvl1pPr> to table headings and <a:lvl2pPr> to the body of the table, which would be cool and helpful.
In the otherStyle section, you can also set linespacing, space before and after, tabs and several other text attributes. Some of these have little effect in a table. In a Word table, adding space before or after has a similar effect as changing the top or bottom cell margin. Not so in PowerPoint. Space before and after in a PowerPoint table has no effect on the cell height. For complete coverage of all parameters you can set in the otherStyle section, please read my articles about setting Textbox Styles: XML Hacking: Text Box Styles and XML Hacking: Styled Text Boxes Complete. The syntax is exactly the same.
To find out more about creating table styles in PowerPoint, please read my two-part article XML Hacking: Custom Table Styles and XML Hacking: Table Styles Complete.
We’re available to create custom table styles for you, just email me at production@brandwares.com


Introduction to Excel XML Part 1: creating a simple table …
Thank you for all this great information. I was able to hack my XML quite elaborately to solve a lot of customization problems in my PPT file. However, this particular section where you discuss <a:lvl1pPr vs <a:lvl2pPr, doesn't work for me the way you describe. Your example shows setting of all caps for <a:lvl1pPr, and your illustration shows only the header of the table being affected by this. You also set <a:lvl1pPr font to 14.5 and <a:lv21pPr, and the remaining levels to 12, and your illustration indeed shows that only the header row is 14.5 point font and the next row is 12 point font.
However, when I try all this, all the attributes I set in <a:lvl1pPr end up applying to the whole table. If I add the caps as you describe, it makes the whole table caps. If I make <a:lvl1pPr have font size 22 (2200), it sets the whole table to font size 22. Furthermore, the <a:lvl2pPr attributes I set, in my case font size 20, are only obeyed by level 2 indented text, such as in a sub-bullet. So it seems to me that you are saying <a:lvl1pPr applies to the header, when in fact it applies to all rows and all text that is at the first level of indentation and the subsequent ones only apply to sub-levels of indentation.
My problem is that I need the header row to be size 2200 and alignment to be ctr. I can't seem to get this to happen to only the header row. Based on your all caps for only the header row above, I thought it would work by just setting <a:lvl1pPr to have 22 font and ctr alignment, but it didn't work for only the header row, it applied to all rows, so I tried your all caps example, and as I stated above, it didn't work only for the header row either.
Is it maybe that it used to work in previous powerpoint versions and then someone "fixed it" to work for indentation levels instead of row levels? Is there some other way to achieve this? Thanks in advance for any insight on this.
Thanks for your comments, I’ve clarified the text of the post. As with an ordinary text placeholder, all text starts at level 1 and the user has to use Home>Increase List Level to get to the other levels. In PowerPoint 2016 for Mac, this command is Home>Indent More. It would be great if a designer could assign a list level to a table part so that the heading automatically came out all caps while the body was upper and lower case. As the Open Office spec is currently written, only a few type attributes like bold and italic can be set in the table style. For this reason, even after creating a table style, it’s still a good idea to include a sample table in your presentation with a few instructions about using Increase List Level in appropriate areas.
Oh, and I should mention I’m using PowerPoint 2016 and also I really want to thank you for posting all this. I read all of your hacking xml stuff, had never done it before, it seems easy now, and it’s all thanks to you. It is very well done!
Dear John,
your posts on this website really helped me a lot to change a Table style which was predefined by Microsoft but not in line with the CI guidance of our company.
The prefined table style changed the text color to white and bold for the cells manipulated when clicking ‘first row’ and/or ‘first column’ and the default font size was also wrong.
What took me some time to understand (and I thought it might help other readers as well) was that one has to change the font size in the “otherStyle” section of the “ppt\slide masters\slidemaster1.xml” file, while the bold and text color setting have to be changed in the “ppt\tablestyles.xml” document. BTW: In the later ‘not bold’ can be choosen by setting b=”off” , in contrast to the b=”0″ nomeclature in the first document (thanks microsoft for this extra complexity).
Thanks for enabling me to solve this and keep up the great work on this homepage!
Volker
Thanks for pointing out the otherStyle levels for setting table text. There’s a link in the article to this piece about Default Table Text that covers this. And yes, it would be nice if Microsoft could stick to one syntax for applying bold.
Do you know how to set vertical alignment of text using Default table text? All of my text is currently top aligned, I’d like them bottom aligned. Thanks in advance.
Unfortunately, there is not a way to set the vertical alignment in a table style. The p:otherStyle section of slideMaster1.xml has a fontAlgn parameter, but all it does is set the vertical alignment within a line of text. The vertical alignment is then visible if you have large text followed by a smaller point size.
When you set vertical alignment using the PowerPoint program interface, a tag is added to the selected cell: . This can’t be added to a tableStyle.
Hi John,
Your posts are really amazing. They helped me a lot, even though i have no experience with XML files or coding language in general.
I just cannot seem to find how and where i can change the color of a header raw to white instead of black.
Thank you!
Raluca
In this article: XML Hacking: Custom Table Styles,format the <a:firstRow> section, which appears at the end of the table style definition. Set the <a:fill> parameter. If white is part of your color theme and it is set to be the Light1 value, you would use
If white is at a different spot on your color theme, you’ll have to change lt1 to the color theme location where it is.
If white is not part of your color theme, you’ll have to set it as an RGB color:
Is it possible to have a layout with a predefined table (with some text in the first column, and placeholders in the second column)?
Sorry, that’s not possible. Table styles are very simple constructs that include border, fill and some font information. You would need to write a macro, or include a sample to copy and paste, to create the kind of table you describe.
This was really helpful! I had two questions as I read through this:
1. is there a way to middle align the text? I only see instructions on how to adjust the horizontal alignment in this article, but don’t see options for vertical alignment
2. Is there a way to select a different table style by default as part of the template? I see your other article on table styles, but it seems to be on defining a custom table style whereas I just want the template to default to a different table style and to turn off the banded rows option
1. While there is an XML setting for vertical alignment, it only covers text selections relative to the paragraph that contains the selection. It has no effect on vertical alignment relative to the cell.
2. You can only set one table style as the default. The Design option setting (like turning banded rows on or off) are not part of the style. If you need a table style without banded rows, it’s best to create a custom table style that has no banded row formatting. Then when the user inserts it, the design option for banded rows does nothing and it doesn’t matter what the option is set to.
Hi John,
I love your XML hacking posts and I’ve had multiple opportunities to employ this black magic in my work. I owe you so much! Thanks for all of this!
Right now I’m revisiting all your table hacks since I have an interesting assignment – I want to change the default font used in a table when the user creates a new table from scratch.
My current understanding is that table styles are concerned with ANYTHING BUT font selection and size. So I’m back here trying to modify the otherStyle tag in the master. I’ve grafted the “a” tags directly from other components in the same file yet nothing changes. I suspect there’s a conflict between the custom typeface parameter and a parameter of the parent tag.
Before: https://pastebin.com/kUJMJqb2
After: https://pastebin.com/Z5VBf5ep
Ultimately, I wanted to ask: Do you have an idea why my approach is not working or any other suggestions on how I can achieve this? Thanks!
Well, that’s bizarre. Those font settings in otherStyle are completely ignored by PowerPoint. I’ve revised the article to include this new information. To have a different table font, you would have to set the minor (Body) font of the font theme to Open Sans. Then edit the font names in titleStyle and bodyStyle to to be the other fonts you want to display. In those sections, the font names do get used as expected.
Hi John, Thanks for looking into this!
Thanks for the kind words. I’ll have to do a little research to find out what’s possible with speccing other fonts here.
Hello, John!
You are doing a great job with this blog, thank you so much! Completely insane.
I was playing with tables in XML and came across such an issue: when I set different colors for different text levels in tables, nothing happens.
This setting seems to be ignored by PowerPoint.
So, do you know if we can set colors for text levels in tables?
Or are we limited to setting the color to the whole table text & for first/last rows and columns?
Thanks in advance!
It seems that all parameters below the a:defRPr are ignored by PowerPoint. You can’t set a different font or font color. Instead, the Body font from the font theme will be used and the dk1 color from the color theme will always be applied. Thanks for letting me know, I’ve revised the article to include this information.
John, thanks for checking in!
Much appreciated!
This is fantastically useful, thank you
Thanks!
Hi John,
Thanks so much for all of your amazing hacks. They are literally saving me hours upon hours every week.
Is it possible to update the default bullet format within tables? I’ve managed to get it to work for all the other sections of PPT save the table. Thank in advance for any advice!
Thanks! To create bullets in tables, revise the Table Text (otherStyle) section in slideMaster1.xml. Bullets have many parameters, so the simplest approach is to first create bullet styles on the Slide Master (slide master, not slide layouts!). Then open slideMaster1.xml and copy the bulleted styles from bodyStyle to otherStyle. The syntax is identical, so a straight copy and paste will work.
Hi John,
I’m doing exactly this; copying a bullet format from a bodyStyle – lvl1pPr, down to an otherStyle, lvl1pPr.
I was wondering, is there a way to define the bullet and indent, etc., but have the bullets off?
i.e. so when a user inserts a table, there are no bullets applied by default, but when they click the Bullets button on the Home tab, the bullets are applied using the indents and other formatting applied in the otherStyle?
Cheers
Rich
Sorry, there’s no XML to do that. Clicking on the Home>Bullets button applies a Microsoft default bullet format. It doesn’t turn an existing format on and off.
There is a <buNone/> attribute, but it’s intended for application to bulleted text to turn bullets off. Using it in a text style prevents you from being able to add bullets to that text.
A workaround it to create 2 text levels, one with bullets and the other without. Then the user can click on Home>Paragraph>Increase List Level (Home>Indent More for Mac users) to switch between bulleted and unbulleted text.
Thanks for all the great tips. I needed to generate custom styles for my dark background theme for every accent color the same way the default styles of Powerpoint are setup so I built this tool:
https://github.com/nbonamy/powerpoint-custom-table-style-generator
Maybe it will serve somebody else
Thanks for posting this! I’ll check it out.
Hi there… just wondering if we are able to vertically align table content in XML now? Would like to set default so that top row is bottom aligned and rest of table is middle.
Sorry, Microsoft never added vertical cell/row alignment or default cell margins to the table text or table style specs. It’s not possible to preset them.
Thanks for this great guide! It helped me to reduce the font size of newly inserted tables. In relation with the font size, I’d also want to adjust the indents of the bullet lists used in the table cells. with the ‘lMar’ attribute, I’m able to let the bullets start where I want them. However, I also want to reduce the space between the bullets and the texts. E.g, from:
* Start text L1
* Start text L2
to
* Start text L1
* Start text L2
Is that possible and if so, where can it be adjusted? It seems related the the ‘indent’ attribute, but I can’t find a way to make it work. Any tips would be highly appreciated!
The marL parameter sets the distance of the text from the inside of the placeholder. The indent parameter sets the distance from the text to the bullet and is usually a negative number in this context. If the bullet sits at the left side of the placeholder and the text starts 1/2″ in, then marL will be 457200 and indent will be -457200. To reduce the bullet space and move the text to the left, reduce both numbers by the same amount.
When you’re puzzled about how to achieve text formatting, use the slide master to create your formatting with the user interface. Then read the XML created in the slide master’s bodyStyle section and copy that formatting to otherStyle or wherever you need it. The XML syntax is identical.
You are a genius! This is all so amazing and the only blog out there that is this comprehensive.
Question: Is there a way to fix the default height of a table to be tighter/more compact? Right now when I create a new table, the height always defaults to “0.41” even when I changed the default font to 10 pt. It leaves a lot of space between rows. Is there a way to make the default to “0.35” or make it auto adust height to the font size that is in the table?
Thanks for the compliment! Unfortunately there are several parameters that are not part of the table style spec, and default row height is one of those. You also can’t preset cell margins or vertical text alignment.