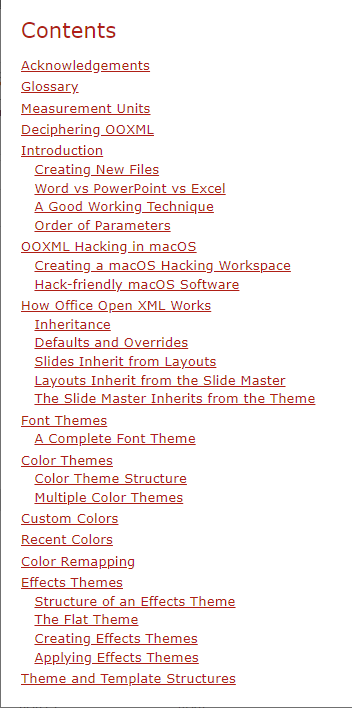
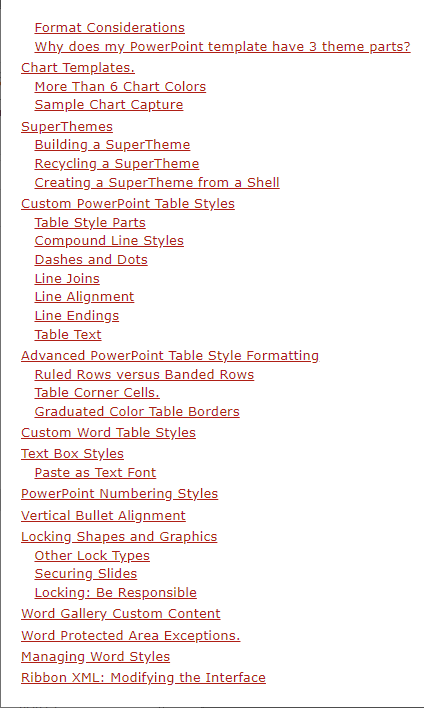
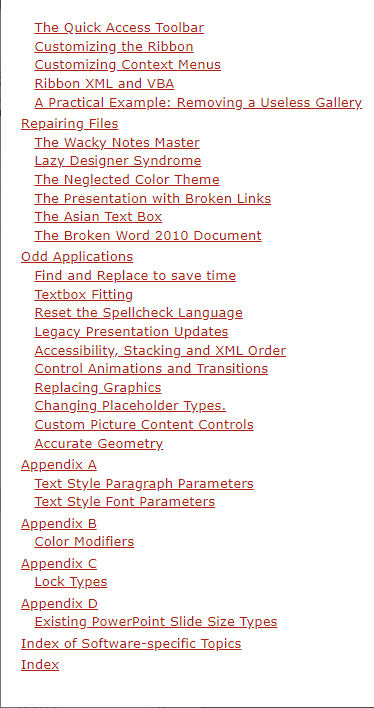
The ebook version of OOXML Hacking has been released. The last three years have gone into adding the equivalent of 40 pages of new information. This is in addition to the trove of unique techniques that already appeared in the print version. Here are screen shots of the table of contents, to give you an idea of the topics covered in this publication:
Barnes & Noble distributes only in the U.S., so use Kobo.com if you’re from another country.
As always, all techniques are covered in both Windows and Mac, where possible. The book contains a link to a downloadable text file of all listings in the book, so you don’t have to re-key text from the screen. The book is currently available on Kobo.com and Barnes & Noble. Barnes & Noble distributes only in the U.S., so use Kobo.com if you’re from another country.
Please note, this e-book has digital rights management applied. All code listings are available in a downloadable text file, so you don’t have to re-key anything. If you have any problems, please contact us at this address
Brandwares provides top-quality, bulletproof templates to a world-wide clientele. We have the Client List to prove it. But you can get your Office questions answered for free (or cheap)!
I also answer questions at Experts Exchange, where I’ve been awarded a Distinguished Expert award for 2021.
This site isn’t free, but it is jam-packed with expertise. There’s a 7-day free trial, if you want to check it out. Tag your post with Microsoft PowerPoint, Microsoft Word, VBA and/or Fonts Typography to ensure your Office questions are answered.
The vast majority of presentations are created using the default templates that comes with Microsoft PowerPoint. All Microsoft-compatible PowerPoint templates have a uniform structure, and the result is that you can copy and paste slides between any deck and the paste works as expected: the content comes across perfectly, and the formatting is updated.
But in almost all corporate presentations with custom templates, this no longer works. Slides pasted from Microsoft-based presentations always need to be reformatted manually, because the custom template haven’t been created to be Microsoft-compatible.
It doesn’t have to be this way. Here’s how to create custom templates that will be both Microsoft-compatible and have a look and feel that is brand-compatible with the organization.
What’s in a Microsoft-Compatible PowerPoint Template?
Most designers create presentation templates incorrectly for the purpose of importing of slides created with Microsoft templates. Almost universal infractions include deleting or renaming the default slide layouts, and deleting or adding placeholders on whatever default slide layouts are left. Less common methods that designers use to wreck templates include deleting all placeholders on the master slide, and deleting all default layouts, then trying to replace them
To understand why these actions could cause problems, we need to understand the PowerPoint file structure. All new blank PowerPoint files contain the following:
1 Master Slide (in Slide Master view, the larger slide at the very top of the left-hand thumbnail list). The parent to all the layouts, to which the slide layouts are children. All text formatting is inherited from this slide. Deleting placeholders here will cripple the template.
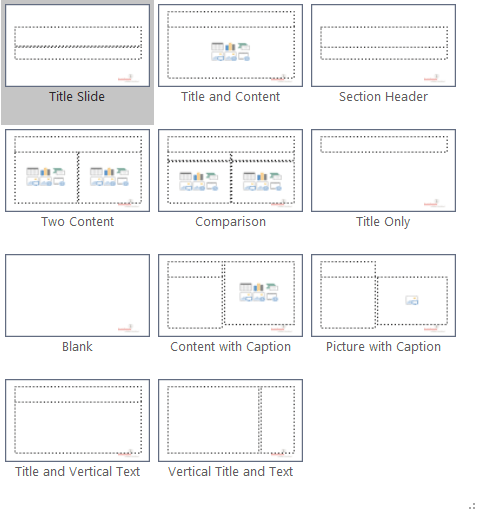
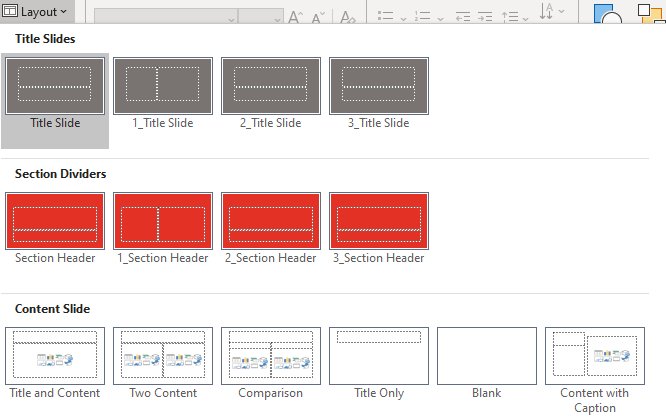
11 default slide layouts, which inherit the formatting set in the master slide. These 11 comprise:
Title Slide, for the presentation title.
Title and Content, for the bulk of the presentation content.
Section Header, to divide the deck into relevant sections.
Two Content, with 2 content areas.
Comparison, similar to Two Content, but each content area also has a corresponding heading placeholder.
Title Only, displaying only a Title field, with the rest of the slide blank.
Blank, with not even a Title field.
Content with Caption, a little-used layout the includes a Title, Text and Content placeholder.
Picture with Caption, similar to Content with Caption, but with a Picture placeholder replacing the Content one.
Title and Vertical Text This layout is intended for Asian language use and is only displayed as a choice if your operating system has an Asian language set up.
Vertical Title and Text Similar to the previous layout, only visible on computers with Asian language input enabled in the operating system.
Each of these layouts has a specific layout type, set in XML and not alterable in the program interface. You can create the correct placeholder types by generating a new, blank PowerPoint file. Each of these layouts contains placeholders for the date and slide number, plus a footer field. All but 1 have a title placeholder.
Here’s the second line of a default Microsoft layout. In this example, obj is the XML type for a Title and Content layout:
If a slide layout has been created by the user from the Insert Layout command, that layout will not have a type. Instead, the second line of the XML will include userDrawn=”1″:
PowerPoint reads the userDrawn property and will not treat your layout as a default layout no matter what you do to it. It will never be Microsoft-compatible.
If you have deleted a default slide layout, you can restore it by creating a new blank presentation, then copying and pasting the layout under the slide master of the deck to be repaired. You can also restore a default layout by running this VBA:
Sub RestoreLayout()
  With ActivePresentation.Slides
    .Add(.Count + 1, ppLayoutObject).Delete
  End With
End Sub
The example above restores a deleted Title and Content layout. Just change ppLayoutObject to the type you need from this list:
Layout Type
VBA Parameter
Title Slide
ppLayoutTitle
Title and Content
ppLayoutObject
Section Header
ppLayoutSectionHeader
Two Content
ppLayoutTwoObjects
Comparison
ppLayoutComparison
Title Only
ppLayoutTitleOnly
Blank
ppLayoutBlank
Content with Caption
ppLayoutContentWithCaption
Picture with Caption
ppLayoutPictureWithCaption
Title and Vertical Text
ppLayoutVerticalText
Vertical Title and Text
ppLayoutVerticalTitleAndText
Here are the recommendations that Microsoft should have published with the release of PowerPoint 2007: All new PowerPoint templates should include all default slide layouts and placeholders. That would have saved so much grief! Every file would be a Microsoft-compatible PowerPoint template or theme.
Please note, I am not suggesting that you restrict your design to only these layouts and placeholders. As long as you have the default layouts with the default placeholders, the rest of the master slide view can be filled with all kinds of special-purpose layouts with any number of placeholders. Just remember, whatever you create today must be supported in the future, if the slides are to remain paste-compatible. For more details, please see my article about best practices for reusing old (legacy) slides: Legacy Slides – Best Practices
I’m adding a plea for sanity on behalf of users everwhere: restraint in slide layout numbers is best for your client’s users. Too many layouts and they just don’t know which one to pick! Don’t confuse them more than they already are. Consider a limit of 25 layouts maximum.
We have years of expertise in this area and can assess your template for Microsoft compatibility, or create a template or theme for you that will work seamlessly with decks based on Microsoft templates. We’re here to help! Contact me at production@brandwares.com.
Chart templates solve the old problem of having to send out copy-and-paste samples of graphs. But they only display the first 6 of the chart template colors you designed.
Adding More Colors
The most common application of chart templates is to overcome the design limitation of having only a 6-color palette to work with. I wrote about this problem years ago: Office Charts: 6 Colors Maximum! – Best Practices. After a chart uses Accents 1 to 6, it starts recycling those same 6 colors with automatically generated darker and lighter variations. Banks and wealth management clients often need many more than 6 data series in their charts, but still want to have colors that are on-brand and designed.
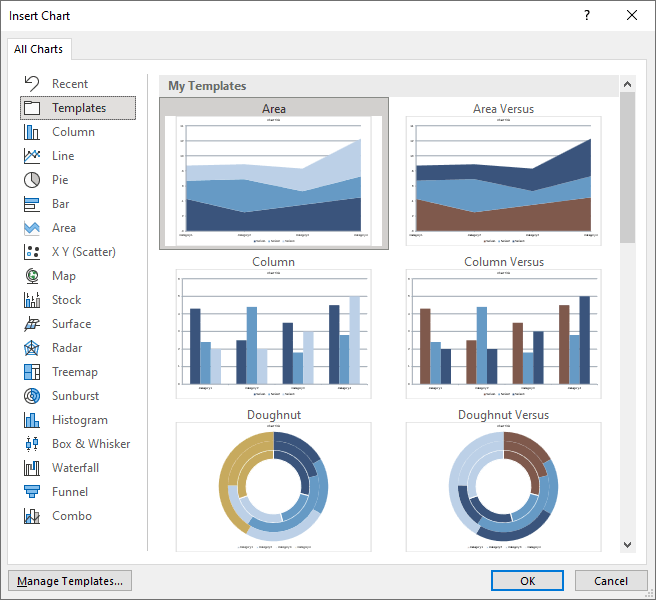
To create a wider range of data series colors, create a chart with the maximum number of data series that the client requires. Our record is 25 colors! Then right-click on the chart edge and choose Save as Template. This captures the formatting of the sample that you’ve created.
Your template will work just fine on charts that have already been created. Select the chart, choose Change Chart Type (yes, even if it’s the right type already), click on the Templates icon, select the chart template and click on Apply. Easy peasy, job done!
The New Chart Problem
But this process breaks down if you try to create a new chart from that template. Choose Insert>Chart, click on Templates, and select the chart type. Then start inputting data. As soon as you get past the 6th color, Office starts using those damn Microsoft default darker and lighter variations instead of the colors you set! This is Authoritarian Helpfulness at its worst!
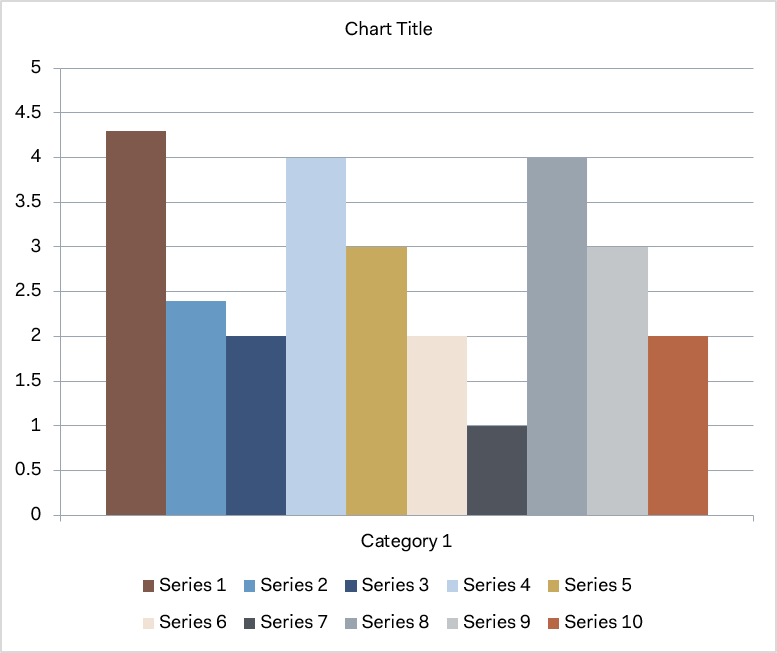
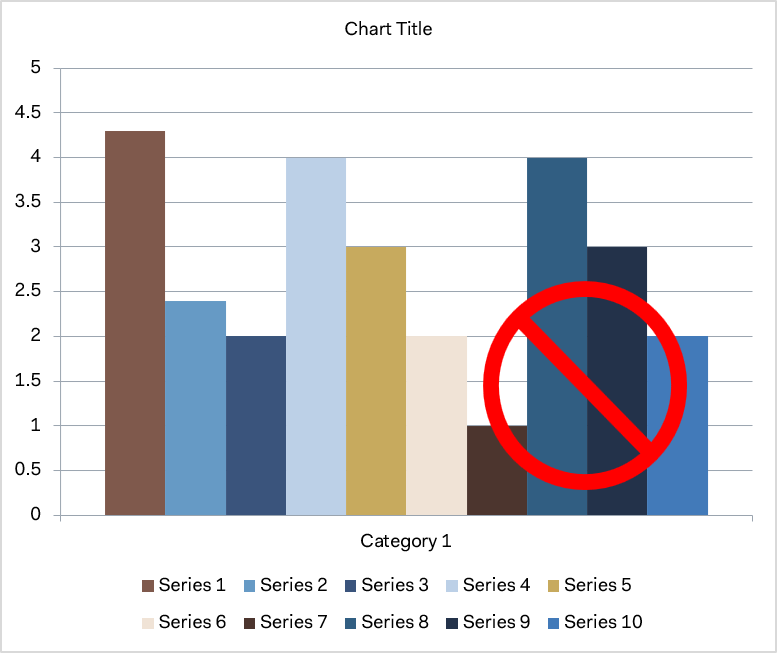
What You DesignedWhat Office Gives You
Yes, you can fix this. Reapply the template by choosing Change Chart Type>Templates and reselecting the template. The colors are corrected to the design specs. But you shouldn’t have to do this! And now that you’ve found this article, you don’t have to.
Understanding Chart Template Colors
Let me back up a bit, and explain how chart templates are structured. The top level of the XML consists of [Content_Types].xml, a _rels folder for documenting the relationships of XML parts and a chart folder holding the good bits.
Inside the chart folder, we find chart.xml, which holds most of the formatting that we created when we made the custom chart. Chart.xml contains definitions that contain the intended series color. The colors in chart.xml get set when you save the file as a chart template, and they get used when you apply the template to an existing table. But they are not used when you create a new chart.
Each series is numbered starting with 0, so this is the series for the 7th color. For the first six, the color is set to an accent color. Starting with the 7th, the color fills are in RGB/hexadecimal. Here’s a sample:
In addition, there are subfolders for charts, media, theme, and _rels. The media folder only holds a BMP file that is used for thumbnail display in Office 2007 and 2010, but not in later versions. The _rels folder is for relationships of XML parts. The theme folder contains themeOverride1.xml. As the name suggests, this is a theme that overrides the theme of an Office file that hosts it. This allows you to use a chart template in any Office document while retaining the original design appearance. Finally, we have the charts folder, which has the XML part we’re looking for.
This folder contains 2 files: style1.xml, containing the formatting for all the chart parts and colors1.xml, with a list of default fill colors and transforms fo apply to those colors. Colors1.xml is the file that supplies the colors when a new chart is created from the template. Here’s what colors1.xml looks like:
On a newly inserted chart, an Office program will use the 6 colors in turn. Then it will cycle through them again, applying the a:lumMod val=”60000″ transform. LumMod modifies the luminance, turning each accent color to a dark version. The chart will follow this pattern instead of using the colors you designed for the extra data series. If you reapply the chart type to the chart, then it will update with your designed colors from chart.xml
Fixing Chart Template Colors
My first step was to read the Microsoft specs for cs:colorStyle. Under section 2.8.3.2 CT_ColorStyle, it reads: “The total set of colors is all contained colors repeated each time with each variation applied. A color style can contain 6 colors and 7 variations. This yields a total of 42 colors with the first 6 having the first variation applied, the second 6 having the second variation applied and so on.” Not promising, we really need more than 6 colors here.
After many fruitless experiments, I decided to see if I could add extra colors anyway:
To my astonishment, it worked! I could create a new chart and insert 10 dataseries with each displaying the designed color. No need to reapply the template! Who would ever have dreamt that Microsoft documentation has a mistake in it! ;-D
The takeaway is that to create a many-colored chart template that works as expected under all circumstances, you need to set the extra color values manually in colors1.xml.
For Office users, the closest thing to a “programming language of the people” is VBA. It’s not too hard to get started, there are gobs of help information from a good search, and the results are immediate. But VBA’s abilities haven’t expanded as its environment has changed. This has become abundantly clear with current versions of Office, where task panes and the Windows-version Backstage haven’t been included in the VBA object model. Many want to edit OOXML with VBA, but Microsoft prefers to shuffle you off to the Open XML SDK programmed with C# to do that job.
Fortunately, we’re on the case at Brandwares. We collaborated with programmer Jan Karel Pieterse to develop a PowerPoint version of his macro set that edits Excel OOXML. We’re making this freely available as a download so you can get the benefit of this.
Let me apologize to my macOS readers. I really try to provide solutions that work cross-platform, but this macro set relies on Windows system calls.
I’ll be honest, this isn’t the most elegant OOXML editing solution. The macro set unzips the OOXML to its component files, gives you the opportunity to edit the XML using VBA string manipulation, then rezips the OOXML to a usable PowerPoint file. The unzip/rezip operations are fairly slow, especially with large files. It’s not something you can use in a real-time editing situation.
One of Brandwares’s specialties is converting legacy presentations to new themes/templates. Often, there are OOXML mismatches that make reused slides retain artifacts or formatting from the old decks. We solve these issues with macro convertors that take a folder full of old decks and transform them into new presentations with new branding. This macro set is great for that.
Edit OOXML with VBA: a Peek Under the Hood
THe file contains 3 VBA modules and 1 class module. Module modConvert is the only one you need to modify. In it, Sub MainVBAOperations does the actual work of opening files, saving as a work file, calling the XML process, saving the modified file and deleting the work file. This is also where you would do any additional VBA processing. As one example, after you modify the XML of a slide master or layout, you have to reset the slide based on it to display the changes. MainVBAOperations is where you would do this.
The other Sub is ProcessXML. Here’s where you unzip the file being modified, open different XML parts for find and replace processes, followed by a rezip of all files back to a working file. The sample code in this module shows a typical revision to the idx numbers of placeholders, a common requirement of legacy presentation conversions and one that can’t be done with the PowerPoint interface.
The module modDisplay, by Shyam Pillai, provides the PowerPoint equivalent of the Application.Screenupdating command that exists in Word VBA. Useful to prevent the screen flashing and jumping as files are processed, it also helps speed code execution. modUNC by Randy Birch, assists with file management.
Jan Karel Pieterse wrote the class module clsEditOpenXML that does the heavy lifting of unzipping and rezipping the document to be modified and reading and writing the XML.
As noted in the code, You are free to use this code within your own applications, add-ins, documents etc but you are expressly forbidden from selling or otherwise distributing this source code without prior consent. This includes both posting free demo projects made from this code as well as reproducing the code in text or html format.
Converting Legacy Presentations
We use often use this macro set to update old (legacy) presentations with a new design. Successful updating requires meeting 5 criteria, please read this article for more details: Legacy Slides – Best Practices. As noted on that page, the 5th requirement is that placeholder idx numbers in the OOXML must match on the old and new layouts. There’s nothing in PowerPoint’s interface that allows you to set idx number, but this macro set allows you to do just that. The pre- and post-processing sections of the macros allow you to set the the other 4 parameters for each slide layout. Click here to download it.
The following advice is particular to presentation conversion. It’s routine that slide masters and layouts will be changed in that process. Then, to apply those changes to the actual slides in a presentation, the slides must be reset, as if you pressed the Home>Reset button in a presentation. Resetting slides wipes out character-based formatting. If a user has applied bold or italic or an underline to particular text, that all will disappear. It’s important to notify your client of this. To make an exact update would require a painstaking construction of a multi-dimensional array for each placeholder on each slide that would record all character-based formatting, then restore it after the update, for which you would have to charge many times as much as for the basic conversion work.
Brandwares is a world leader in presentation updating and conversion. We’re available for presentation assessments, to identify potential problems. We have multiple techniques for seamless re-use of legacy presentations. Contact us when you’re redesigning to ensure your new template will reuse your old slides without a hiccup.
One of my areas of expertise is to do presentation assessments for designers, finding any potential problems in their work before sending their file to their client. Something I see fairly often is multiple slide masters in a template or theme, where they are used as an organizational tool. Typically, one master will be for title slides, another for section headers, and so on. This is a poor practice, but it goes on because designers never have to actually use the files they create. If they did, the problem would soon become evident. Here’s a typical example:
Multiple Slide Masters – How They Work
If I asked you “How does PowerPoint know which slide master to use when there is more than one?”, what would your answer be?
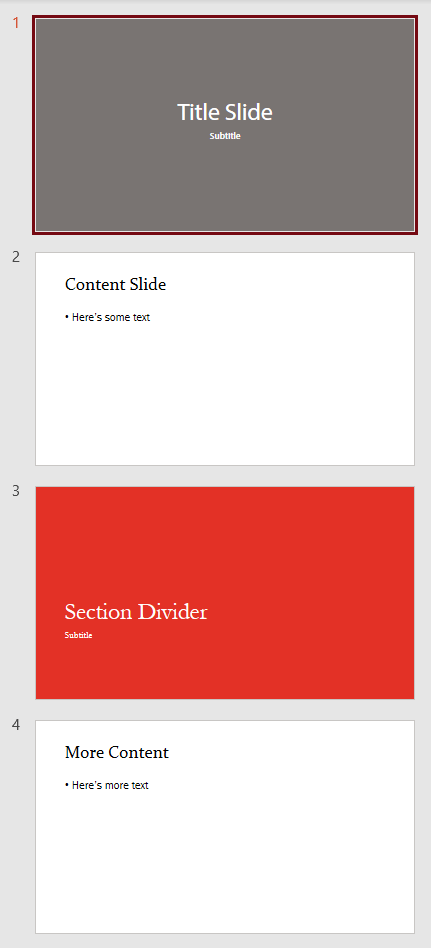
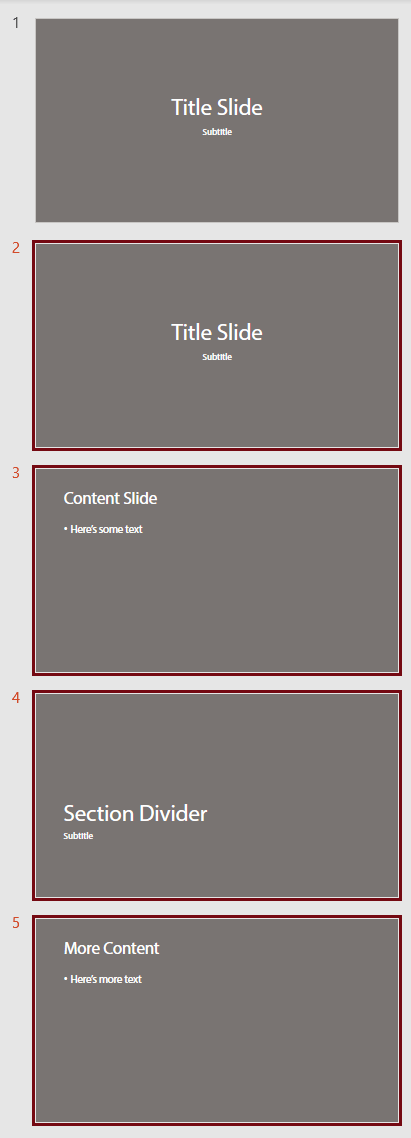
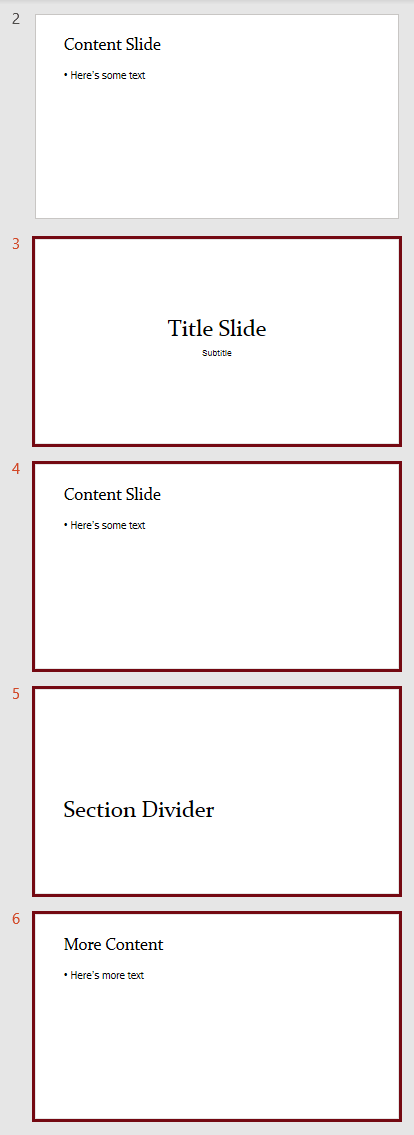
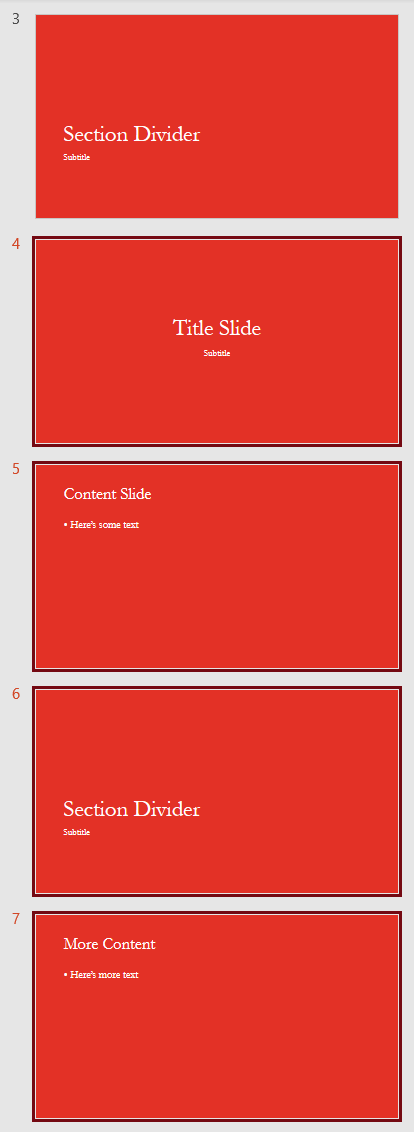
Well, I’ve done the research, so I can let you know. When you paste slides into a presentation, PowerPoint looks at the slide immediately preceding the paste position and uses the slide master for that slide. If there are no slides in the presentation, then PowerPoint uses the first slide master. This has major consequences for the format of the pasted slides. If the slide master of the preceding slide has only title layouts, only the pasted title slides will find their rightful layout. All the rest of the slides will bring their old layout with them. So now the slide master for titles has a whole bunch of non-title layouts. Oops. So much for your organizational scheme. Following are the original slides, followed by what they look like when pasted after slides based on different masters:
4 slides based on 3 slide mastersPasted after slide based on first masterPasted after slide based on second masterPasted after slide based on third master
If the pasted slides are from legacy presentations, where the intention was to update them to the new look, you get a total fail. Not only do they not update, they’ve ruined the new deck with added old layouts. The next time the user adds a new slide and tries to find a layout in that slide master, they get a psychedelic soup of designs.
But wait! It gets worse! For some bizarre reason, designers have a bad habit of deleting all the placeholders on the slide master, then building the design in the layouts. Ouch! The placeholders on the slide master are parents to the child placeholders on the layouts. They are the source for font and paragraph formatting in layout placeholders, as well as the default placeholder positioning. When you paste slides so they use that blank slide master, formatting goes haywire. The slide layouts that get imported with the pasted slide have no source to tell them how to display content. PowerPoint makes a guess and always guesses wrong. Bold text becomes regular, font sizes changes, pictures disappear. It’s a nightmare, and one that designers just don’t understand, can’t explain to their clients, and have no idea how to fix.
A Better Approach
The simplest is to just use a single slide master. In 99% of presentations, one slide master is all you need. That slide master should be formatted as closely as possible to look like a typical content slide. Then for layouts that have different formatting, right-click on the layout background and choose Format background. In the Format Background task pane, check the option for Hide background graphics. Then place the alternate graphics on that layout.
About the default placeholders: keep them! Deleting the default placeholders does nothing helpful and can cause problems. If someone pastes a slide with a footer and your layout doesn’t have a footer placeholder, the footer text will reposition itself, often at the very left edge of the slide, because the content has been orphaned. If your design doesn’t include a footer, move the placeholder off the bottom of the layout! This makes a pasted footer simply disappear instead of looking weird.
Multiple Slide Masters – When and How to Use Them
You can use multiple slide masters for organization of slide types as long as each slide master is identical. An easy way to ensure this is to create all your slide layouts under a single slide master. Then duplicate that slide master and delete the layouts not needed. So you might end up with 2 identical slide masters, one that has all the title and section divider slides, then another that has all the content slides. As long as the slide masters are the same, mixing and matching will not create any problems.
There are other viable uses for for multiple slide masters. One is when a presentation requires multiple color themes. Some organizations have divisions that use code colors: a key color that is used only in that group. Under the slide master, create the complete set of layouts needed for the presentation. Set the code color in Accent 1 if it’s a predominant element of the client branding. If it’s a subtle design change, Accent 6 is better. Get the client to sign off, so the design is not going to need a lot of future revisions. Then copy and paste the slide master for each code color required. Finally, revise the color theme for each slide master, changing only the accent color. Following this method, every slide master has every layout. The worst that can happen is someone pastes in the wrong place and the code color is off. Easily fixed.
The other time you need multiple masters when a client has rolled out a new template, then realizes they need to handle legacy slides. Then you create a second slide master with layouts that match the new look but have a layout structure that is compatible with the old decks. At the beginning of the deck create 2 sample slides, one based on the new slide master and another based on the legacy slide master. Place a notice to the user just off the edge of the slide master for the first slide: “New slides only! Don’t paste old slides!” and on the second “Paste old slides here! No new ones!”. Then users are less likely to paste slides in the wrong spot and get weird results.
Replacing odd fonts and errant languages in PowerPoint is not something that always works well in the program. Problems with replacing double-byte fonts for Asian languages have been documented on other pages, but designers also have problems replacing Mac-only formats like AAT (Apple Advanced Typography) fonts.
There’s a similar problem with languages. While language tags are scattered all over in XML, you can only reach some of them with PowerPoint’s built-in Review>Language>Set Proofing Language (Windows) or Tools>Language (macOS) command. When files are moved between computers, it’s very easy for the file to have a mix of language tags.
In Windows, there are some free macros available to make replacing languages easier in PowerPoint, but there’s no equivalent for Macs. So here’s my go-to method to fix both problems with not much more than a good text editor, like NotePad++ in Windows and BBEdit on Mac. If you’re new to this site, please read my introductory articles OOXML Hacking: An Introduction and, if you’re on a Mac, OOXML Hacking: Editing in macOS.
Referring to the macOS article, a patient Mac user can use BBEdit 11 or better to open a presentation, select each file in turn and get the job done. But your time will be better spent by creating a network or USB disk that doesn’t create .DS_Store files. It’s a little time-consuming the first time, but if you’re someone who creates PowerPoint files on a regular basis, you’ll soon recover that time. The nice thing about this technique is that it always works, 100% of the time, even with double-byte fonts.
Replacing Fonts in PowerPoint
Unwanted fonts can be introduced when you’re doing design experiments, collaborating with clients, or when you convert a KeyNote presentation to PowerPoint. In all these cases, you may end up with fonts you cannot remove, or even with a deck you cannot save. Start by making a list of all fonts that need to be eliminated. You can get the names by choosing Home>Replace>Replace Fonts (Windows) or Edit>Find>Replace Fonts (macOS menu). Then expand the PowerPoint file to XML parts.
Now fire up your text editor. Both BBEdit and NotePad++ include utilities to find and replace in files. With both, you point the find at a folder full of expanded XML files from your presentation. In the Find field, look for typeface=”Font Name”, where the font name is the name listed in Home>Replace>Replace Fonts (Windows) or Edit>Find>Replace Fonts (macOS menu). The Replace field should also be typeface=”Font Name”, but here the font name is the font to match the rest of the deck. Executing the Find and Replace should display a list of files where changes were made. Both programs automatically save the changed files, so all you have to do is close the text editor and rezip the XML back to a presentation.
Windows users can take a shortcut with this process. PowerPoint for Windows has a save format called PowerPoint XML Presentation (*.xml). This saves the entire presentation as one big XML file. Open that file in plain old NotePad, choose Edit>Replace and do the same replacement as above. No fancy text editor needed! Then open the XML file in PowerPoint and save to a normal presentation format for your client.
Replacing Languages in PowerPoint
PowerPoint puts language tags all over the place. Here’s a random sample showing one paragraph with one word that contains 2 different language tags!:
The technique is nearly identical to font replacement, you just search on a different tag. In the example above, we would find lang=”en-CA” and replace it with lang=”en-US” to create a uniform U.S. English presentation. Here at Brandwares, we do a lot of international work, so files can have language tags from all over. A standard part of file finalization is replacing language tags with the target language for the client.
When you’re working with OOXML files, multifile find and replace is a very useful technique to solve all kinds of problems. As another example, here’s my article on fixing broken color themes with similar techniques: OOXML Hacking: Repairing Color Themes. Mastering multifile find and replace can save you hours over manual repairs to PowerPoint files.
Is your problem more complex? You just can’t get the result you want with find and replace? That’s why we’re here, to help you get your work done faster! Shoot me an email at production@brandwares.com, I’ll get you going in a jiffy.
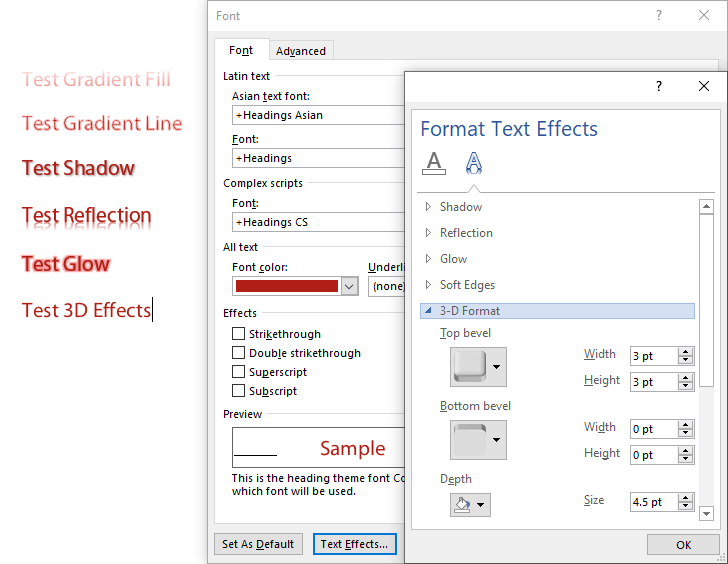
The Best Practice is to NOT use Text Effects in Office. Ever.
That could have been my shortest article ever, but I guess I should explain the reasons. I’m referring to the graduated fills and lines, the glows, reflections, shadows and 3-D effects you can add to text. In the past these effects have caused some problems with ordinary shapes, but with text, they’re a disaster.
Clearly, it’s not enough for most users that these effects are visually hideous. That just a natural result of the low value we assign to arts education. In many years of working with competent graphic artists, I’ve never been asked to create any template that uses these effects. Designers understand the need for restraint, users don’t. And so we get the appalling appearance of most Word and PowerPoint documents.
But the functional problem with these effects is how they affect PDFs created from Word, PowerPoint and Excel. Microsoft has no clue how to export true PostScript of the fancy effects. So they adopt a simplistic approach: flatten them to graphics. Unfortunately, this means the text vanishes, leaving behind only a pretty picture. Well, not even that. All kinds of PDF functions are impaired: Text to speech is impossible, accessibility goes right out the window, reimporting the PDF to Office is brain-dead.
I tested PDFs created in 3 ways: saving to PDF in Office, printing to Acrobat and printing to the Microsoft Print to PDF print driver that comes with Windows 10. When saving to PDF, all text with applied effects was flattened. When printing to either Acrobat or Microsoft Print to PDF, Gradient Fills, Gradient Lines and 3D Effects were flattened, while Shadows, Reflections and Glows remained as live text.
The moral is clear: when the client asks for Text Effects, just say NO!
Free Control Control Add-in for Word for Mac
Subscribe to the Best Practices blog and get a free copy of our new Control Control add-in. This is the easiest way to create the same modern form controls that are in Word for Windows. Enter your real email and hit Subscribe in the right-hand column of this page. You’ll receive the add-in and installation instructions within 3 days.