I’ll admit right off the bat, graduated color table borders is a trick you might need only once every ten years. But it’s a good illustration of the little touches you can add with XML Hacking that you just can’t do any other way. If you’re unfamiliar with XML hacking, please read XML Hacking: An Introduction. If you’re using a Mac, you should also read XML Hacking: Editing in OS X.
I was working on a presentation for a designer and the theme used graduated color rules. Most of the layout only need a rule below the title, which was simple to do with user interface. But then the designer included a slide that clearly needed to be a table and that table had the same graduated colors used as horizontal borders. At first, I informed him this wasn’t possible, but as I researched the issue, I found there was a way.
The answer was in a 10-year-old blog post by Mike Fried. Back then Mike was one of the engineers creating Office 2007 and his 2 posts on PowerPoint table styles have lots of good information. Toward the bottom of the article, he included garish graduated color table borders. It was enough to crack the code.
As an aside, I’d like to mention that you can find out the details on any Open Office XML parameter by Googling it. There is extensive documentation on the web, even though some of it is terse database excerpts. The essential command for a gradient line is a:gs. The GS stands for Gradient Stop, the points on the line that define where a particular color appears in the graduated line.
Googling ooxml a:gs gets you the Datypic site that lists elements and attributes, but explains almost nothing about them. However, this site can be useful because all XML elements are hyperlinked, so you can quickly find related parameters.
Further down the page is the openofficexml.com page on a:gs. This site has relatively verbose explanations of the element, a clear example of useage and definitions of the elements included in the xml object.
Finally, many searches will turn up links to the Microsoft MSDN developer pages about Open Office XML. These discuss Themes and XML in a more conversational style that is great for picking up the overall concepts. Occasionally, you’ll also find a valuable blog post, such as Lars Corneliussen’s explanation of Open Office measurements units.
Graduated Color Rules
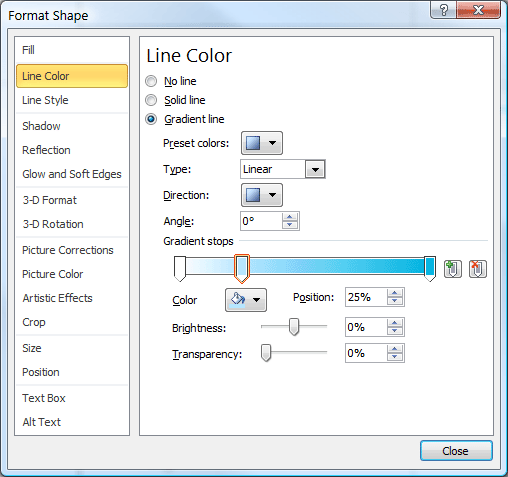
But back to graduated color table borders! First, let’s look at a graduated color rule, which you can create using the program interface. Here is the dialog box showing the settings. The central point of the gradient has been shifted to the left to have more solid color on the right side and a rapid dropoff to white on the left:
Here’s how the rule looks:
When we examine the XML for this rule, it looks like this:
The pos (position) parameter is a percentage of rule length, with 100000 representing 100 percent. The colors are straightforward, with bg1 being the white background and accent1 the cyan. For the midway color value, I used the handy RGB Tint Calculator on this site, but then moved that value to the 25% mark.
Graduated Color Table Borders
The XML for a rule translates exactly to the XML for a table style. Here is the style for the top border, the same XML is applied to the inside border so that all interior rows show the same rule:
Word is found everywhere, but Word users with training are a scarce commodity. It’s a shame, because a little training can go a long way to get really nice results. This article will cover the most common formatting mistakes that Word users make. If you’re a designer, you could still benefit, I see plenty of these errors from design companies as well.
Formatting Mistake #1: Not making the Non-printing Characters Visible
Pretty View
By default Word is set up to show “pretty” documents. Microsoft has decided that users want to see what the printed output will look like on-screen. So Word hides all the control characters that are vital for reliable formatting. Users can’t see the hidden formatting that they are inserting or deleting. Result: formatting mistakes! The only way you can provide professional documents for clients is by making these visible so you can deal with them. When you want to see the printed result, do a Print Preview. It’s fast and more accurate than the “pretty” screen display.
Useful View
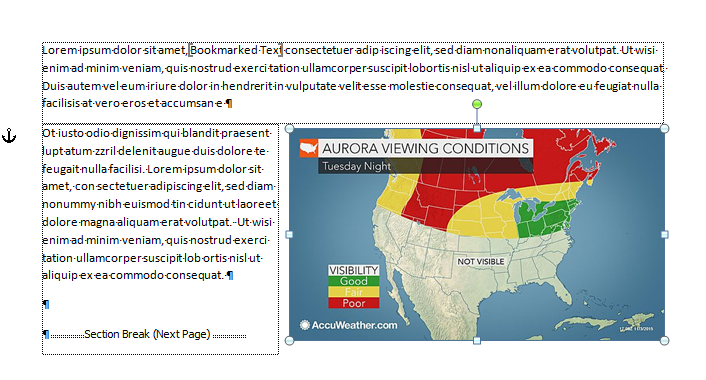
The exact steps for show the control characters is slightly different for each version of Word, so I’m not going to list them all here. To start in OS X, look for Word>Preferences>View, in Windows, choose File>Options>Display. Make all the non-printing or formatting characters visible. It’s also helpful to display Bookmarks, Object anchors and in Word 2010/2011 or earlier, Text Boundaries. In Windows, these last three are found on the Advanced tab of Options.
Now you can see Paragraph Marks, which hold the paragraph formatting for the text that precedes it. You can see the Section Breaks that hold all the header/footer, margins and page orientation information for the paragraphs preceding it. And you can see the Anchors for text boxes and floating pictures, which makes it much easier to anchor to a paragraph that is likely to stay on the same page.
Formatting Mistake #2: Creating New Pages with Multiple Carriage Returns
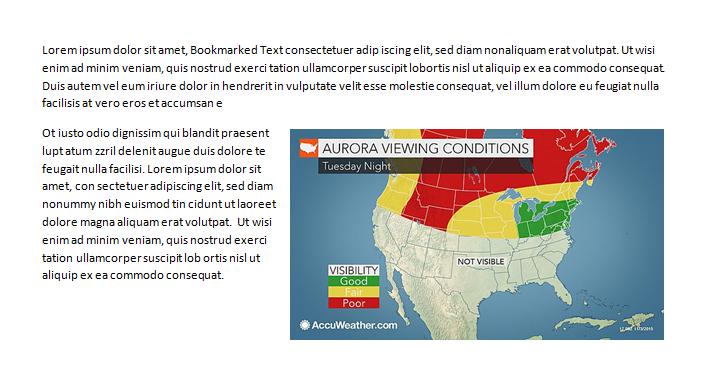
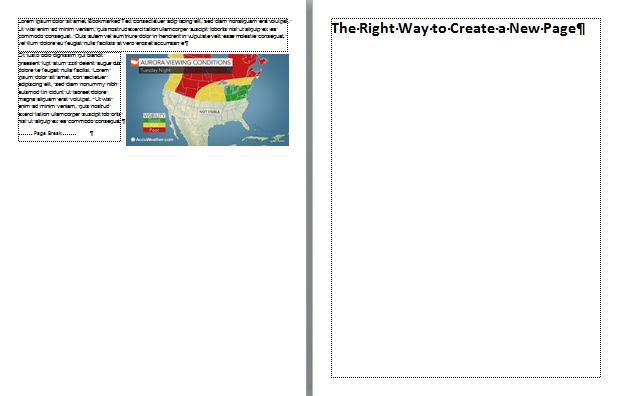
This is the classic hallmark of the Word user who has never taken a course or cracked a book. At the end of a topic, they’ll type enough carriage returns to get to the next page, then type a new heading. It looks perfectly fine on the original computer:
How it looks on your computer.
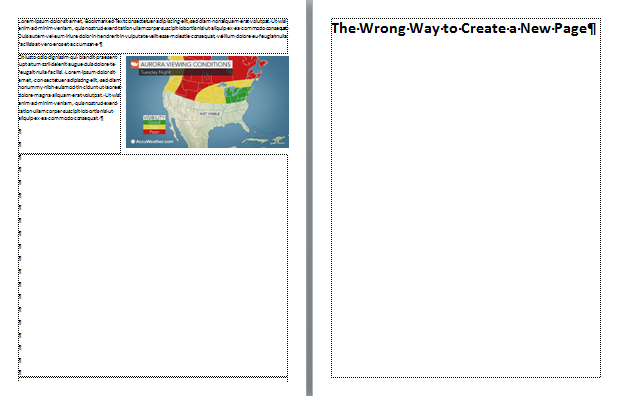
But then it’s sent to a different computer with different fonts or a different printer. The heading that supposed to be at the top of a page either moves to the bottom of the preceding page, or moves down so it’s not at the top of the page anymore. It doesn’t matter much which one happens, because the formatting mistakes scream Amateur Hour:
How it looks on a different computer.
Text flow in Word depends heavily on the font being used and the printer that has been selected. If you move the document to a different computer, they might not have the same font. Even a change in the version of a font is enough to make the text break differently. As for the printer, Word fabricates pages on the fly by using the metrics of the selected printer. These metrics come from the printer driver. So if the user who receives the documents has a different printer, or even a different driver for the same printer, the pages will be laid out differently.
The knowledgeable Word worker will insert a Page Break (not a Section Break) at the end of a text block to create a new page:
Page break: How it looks on every computer.
A really clever user will create a heading style that includes the paragraph attribute Page break before, so that whenever the heading style is applied to text, it automatically pops to the top of a new page:
Heading Style using Page Break Before Setting
Formatting Mistake #3: Using Tabs to Arrange Data in a Grid or Table
Whenever you need to arrange comparative information in rows and columns, you’re creating tabular arrangement. It’s always a good idea to pause for a moment and really look at the kind of data you want to present, so that you can choose the best format for that. If you find yourself using tabs and spaces to create a grid of data, STOP.
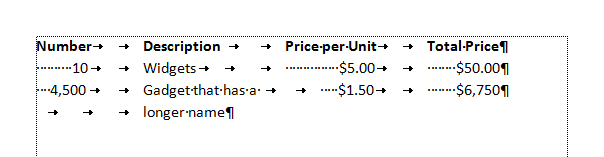
Making a lame table with tabs and spaces.
Information in a grid is tabular data (from which the tab key takes its name), but tabular data should go in a table. That’s what they’re for! Tab keys are left over from typewriters, when there was no other way to create a data grid. Designers are also guilty of creating grids with tabs, because table tools are relative newcomers to page layout software.
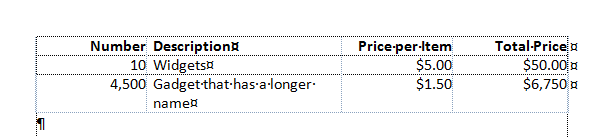
Use a table to arrange tabular information.
Tables are also the only professional way to make forms, which brings us to our next common mistake:
Formatting Mistake #4: Using Typewriter Techniques to Make Forms
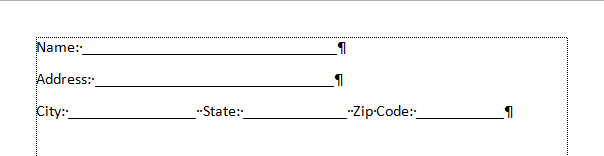
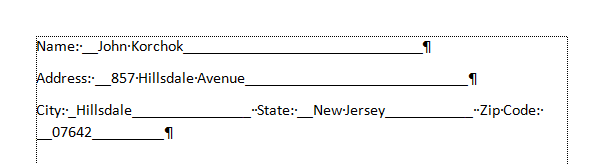
Word, especially Windows versions, is loaded with excellent form-creation tools. But you’d never know it from the forms I almost invariably see created in that program. The common approach is to type a text heading, then dozens of underscores to indicate where the form-filler is to enter their data. This could pass for forms that are printed out and filled with a a pencil. You know, like people used to do 50 years ago:
Typewriter-style Form
Open the Word “form” on your computer and try filling it in. As you type, the underscores remain, trailing after your text. Type a couple of line of text: the left side of the filled portion falls underneath the heading, not to its right. The professional term for this is “a dog’s breakfast”.
The form falls apart when filled.
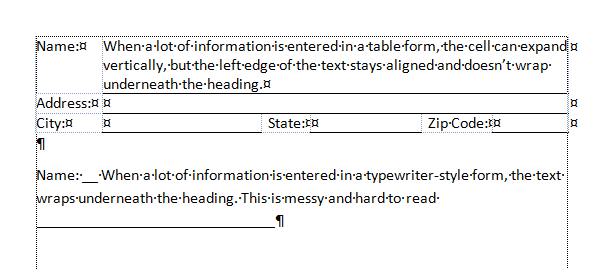
For forms that are filled on a computer, you need a much more robust method. Create a table with a cell for the heading and a separate cell for the filled-in area. If the form will only be filled out on the computer, you don’t need any horizontal rules to guide your text. The computer does that for you. If the form is intended to be dual purpose computer or hand-filled, add a thin border to the bottom of the filled-in cell. No other border are necessary or desirable. All of a sudden you have a form that is neat before and after filling, easy to read, even, dare we say, good-looking!
The right way to make a form: with a table.
Here’s a comparison of a table form and a typewriter-style form when filled with longer text:
Inserting long text
Formatting Mistake #5: Local Formatting Instead of Styles
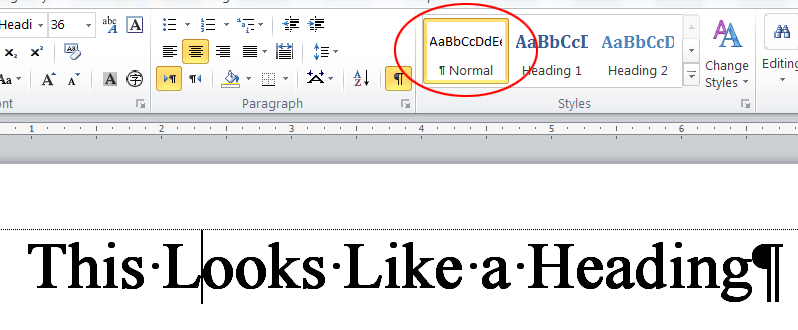
Another giveaway of the Word amateur is when you click on different types of text and heading, but the Style always says Normal. This means the creator of the document made no use of Styles. Perhaps they think they are saving time, but the opposite is true. Repurposing or updating an unstyled document takes almost as long as creating it in the first place. Plus, useful Word features like a Table of Contents or the Navigation Pane don’t work well without using styles.
Using local formatting to imitate true styles.
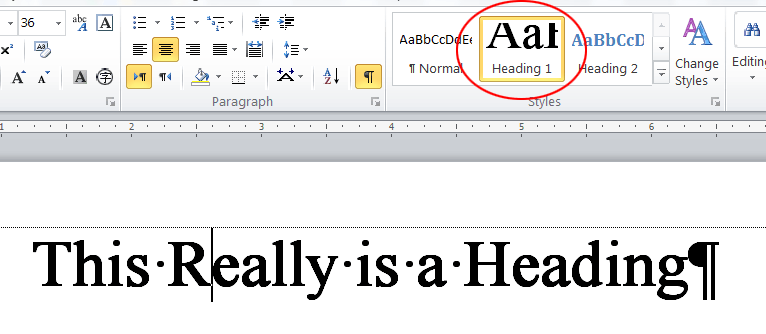
After taking just a few minutes to create some basic styles everything about document creation and revisions is much faster. Styles are a true productivity booster. If you’re not using them, either you are wasting a lot of time, or you’re making someone else fritter away hours of their work day. Styles ensure your documents have a consistent, professional appearance. Updating their appearance in the future takes only a few minutes. It’s what the pros do!
A Heading Style applied.
We’re Word professionals! Brandwares will create technically perfect templates and documents for your company. For bullet-proof files, contact me at production@brandwares.com.
You have a crucial thesis or presentation that’s due in the morning, but when you try to open it, you get a message saying the file has an error. It may seem like the end of the road, but with a little XML hacking, you can repair your file in just a few minutes and be back to work. Document repair is something you can do yourself.
First, let’s look at different causes of file corruption. The number one cause is working on files while they are on temporary or removable media. A USB or flash drive is a convenient way to carry data. The common alternative is to keep your information in the Cloud. But both of these are hazardous if you’re editing files. Accidentally ejecting a USB stick or losing your Internet connection while a file is open in Office is a near-guarantee of corruption. This type of corruption is also disastrous, because the file contents are so thoroughly scrambled, there is no way to recover the data.
But there are also files that get scrambled by software and usually these are recoverable. We’ll use the same techniques covered in previous posts. Windows users should review XML Hacking: An Introduction, while OS X hackers need to follow these instructions: XML Hacking: Editing in OS X
Is the File Recoverable?
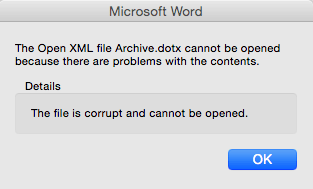
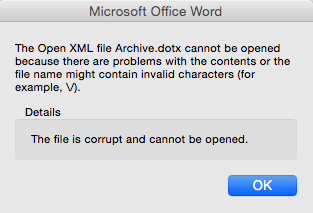
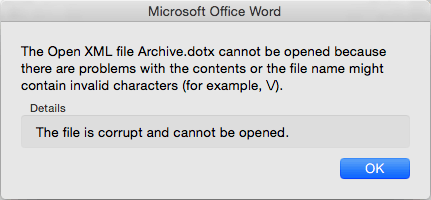
When opened in Office, unrecoverable files may give you errors like these:
The first step is to rename a copy of the file with a .zip ending and expand it. An unrecoverable file (one scrambled by a USB or Cloud drive) will almost always raise an Zip error. Cut your losses, you’re not going to be able to fix this. As a second-best alternative, try opening the original damaged file in NotePad (on Windows) or Text Edit (OS X) to recover whatever text you can. You also might be able to extract some contents by opening in a different word processor, like Pages on a Mac.
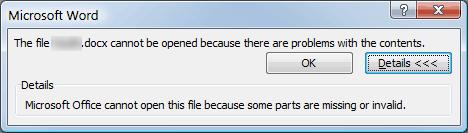
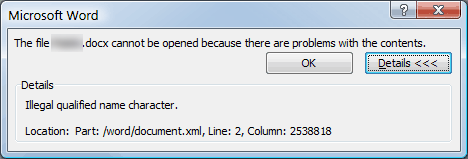
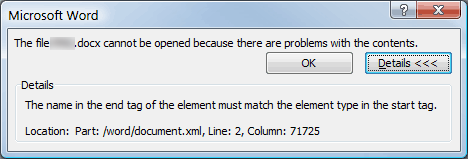
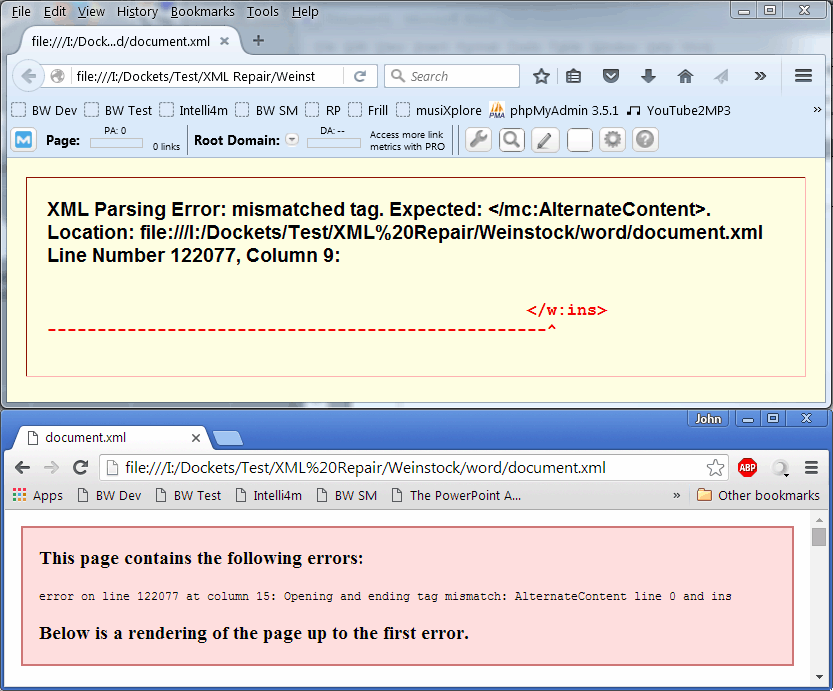
By contrast, if you see the following messages, document repair is possible:
You can see that the first 2 messages are generic, while the second 2 give a specific location for the error. This means the file is at least partially readable by the program.
Error-finding
There are quite a few document repair articles on the web that are worth reading for the variety of tools that people are using. I prefer a combination of a good text editor (NotePad++ on Windows, BBEdit on OS X), plus a modern browser like FireFox or Chrome. The text editor is where you do the editing, while the browser parses the XML and finds any errors.
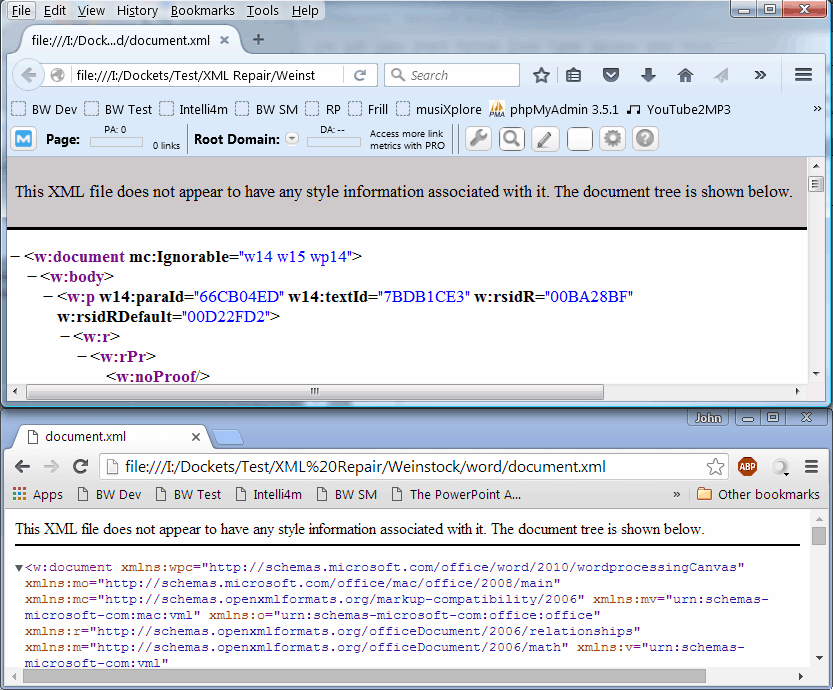
You’ve already unzipped the document or presentation, now look for the XML portion that contains the error. Most of the time, with a Word file, document.xml will be the culprit. Open document.xml in the text editor and Prettify (NotePad++) or Tidy (BBEdit) it to make it readable. A raw document.xml file only has 2 lines, which is why the XML errors are invariably reported as being on line 2. Making the text readable also adds useful line numbers to error reports, making the errors much quicker to find. Now the file should look like this:
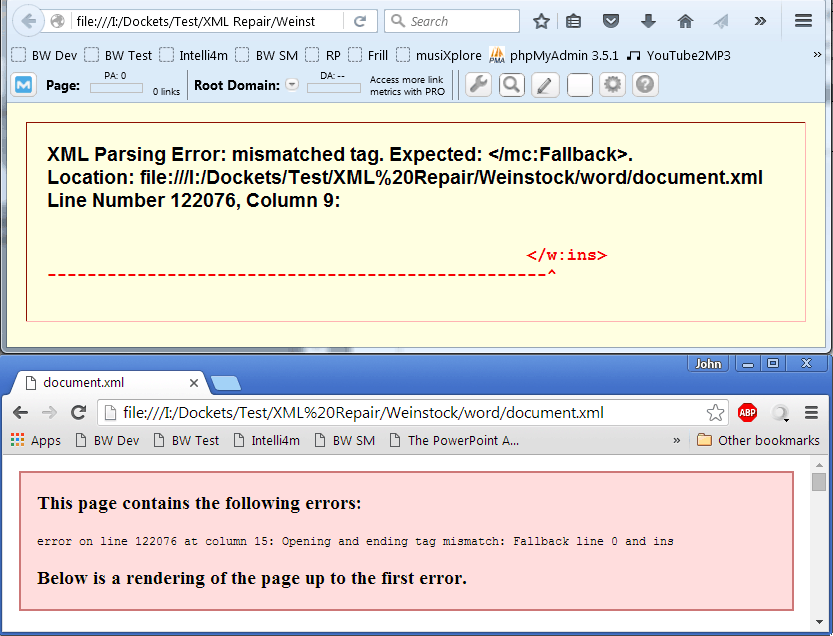
Save document.xml, then open it in your choice of browser. This is how FireFox and Chrome show where the first error is:
As you can see, the report is a little more informative in FireFox. The error is a mismatched tag: a tag was opened but not closed. It expected to see the closing tag </mc:Fallback> and it tells you exactly where it thought that tag should be. The arrow points to the first character that is in error. The correct way to interpret this is that the expected end tag should be inserted immediately before the tag pointed to.
Document Repair Technique
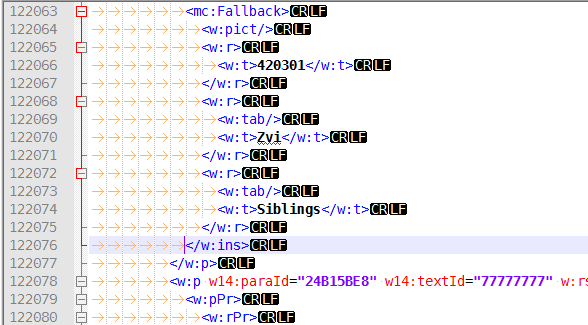
Here’s what the error location looks like in the text editor:
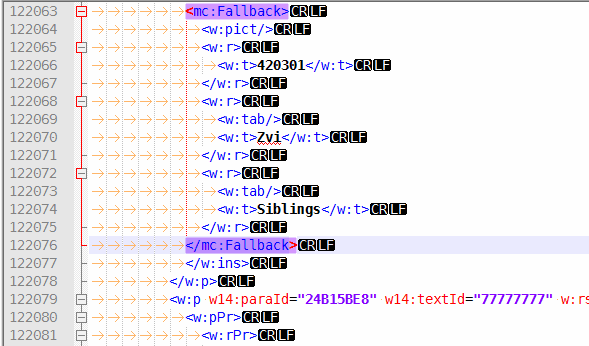
Then here is what it looks like after inserting the closing tag (you can copy and paste directly from the browser window):
Save document.xml in the text editor, then refresh the browser. The next error is shown:
Repeat the steps. Some files have only a couple of errors, others may have dozens. You’ll know when you’re done, because refreshing the browser will give you a different screen, displaying the XML instead of an error message:
Rebuild the File
Close the text editor and browser, then re-zip the folders and [Content_Types].xml, giving the zip file a new name and a file ending that matches the original. Open it to ensure it works. Office does not tolerate XML errors well and doesn’t give you clear error messages, so if the file doesn’t open, you missed something. In addition, Mac users have to use Terminal to zip and view files, as noted on the XML Hacking: Editing in OS X page.
Lots of people ask “How can I prevent this?”, but there isn’t a really good answer. If a file can be repaired, it’s almost always due to a program bug that writes malformed XML. In the Word file used for example, this is often when a placed graphic has no fallback information, which is supposed to help with graphic depiction in older file formats. It appears that the program omits the closing fallback tags when saving and you get the error. It’s not your fault, but Microsoft has not been able to find and eliminate this bug since the 2007 version.
OS X versions of Microsoft Office have always been the poor step-children in the Microsoft family. Always missing important features found only in the Windows alternatives. One of these obvious disparities has been in the area of linked Excel charts. In Windows, Microsoft uses their OLE technology to allow, for instance, an Excel workbook to be linked to a PowerPoint presentation.
The Excel workbook can still be edited independently. The charts can be revised based on new data, and when the presentation is opened, the updated information will be displayed. This is a powerful tool in many situations where information is changing rapidly and the presentation must stay current. This approach also leverages the inheritance of data. This allows users to have only one data source that drives updates in many different places.
Of course, OLE being a proprietary Microsoft technology, it has almost no support on other operating systems. The only way it appears in OS X is if an individual software vendor creates an instance that works with their code. Office for Mac has had its own tiny version of OLE that allows some, but not all the features found in Windows. You could only insert Office objects (forget about PDFs) and you couldn’t link, only embed.
Until now. With the release of Office 2016 for Mac, the tiniest crack of linkability has finally opened. Try these steps: Open Excel 2016 for Mac and create a chart. Select that chart and copy it. Open a presentation in PowerPoint and click on the down-pointing arrowhead beside the Paste button. Now your options include all of the following:
Use Destination Theme & Embed Workbook
Keep Source Formatting & Embed Workbook
Use Destination Theme & Link Data
Keep Source Formatting & Link Data
Paste as Picture
Options 1, 2 and 5 have always been available. The news is with 3 and 4, where linked data for charts becomes a new possibility. But along with this fresh opportunity comes a problem that hasn’t been addressed by Microsoft. It’s very nice to link charts, but the Microsoft default is always to hard code the link path. This means that moving the presentation and Excel source to a different computer destroys the links. The charts are no longer editable, because the link path has changed.
Remember the poor step-child analogy? Here it is again: Windows versions of PowerPoint allow you to edit the links in the program so you can fix the path problem. But no such facility exists on the Mac. To update those linked Excel charts, you need to … hack the XML!
If you’re new to XML hacking, please read my introduction to the subject. Since this topic is specific to OS X, it’s also vital to read XML Hacking: Editing in OS X as well. I assume that you have figured out the correct path to the Excel file on the computer where the presentation has been moved.
Updating linked Excel Charts with XML Editing
After unzipping the presentation, you’re going to look inside the folders for ppt/charts/rels. Office XML files are full of rels folders that contain the relationships between the components of the document. Each chart in the presentation consists of a file i.e. chart1.xml with a corresponding chart1.xml.rels inside the rels folder. The number in the chart name increments for each additional chart linked.
The lines of code are long, please scroll to see where I’ve bolded the path and file name, this is the section you have to modify to update the linked Excel chart.
Just as a comparison, here’s the analogous information from a PowerPoint 2010 file. In this case, there is not a chart folder containing chart.xml files. Instead, the charts are part of the slide files and are found in slide1.xml. The rels file is slide1.xml.rels and it looks like this:
A close examination shows that much of the same information in a Mac file is also here, but the file and path is Windows-style. Using this information, you’re ready to update those linked Excel charts with the best of them!
Are you managing styles in your Word documents? A hallmark of a professionally-created template is the appearance of the Quick Style Gallery. If I open a template and see this:
I realize the person who constructed the file doesn’t know better or doesn’t care. The clue are the 4 zombie styles on the right side. If you expand the gallery, you’ll see 8 more zombie styles. These 12 are automatically generated in every new installation of Word. Nobody uses them, they just clutter the interface. If you’re managing styles, you’ll make them disappear.
These 12 can’t be deleted, they are termed built-in styles and the Delete button is disabled in the style management dialog. But in Word for Windows, there is a Style Management panel called Recommended, where you can Hide them or optionally apply Hide Until Used. This last attribute keeps the style out of the Quick Style Gallery until the first time you apply it in a document, at which time it becomes visible.
But where is the Recommended panel in Word for Mac? Did someone Hide that too? No, it’s just not an option for Mac users. Microsoft left it out (speculate at will). But all is not lost: You can still manage style visibility on the Mac, you just have to do it with XML Hacking. New hackers should read XML Hacking: An Introduction and XML Hacking: Editing in macOS before trying these steps.
When you first open an Office XML field, the content is linearized and difficult to read. In BBEdit, apply Test>Apply Text Filter>run_tidy, an add-on script for BBEdit that you can download here. Voila! Readable XML!
Managing Styles with XML Editing
Word styles are stored in word/styles.xml and word/stylesWithEffects.xml. Word 2007/2008 reads styles.xml while Word 2010/2011 and later use stylesWithEffects.xml, so whatever changes you make, do them to both files. Word doesn’t always create a styleWithEffects.xml part, so if there isn’t one in your file, just edit styles.xml. Word’s built-in styles are in the w:latentStyles part. Let’s work on that first, then deal with custom styles.
The style order in the XML file has nothing to do with the order of styles in the user interface, so it’s best to search for them. Start with the Title style. The default listing looks like this: (You may see a somewhat different collection of tags from different Word versions.)
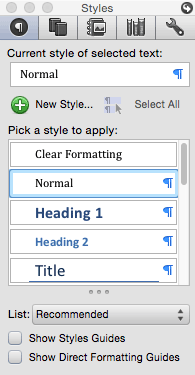
The Styles list: a good place to display occasionally-required typestyles.
To make this style disappear from the Quick Style Gallery, but still appear on the Styles list, just delete the w:qFormat="1" tag. If you want to remove a style not only from the Quick Style Gallery, but also from the master list of recommended styles, then don’t bother with w:qFormat="1", just remove w:semiHidden="0". Finally, to give the style the ability to remain on the Styles list, then be added to the Quick Style Gallery when it is first used, leave the other tags as is and change w:unhideWhenUsed="0" to w:unhideWhenUsed="1".
Besides the Title style, the other zombie styles you’ll probably want to remove are:
Subtitle Subtle Emphasis Emphasis Intense Emphasis Strong Quote Intense Quote Subtle Reference Intense Reference Book Title and List Paragraph
Another useful edit you can make to styles is to change the number beside w:uiPriority. Decreasing this number moves a style up the list, while increasing it moves it down. You may have noticed that editing w:uiPriority in the w:latentStyles has no effect on the position of Normal style. See Custom Styles below to solve this.
For all styles that have the same level number, they are displayed in alphabetical order. I usually rank them in the order they are likely to be used, with the body text and headings at the top, followed by bulleted, numbered and lettered styles. Often you’ll have styles that serve a function in a Word file, like unique styles that are referenced by StyleRef fields. If the user doesn’t need to apply a style, hide it. The simpler you make their interface, the fewer mistakes they can make.
The styles/stylesWithEffects XML parts contain a list of exceptions. There are many styles that remain invisible until you add an exception to the list. As an example, if you want to make the Body Text style to be at the left end of the Quick Style Gallery, you would first copy and paste the exception for Normal, then change the name to Body Text. The w:uiPriority=0 tag will ensure Body Text pops to the left end.
Managing Styles: Custom Styles
To manage custom and special styles, scroll down below the latentStyles section. Here you’ll see more verbose XML like this:
Here’s where you can change the order of Normal. Because this XML part comes after the Normal entry in latentStyles, it over-rides those settings. Any style set to 0 will appear to the left of Normal in the Style Gallery and above Normal in the Styles List.
Here’s what a custom style looks like:
<w:style w:type="paragraph" w:customStyle="1" w:styleId="Code">
  <w:name w:val="Code"/>
  <w:basedOn w:val="Normal"/>
  <w:uiPriority w:val="6"/>
  <w:qFormat/>
  <w:rsid w:val="00A12E2B"/>
  <w:pPr>
    <w:spacing w:after="0" w:line="240" w:lineRule="auto"/>
  </w:pPr>
  <w:rPr>
    <w:rFonts w:ascii="Bitstream Vera Sans Mono" w:hAnsi="Bitstream Vera Sans Mono"/>
  </w:rPr>
</w:style>
While you could edit all attributes of the style here, it’s easier to do through the user interface. But you can change the order, here set to 6.
Save the XML file. If you’re using BBEdit, you’re done. If you’re working with another editor, re-zip [Content_Types].xml plus the folders. Change the ending of the resulting Zip file to .docx and click on the Use .docx button when OS X asks. Open the file and check out the beautifully clean Quick Style Gallery, thanks to you managing styles!
This is a complex topic, so don’t feel bad if it’s hard to get working as expected. If you’re on a deadline, Brandwares can do this for you. Just email me at production@brandwares.com.
Note: I’ve included the original article text to describe the background issues about XML editing in macOS, but to retain your sanity, be sure to follow the May 2016 and 2025 updates at the end and use a text editor that doesn’t require unzipping and rezipping the files
When you’re hand-editing Office files in Windows, it’s pretty straight-forward: unzip file > edit > rezip, you’re done. Editing in macOS requires a couple of extra precautions. This is because the graphical user interface adds Mac attributes to files and plants hidden files in folders. Office will not tolerate either of these:
XML error message in 2008
XML error message in 2011
XML error message in 2016
If you use macOS’s Archive Utility to unzip or zip the files, Word will refuse to open the resulting file. On top of that, if you look in any of the folders using the Finder, a hidden .DS_Store file will be created in the folder. When re-zipped, Word will not accept the extra file and again report an XML error. The solution to these issues is to use the command line, like the Unix warrior you want to be! Remember to run each Terminal command by pressing the Return key after typing the command.
A valuable utility for this is OpenTerminalHere. Open any Finder window, click on OpenTerminalHere and a terminal window opens pointed to the Finder window. So download and install it, then follow these steps to open, edit and re-zip Office files:
Move a copy of the Office document (let’s call it TestDoc.docx) to a separate folder and open that folder in the Finder.
Click on OpenTerminalHere to open a copy of Terminal aimed at the folder.
In the Terminal, type
unzip TestDoc.docx
then press Return. The file is unzipped into several folders plus a file called [Content_Types].xml.
Do not look in any of the folders using the Finder, or you’ll have to start over. To examine a folder’s contents, use the Terminal to change the folder, then list the contents:
cd word

ls -l
To go back up to the previous folder, type:
cd ..
To edit the files, open your text editor, then navigate using the File>Open dialog to find the file. Edit the file, then save and close.
When you’re all done, double-check that terminal is pointing at the original folder holding the documents and the expanded folders. If you’re unsure, close terminal, then click on OpenTerminalHere to reopen in the right spot.
In Terminal, re-zip the files with this style of command:
zip -r RevisedDoc.dotx [Content_Types].xml _rels docProps word
This example is for Word, but the correct syntax after zip -r is to type the name of the final document, followed by the file and folders, each separated by a space. The file is reassembled into an Office file.
Test that you can open it. If you get an XML error notice, re-read the above steps and try again.
Please note: these editing techniques are required when editing in macOS with Word, PowerPoint and Excel documents and templates, plus Office Theme files (the kind exported from PowerPoint that combine all Theme elements.
If, on the other hand, you are editing a Font Theme or a Color Theme, those are simple XML files. They don’t need to be unzipped or re-zipped and Office doesn’t seem to care about macOS attributes attached to them. These plain XML files don’t need to be handled through the terminal, just use the Finder.
Next time, we’ll be looking at managing Word styles in macOS. Finally, a way to get rid of the zombie styles automatically created by Word! Happy hacking!
March 2016 Update
An alternative to working entirely in Terminal is to work on a network or USB disk where creation od .DS_Store files has been turned off. On a network disk, open Terminal in your choice of folder and run the command:
While this will prevent future generation of the .DS_Store files in that folder and any subfolders, it’s very likely you already have such files, since they’re created almost as soon as you view a folder’s contents in the Finder. In addition, some important XML parts are hidden and need to be revealed. So while Terminal is open, run:
The second line restarts the finder to force a refresh of the view. Now you can see any .DS_Store files and delete them before re-zipping the files into an Office document. You’ll have still have to do the zipping in Terminal. Also, no .DS_Store files means OpenTerminalHere doesn’t work, so you’ll have to navigate manually via Terminal commands. Now you know why this is a lame alternative.
If you try this technique, you can always restore the clean file view by running:
defaults write com.apple.finder AppleShowAllFiles NO

killall Finder
Once you’ve created this OOXML editing drive, you can use the command-line zip utility to unzip the files. But there’s also a very useful GUI utility that works better than Archive Utility with Office files. Visit the App Store and get The Unarchiver. Then use it to unzip and expand the Office file.
Editing in macOS – May 2016 Update
BBEdit 11 and better has the ability to open and edit Office files directly, avoiding all of the above hassle when editing in macOS. BBEdit has a 30-day free trial with all features included. While older versions of BBEdit used Tidy to format text, that utility has been retired. The BBEdit programmers have written a script to format XML in human-readable form. You can download it from here, please be sure to read the installation instructions first: Click to download XML Tidy Script for BBEdit
Here’s your working procedure:
Open your Office file in BBEdit 11 or later. In the left-hand pane, you’ll see a folder tree of the files contained within, so no unzipping is required
Select the file you want to edit. The file opens in the main BBEdit window, displaying two lines. The first is the XML header, the second is the actual content.
Click at the left end of the second line.
Choose Text>Apply Text Filter>run_tidy.
Make your edits and save. It’s not necessary to linearize the XML. The Office program will do that anyway the first time you save it. However, if you like to leave things exactly the way you found them, click in from of the first line of content (after the header line), choose Markup>Utilities>Format…, change the Mode to Compact and click on the Format button. Save the file and test your editing in macOS.
Editing in macOS – July 2018 Update
Technology marches on! If you use the Chrome browser, there is a free XML editing alternative that avoids unzipping and rezipping files. Open this link in Chrome: OOXML Tools and download the free plugin. After installation, click on the OOXML icon to the right of the browser address bar. Drag your Office files onto the browser window to begin editing. When you’re finished, click on the Save button, then the Download button in the upper left corner and give the new file an appropriate name. Chrome will place the new file in your Downloads folder and leave the original file untouched. OOXML’s EMF/WMF bug has been fixed, so download the most recent version. Thanks to Bram Alkema of the Netherlands for informing us about OOXML Tools.
Editing in macOS – 2025 Update
After a few good years, OOXML Tools is no longer supported in Chrome. But there is another option for editing OOXML: Visual Studio Code from Microsoft. Here’s the page on how to install the program. Then install the OOXML Extension Pack.
The workflow is a little odd, because you can’t use File>Open to work on an Office file. If you do, you’ll see a message “The file is not displayed in the text editor because it is either binary or uses an unsupported text encoding.” That’s because Offices are Zip archives, which VS Code can’t open as text.
Instead, choose File>Open Folder and select the folder containing the Office file. That file then appears under WORK DOCS in the left pane of Code. Right-click on the file name and choose Open OOXML Package. Under the OOXML VIEWER heading in the left pane, the XML parts of the file appear. Select a part to display and edit it in the right-hand editing pane.
Please note, for any OOXML Hacking that requires adding new XML parts (Ribbon mods, creating SuperThemes), BBEdit, OOXML Tools and VS Code will not work. You’ll have to use the March 2016 update solution and create a network or USB disk set up for XML editing.
We’re experts in XML hacking, so you don’t have to be. Contact me at production@brandwares.com with the details of what you need hacked.
Font themes are one of the simpler theme elements in Open Office XML, but for some baffling reason, Mac Office users can’t create one. It’s odd enough that the only Mac program that can create a color theme is PowerPoint, but even it can’t provide an escape from Calibri and Arial! So I’m going to show you how to do it on your own.
Let’s start with a dead-simple font theme. Here’s the minimal file that Office will read:
Important Note: If you copy and paste this sample, you must change the non-breaking space characters to ordinary spaces. I need to use non-breaking spaces to format an HTML page, but Office will refuse to display your font theme if you don’t search and replace them with regular spaces.
You can create this in any text editor, including TextEdit in plain text mode (don’t try this with an rtf file). However, by default TextEdit will change the necessary straight quotes to smart quotes, producing a file that Office will not recognize. If you’re using TextEdit, make sure you visit both TextEdit>Preferences and Edit>Substitutions and turn off Smart Quotes in both locations. A better alternative is the free version of BBEdit. When you visit this link, click on the Download link to get the free version. If you do any significant amount of XML editing, the paid version of BBEdit is well worth the $50 price tag.
The most common font theme problem is using smart quotes (Hex 201C + 201D, Decimal 8220 + 8221) other than plain straight quotes (Hex 22, Decimal 34). But you can also ruin a font theme by using non-breaking spaces (Hex A0, Decimal 160) instead of regular spaces (Hex 20, Decimal 32). Even though a font theme is encoded in UTF-8, you should only use plain ASCII characters for the text. XML has a low tolerance for non-standard characters.
Now that you’re set up to edit, copy and paste the font theme file. The <a:latin> tag is the standard font for your theme. <a:majorFont> is for headings and <a:minorFont> for text. Fill in <a:ea> with a font that supports Chinese or Japanese (ea stands for East Asian), if you want to support those languages. The <a:cs> tag stands for complex scripts: Arabic, Thai, Hebrew and many more. For more detail on non-European language support in font themes, please see my article XML Hacking: Font Themes Complete. Or you can just leave those tags blank if you have a predictable user base that won’t require them.
A common mistake is to get too specific with the font name in font themes. The name is only the base font name as displayed in Powerpoint’s font menu. “Open Sans” will work, but “Open Sans Extrabold” will cause Word 2011 to display a blank space where the font theme should be, while Word 2016 will simply ignore the entire file.
Save the file as a text file with a .xml ending and give it the name you want to appear in the user interface. “Brandwares.xml” will appear in the Font Theme menu as Brandwares.
For Office 2016, 2019, 2021, 2024 and Microsoft 365 subscriptions, save this file to Users/YourUserName/Library/Group Containers/UBF8T346G9.Office/User Content/Themes/Theme Fonts. For Office 2011, save it to Users/YourUserName/Library/Application Support/Microsoft/Office/User Templates/My Themes/Theme Fonts. In current versions of OS X, the user Library is hidden by default. To open it, hold down the Option key, while clicking on the Go menu and choosing Library.
Once it’s correctly installed, it will show in PowerPoint’s Slide Master view under the Fonts dropdown. A new Custom group will appear at the top of the list, with your font theme in it. Once you apply it and a color theme to a presentation, you can save as a theme file and distribute that to your users, it will contain the font theme you just created. Happy hacking!
Font Themes – An Alternate Method
March 2017 edit: If you have any problems creating a font theme from scratch, here’s a workaround. Open an existing font theme that come with Office and edit the font names to the ones you want to use. These files are the verbose style discussed in this article: XML Hacking: Font Themes Complete. For most uses, you only need to set the a:latin font in the a:majorfont and a:minorfont sections. Here’s where you can find the Microsoft Font Themes:
Office 2011 for Mac – Open Applications/Microsoft Office 2011/Office/Media/Office Themes/Theme Fonts and copy any of the XML files.
Office 2016, 2019, 2021 or 2024 for Mac, or Microsoft 365 for Mac – Open Applications, then right-click on Microsoft PowerPoint and choose Show Package Contents. Open Contents/Resources/Office Themes/Theme Fonts and copy any of the XML files in there.
Here are the locations for 32-bit versions of Windows. If you’re using a 64-bit version of Windows, check the same path inside C:\Program Files (x86).
Office 2007 for Windows – Open C:\Program Files\Microsoft Office\Document Themes 12\Theme Fonts.
Office 2010 for Windows – Open C:\Program Files\Microsoft Office\Document Themes 14\Theme Fonts.
Office 2013 for Windows – Open C:\Program Files\Microsoft Office\root\Document Themes 15\Theme Fonts.
Office 2016, 2019, 2021 or 2024 for Windows, or Microsoft 365 for Windows – Open C:\Program Files\Microsoft Office\root\Document Themes 16\Theme Fonts.
Too complicated? We can help! Brandwares is a full service template creation service for all Office programs. Contact me at production@brandwares.com
Custom Table Styles are probably one of the more detailed hacks you’ll have to write. See the constructions details in my previous post. Besides the basic table format, there are 6 optional format layers you need to at least consider. In a minimal table style, you’ll need to include at least the Header Row, First Column and Banded Rows. Most users will expect to see these options. Total Rows, Last Columns and Banded Columns are less requested, you only need to include them if a design or client specifically requires them.
As mentioned in part 1, if you haven’t hacked XML before, please read XML Hacking: An Introduction. If you’re using a Mac, you should also read XML Hacking: Editing in OS X. In addition, an essential companion to this pair of articles is the post on setting Default Table Text, which is set in a different XML component..
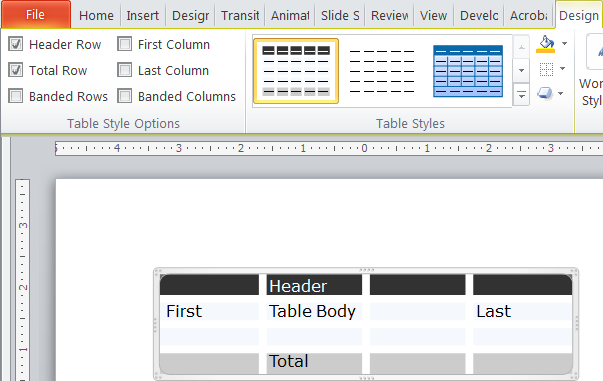
Let’s take a look at how our work appears in the PowerPoint interface. First, we’ll insert a plain vanilla table. By default this takes on colors and fonts from the current PowerPoint theme:
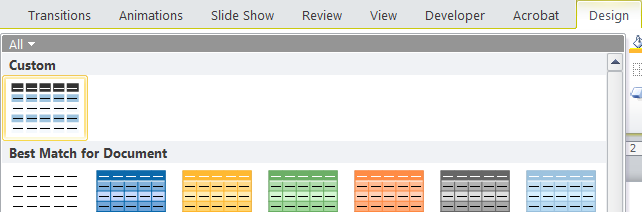
Next, we choose the Table Tools>Design tab, open the Table Styles gallery. Up at the top a new Custom section has appeared with our new custom table style:
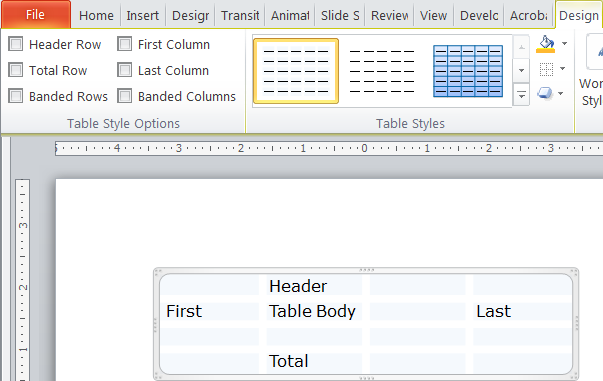
Select the custom table style and the default table changes to match our design. This screen shot has all formatting options turned off, so effectively we are seeing the Whole Table formatting only.
Table Style Options: Banded Rows and Header
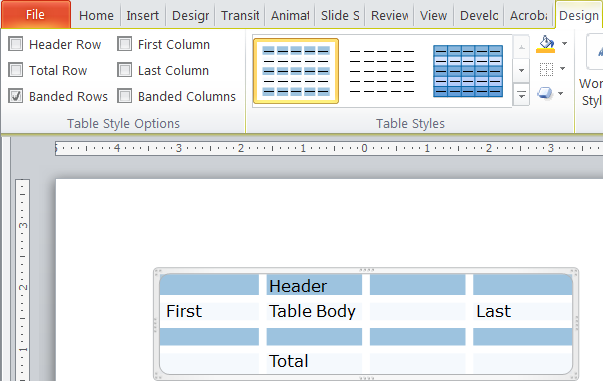
Using the options panel in the upper left corner, we can add some of optional formatting layers we created in XML. First, let’s turn on banded rows. If you remember, we only formatted odd-numbered rows, so the banding only changes rows 1 and 3 in our example:
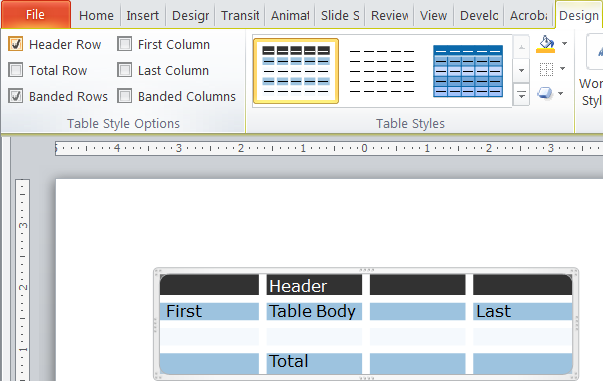
Next, we’ll leave banded rows on and also add the Header row. This row doesn’t count as part of the table body, so the banding moves down 1 row:
Table Style Options: First and Last Columns
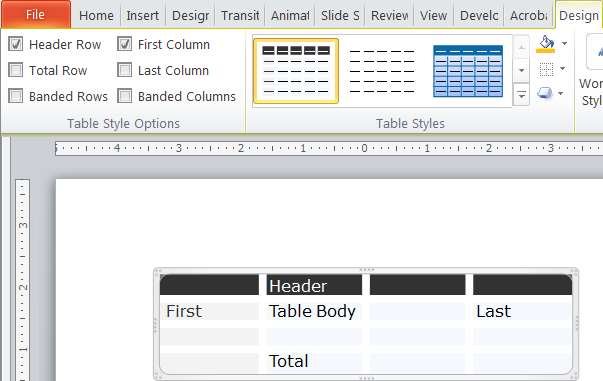
Next, we’ll turn off banded rows, leave the Header as is and add the first column:
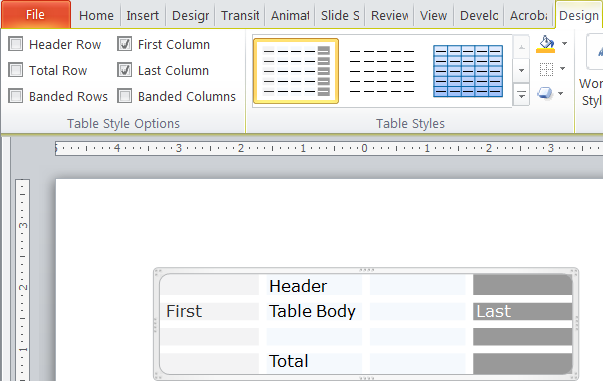
Here’s the table with First and Last Columns checked:
Table Style Options: Header and Total
And finally, Header and Total Rows:
As you can see, with some pre-planning, one table style can cover quite a few related table looks. The layer options for different features make the table useful for many different purposes and the options panel makes it fast and easy for users to try different combinations. This feature is a major advance over tables in PowerPoint 2003 and earlier, which were quite crude by comparison.Table styles a similar way in Word, PowerPoint and Excel. While Word and Excel include table style editors in their interface, PowerPoint needs to be hacked to create them. Sadly, the table style specs for the different parograms are dissferent, so it’s not possible to trasfer tables style OOXML among Word, Excel and PowerPoint.
Table Styles: What You Can’t Do
You cannot set vertical cell/row alignment or cell margins in default taxt table text or a table style. It would have been possible given the OOXML spec, but Microsoft just didn’t bother.
Of course, if the process is too complex, we’re here to help. The current price on a custom table style is US$120. Just email me production@brandwares.com
For branded documents, you want to have a unique table style. Microsoft Office programs include a pile of table styles that are auto-created by the software, but they all have that generic MS look. It’s possible to create custom styles in Excel and Word for both Windows and Mac using the program interface. But if you’re using PowerPopint, you can still create custom table styles. You just have to hack some XML!
First we have to cover how Office programs create custom tables. It’s not a simple subject, but understanding this will also help you if you’re trying to create custom table styles in Word for Windows or Excel, which actually have tools to do this in the respective programs.
Let’s start by making one thing clear: table styles do not format the font choice or size contained in the tables. Yes, I know the Word and Excel table style tools have font formatting dropdowns, yes I know Microsoft help files say that font styling is included in table styles. The truth is that font styling in a table style is limited to setting bold or italic attributes, font color and whether the table component uses the Headings or Body font as specced in the Font Theme. For typeface and size, alignment and weight/italic controls, read my post on Default Table Text
I find that it’s easier to format Office tables if I imagine that table formatting has layers. The base layer is any overall formatting that applies to the table as a whole. Then, we build layers on top of that base formatting that looks after the Header Row, probably the most common feature applied to tables. We follow this with the Total Row, the bottom one. Next, the First and Last Columns. Once these outer areas are formatted, we add layers for Even and Odd Row Banding and then Even and Odd Column Banding. Finally, we can spec special formatting for the cells in the 4 corners. This sequence moves from the general to the particular and also from the most common to the rarest formatting.
This sequence is how the table style dialogs in Word for Windows and Excel present table elements. It’s similar to the order in which we enter the information in an XML custom table style. If you follow this order, you’ll get a custom style in much less time than if, for instance, you try to start with the even and odd rows.
Word’s custom table styles are stored in the styles.xml file. This is in the word folder of an unzipped file. The comparable file for PowerPoint is called tableStyles.xml in the ppt folder. The XML is similar in concept, but the differences mean you can’t copy and paste from one program to another. If you’re not sure where to find these files, please read XML Hacking:An Introduction. If you’re editing on a Mac, you should also read XML Hacking: Editing in OS X
Below is a typical PowerPoint table style. I’ve broken the listing into 4 pieces so it fits on the page. Copy and paste them together into one listing, or download it as a zipped text file:
That's a big pile of XML to throw at you. Let's break it down, first, the section that sets parameters for the whole table. Think of this like a layer cake, with the WholeTbl section being the first layer. Then later attributes are superimposed on top of it.
Line 2 is the container tag that holds individual table styles. The last part of the tag includes the def tag that sets which table style will be used as the default. Paste in the GUID of your custom style here to make it the automatic style in a template or presentation.
From line 3 to 8, we set the font characteristics that we can: idx="minor" means the font will be the theme body font. The actual font used is set in the theme, not here. Line 5 sets a dummy font color, in this case the Office preset color Black. Then in line 8, the actual color is set to the dark1 theme color.
Line 10 begins formatting the default borders. Beginning at line 12, the left border is set to w=0, meaning it has a 0 thickness and does not display. If it did display, the color setting in line 14 would set it to bg1, or the first background color, normally white in most themes. The following sections for right, top and bottom borders are identical.
By contrast, look at line 40 for Inside Horizontal borders (the ones between each cell. Here the weight is set w=114300. The measurement units are EMUs or English Metric Unit, a made-up measurement system that allows easy conversion between English and Metric systems. At 914400 EMUs per inch, it means the line weight is 1/8 of an inch, unusually thick borders for a table.
Then, starting on line 55, are the fill settings for default cells. Line 57 set them to an RGB color value, since this is a tint not found in the theme. The color notation is hexadecimal, just as on an HTML page.
Custom Table Style Layers
Next up is the section for the odd and even-numbered horizontal bands:
In XML, an empty or unused attribute closes itself, as does the final object in a chain of references. Line 64 shows <a:tcBdr/ > with a slash right after the name. The slash closes the border attribute, indicating that adding odd-number row formatting doesn't include a change to the borders. On the other hand, the fill is active, using the Accent 6 color from the theme. Accent 6 closes itself because it's the final item of information in defining the fill.
Compare lines 72 to 76 (even-numbered rows) with 63 to 71 (odd-numbered rows). No format was set for even-numbered horizontal rows, so applying this attribute in Office will have no effect on the table appearance.
Next up are banded columns. This is similar to the banded row section: odd-numbered rows are defined, but not even-numbered. The fill color is a hexadecimal RGB, value, since this color is not in the theme:
This contains sections for font, border and fill parameters. As with the whole table section, font formatting is limited to speccing which theme font and color to use. No borders are assigned and the fill color is an RGB gray. Here are the remaining parameters for the First (leftmost) Column, the the last (bottom) row and first (top) row. In the Office interface, the top-most row is referred to as the Header Row and the bottom-most as the Total Row.
Custom Table Styles - Color Models
Here are the different ways you can spec color. Use the same syntax for fonts, borders and fills:
<a:schemeClr>: These access the Theme Colors. For the 2 pairs of light and dark colors that form the first 4 in a theme, you may see them variously as lt1, dk1, lt2 and dk2, or bg1, tx1, bg2 and tx2. Be careful with using the last 4, because Office Open XML allows mapping other colors to bg and tx. The safer choices are lt and dk. These are followed by the 6 accent colors: accent1 through accent6. Finally hlink and folHlink designate the hyperlink and followed hyperlink colors. Examples are <a:schemeClr val="lt1"/> or <a:schemeClr val="accent2"/>.
<a:srgbClr>: Sometimes you need colors that are not in the theme. This color model uses hexadecimal colors, exactly the same as used in HTML. <a:srgbClr val="F5F9FD"/> is one example.
<a:scrgbClr>: This is also RGB, but uses percentages instead of hexadecimal: <a:scrgbClr r="50%" g="50%" b="50%"/>.
<a:hslClr>: If you need to use HSL (Hue, Saturation and Luminance), this is the model for you. Try <a:hslClr hue="14400000" sat="100%" lum="50%"/>.
<a:prstClr>: These are a limited range of named colors that were used in early versions of Microsoft Office. They're just here for legacy file format support, but you'll see them used in some XML sample listings. An example would be <a:prstClr val="black"/>.
<a:sysClr>: This model allows you to use operating system colors. Beware, you'll get different results in OS X then in Windows, and users can customize their system colors as well. <a:sysClr val="windowText"/>.
Clearly, when you edit this XML by hand, you'll need to be familiar with the custom color theme used in the file and its hex values. Read my post on this subject: XML Hacking: Color Themes Next time we'll take a look at how table styles connect with the Office program interface to give the user access to these features
As always, if this seems too daunting, Brandwares is here to create custom table styles for you. Contact me at production@brandwares.com.
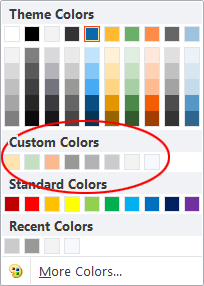
In my last post, I looked at adding extra color themes to PowerPoint masters. But any color theme can only hold a maximum of 10 colors (not counting the hyperlink colors, which are not available in the color picker). The solution is to add Custom Colors to the theme.
Fortunately, most desktop versions of Office programs beginning with 2007 have a hidden capacity to display up to 50 additional colors. These form a new row below the theme colors and above the stock Microsoft row. These extra colors are not supported in PowerPoint 2008 or 2011 for OS X. While these versions will open a file with more colors, the colors do not get added to the color picker. Here’s what the color picker in every other variety of Word or PowerPoint looks like after adding additional colors:
Custom Colors in Office
Custom colors do not appear in PowerPoint for iOS, PowerPoint for Android or PowerPoint for the web. The web version of Office is also used in SharePoint, so SharePoint users won’t see them. You must be using PowerPoint for Windows or for Mac to see them.
OOXML Basics
If you’re new to XML hacking, be sure to read my Introduction to the subject first. If you’re editing on a Mac, there are some other considerations covered in this article. I should also clarify: a Color Theme or a Font Theme are only sub-parts of a Theme as saved by PowerPoint. A PowerPoint Theme file contains the entire presentation, including masters, layouts, and full theme files. It’s this full theme file that we need to edit. Custom colors never appear in a Color Theme file.
As with the extra color themes we looked at last time, custom colors are added to the XML theme files found in ppt>theme. I mentioned in the last article, presentations almost always include a default Office theme as a fallback and this theme is always last in the list. So in a presentation with 1 color theme, there will be a theme1.xml and a theme2.xml inside the theme folder. Ignore theme2.xml and customize only theme1.xml.
Setting Custom Colors
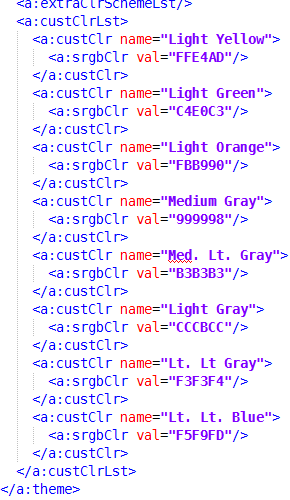
These colors are the last category in a theme file, so it’s easy to find. As before, we expand the PowerPoint file (really a zip archive with a different file ending), open ppt/theme, open theme1.xml in a text editor and reflow the text to be humanly readable. Then scroll all the way down to the end. An unmodified file will only display the <a:extraClrSchemeLst/> self-closing tag. To add more colors, we add a new branch to the tree. Below <a:extraClrSchemeLst/>, we type a new entry: <a:custClrLst>. This is followed by our additional color definitions and the closing tag </a:custClrLst>. Here’s what a list of custom colors as seen in the screenshot above would look like in XML:
A nice feature here is that, unlike color themes, you can actually supply a name for the color. This is followed a hexadecimal RGB color value, as used in web design. This list has only 8 colors, but there is room for up to 50 in the color picker. If you read the last article about color themes, you’ll soon realize that each theme file can have a different set of additional colors that goes with it as well. The combination of themes and custom colors gives you 18 colors per theme to play with, almost enough for the most color-crazed designer!
Custom colors can be added to the theme1.xml file in Word and Excel using exactly the same syntax. The colors appear in the color picker as expected in Word but are partially ignored in Excel. In Excel, these colors display for almost all objects on the Insert tab: Text Boxes, Shapes, SmartArt, Charts, WordArt, etc. But if you’re seeking to format worksheet text, cell fills or borders, they do not show. (Thanks to reader Kaz for pointing this out.)
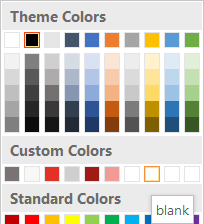
Custom Colors in Columns
By default, the colors appear in 5 rows of 10 colors each. Some designers prefer to display the colors in columns instead of rows. To work around this, add your colors to form the top row of your columns. Then complete the row of 10 with dummy colors that have a value of FFFFFF and blank as a name:
Another limitation is that if you save a presentation as a Theme (*.thmx) file, custom colors in the presentation don’t get added to the Theme file. You’ll have edit a saved Theme file to add the custom colors to it, then they can be applied to another file. Or you can save the original presentation as a Presentation (*.pptx, *.pptm) or Template (*.potx, *.potm) to preserve the Custom Colors.
By extension, this also means that to add custom colors to Word by applying a PowerPoint Theme file, you must edit the Theme file to add the custom colors. Or course, you can hack the Word document or template to get them. The file name in Word will be the same: theme1.xml, but it is to be found in the word/themes folder instead of ppt/themes. As with PowerPoint, custom colors are added to the very end of the theme.xml part.
If you have added custom colors, then duplicate the slide master, the custom colors will also be duplicated (each slide master has a separate theme file as well). But if your first slide master has custom colors and you simply create a second slide master, the second master will not include the custom colors in it’s theme.
Unlike theme colors, custom colors are not automatically applied to charts. Automatic chart coloring in PowerPoint, Excel and Word is limited to 6 settable colors (see this post for chart coloring details). After that, the host program starts generating automatic variants based on the theme. However, for the detail-oriented among us, manual recoloring of data series with custom colors is very convenient and miles above the previous technique, inputting RGB values from text.
I’ve written a lot about PowerPoint, but the additional colors can be used anywhere in Word as well. In Excel, you get partial access. Most objects on the Insert tab can have custom colors applied, like AutoShapes and SmartArt. Custom colors cannot be used for worksheet formatting. Cell and font coloring won’t use use them, they just don’t appear in the color picker for those objects.
We’re here to do this for you, if you prefer! Please contact me at production@brandwares.com. Next time, I’ll tackle formatting custom table formats in XML. This is a complex subject, so it will take at least 2 posts. Stay tuned!
Free Control Control Add-in for Word for Mac
Subscribe to the Best Practices blog and get a free copy of our new Control Control add-in. This is the easiest way to create the same modern form controls that are in Word for Windows. Enter your real email and hit Subscribe in the right-hand column of this page. You’ll receive the add-in and installation instructions within 3 days.