SOLD OUT! The paper copies of the book are all gone, but the ebook version (with an additional 40 pages of new content) is available here.
After years of original research, you can finally buy the book! Filled with unique information not found anywhere else, online or in print, this manual shows you how to build SuperThemes 3 different ways, how to create custom Effects Themes, how to edit the Ribbon in macOS, and much more!
The book expands on many of the brief articles on this site, putting them in logical order and expanding the number of examples. Author John Korchok explains how Office Open XML files work, shows you where to find each XML part and how each part can be modified. With these tools, you can provide unique services to your clients or users that you can’t find at the average Office template service bureau. To give you a better idea of what it covers, here is the Table of Contents:
All techniques are covered in both Windows and macOS. The book includes a link to a downloadable text file with all the hyperlinks, XML and VBA listings, so you don’t have to retype anything from the printed page. At this time, only print copies are available, ebook versions will be here in several months. To buy the book, click here.
This October 6 – 9 in San Antonio, the world’s top presentation experts will be meeting at the Presentation Summit 2019. This is the place to learn how to make amazing presentations that sparkle, or network with pros who can make you shine.
For the first time, Brandwares will be a sponsor. I’ll be attending with my new book OOXML Hacking. In addition to expanded versions of my online articles, put in a logical sequence, there are new chapters from our original research. I show you three ways to build SuperThemes, how Effects Themes work and how to create them, plus much more information that can’t be found anywhere else, in print or online.
Indezine.com, the media sponsor for the Presentation summit was kind enough to interview to find out more. Here’s is the result:
A client sent a design for a Word template that had lots of boxes and photos with uniform rounded corners. Not an unreasonable request, but Office doesn’t do that well. In PowerPoint, Word and Excel, rounded corners are proportional to the size of the shape. Making them uniform manually is picky and time-consuming. But with a dash of VBA, we can make the job easy.
The Math
As a round-cornered shape gets larger, the corner radius increases as well, in proportion to the length of the shortest side of the shape. Since we want to keep the radius the same size, we need to create a formula that makes a smaller number as the shorter side increases. We need an inverse number! We can create this by dividing the preferred corner radius by the short side size. And you thought you’d never need that high school math!
Here’s VBA code that will work in Excel, Word and PowerPoint on selected round-cornered boxes. Thanks to the Rembrandt Kuipers and Ernst Mathys who have commented below, this macro has been improved since it was originally published. Replace the number after sngRadius with your desired radius size in points.
Sub RoundedCornersFixedRadius()
    Dim oShape As Shape
    Dim sngRadius As Single
    sngRadius = 8.50394 'Radius size in points. 8.50394pt is equal to 3mm.

    For Each oShape In ActiveWindow.Selection.ShapeRange
        With oShape
            If .AutoShapeType = msoShapeRoundedRectangle Then
                LengthOfShortSide = IIf(.Width > .Height, .Height, .Width)
                .Adjustments(1) = sngRadius / LengthOfShortSide
            End If
        End With
    Next oShape
End Sub
To set rounded corners on a PowerPoint placeholder, open Slide Master view, select the placeholder and run the above macro.
Uniform Rounded Corners for the Whole Document
To run this on a whole presentation, document or workbook, we need to customize the routine for each Office program. Here’s the Excel version:
Sub RoundAllXLCorners()
    Dim oWorksheet As Worksheet, oShape As Shape, sngRadius As Single
    sngRadius = 8.50394 'Radius size in points.

    For Each oWorksheet In ActiveWorkbook.Worksheets
        For Each oShape In oWorksheet.Shapes
            With oShape
                If .AutoShapeType = msoShapeRoundedRectangle Then
                    LengthOfShortSide = IIf(.Width > .Height, .Height, .Width)
                    .Adjustments(1) = sngRadius / LengthOfShortSide
                End If
            End With
        Next oShape
    Next oWorksheet
End Sub
To do the same in PowerPoint
Sub RoundAllPPCorners()
    Dim oSlide As Slide, oShape As Shape, sngRadius As Single
    sngRadius = 8.50394 'Radius size in points.

    For Each oSlide In ActivePresentation.Slides
        For Each oShape In oSlide.Shapes
            With oShape
                If .AutoShapeType = msoShapeRoundedRectangle Then
                    LengthOfShortSide = IIf(.Width > .Height, .Height, .Width)
                    .Adjustments(1) = sngRadius / LengthOfShortSide
                End If
            End With
        Next oShape
    Next oSlide
End Sub
And finally, for Word
Sub RoundAllWDCorners()
    Dim oShape As Shape, sngRadius As Single
    sngRadius = 8.50394 'Radius size in points.

    For Each oShape In ActiveDocument.Shapes
        With oShape
            If .AutoShapeType = msoShapeRoundedRectangle Then
                LengthOfShortSide = IIf(.Width > .Height, .Height, .Width)
                .Adjustments(1) = sngRadius / LengthOfShortSide
            End If
        End With
    Next oShape
End Sub
Before: Rounded Corners, but not Uniform
The Word version is a little simpler because a Word document is one big object, while Excel and PowerPoint both have multiple objects for each worksheet and slide, respectively. But the similarites point out that when you’re searching online for VBA code, finding something for a different program and modifying it can be a huge time-saver. By far, Excel has way more code written for it, so Excel VBA sites can be a fruitful source for Word and PowerPoint code ideas.
After: Uniform Rounded Corners
These macros have been tested under both Windows and macOS and work well under both.
To use these macros with other shapes, please see my article Every AutoShape – Cool Code for a downloadable reference file showing all AutoShapes along with their XML and VBA names. Then replace msoShapeRoundedRectangle with the mso shape name you need.
June 2023 Update: I’ve created a VBA add-in for Word for Mac that allows you to more easily add Content Controls in Word documents, with an interface similar to the Windows version. I’m looking for beta testers for this add-in. If you have time to test, please email me (my address is in the Meet the Author sidebar).
Content Controls are an improved form of fillable form field, but the Word for Mac user interface doesn’t include Content Controls for macOS. I show you how to sidestep this limitation to be able to create superior fillable forms.
Microsoft Word for Windows has three different types of fields to use for fillable forms. The oldest of these are Legacy Form Fields, which exist in every version of Word, Windows and Mac, but not DOS, back to the dawn of time. Legacy form fields require the document to be protected for forms, which closes down many formatting options even on unprotected sections. These are the only form fields available in the Mac program interface. Windows version also have ActiveX controls. These generally have a crude appearance. They don’t work at all on Mac versions of Word.
Finally, we have the newest type of form fields, Content Controls. These were introduced on Windows in Word 2007. The collection of controls was expanded a little in 2010 and a little more in 2013. Word 2008 and 2011 can’t use or create them, but in Word 2016 for Mac, the program started honoring Content Controls created in Windows, so they work as expected on both platforms. Unfortunately, the tools to add and modify them are still not in the program.
Please note: A known error occurs if you try to insert a Content Control into an old Word file in .doc format. You’ll see an error like Run-time error 445: Object doesn’t support this action. Update the file to .docx format to fix the issue.
Content Controls for macOS: What Are They?
While Legacy Form Fields have only 3 types (Text field, Checkbox and Dropdown), there are 9 (or 10, depending on how you count) types of Content Controls. Here’s a look at each type:
Plain Text and Rich Text
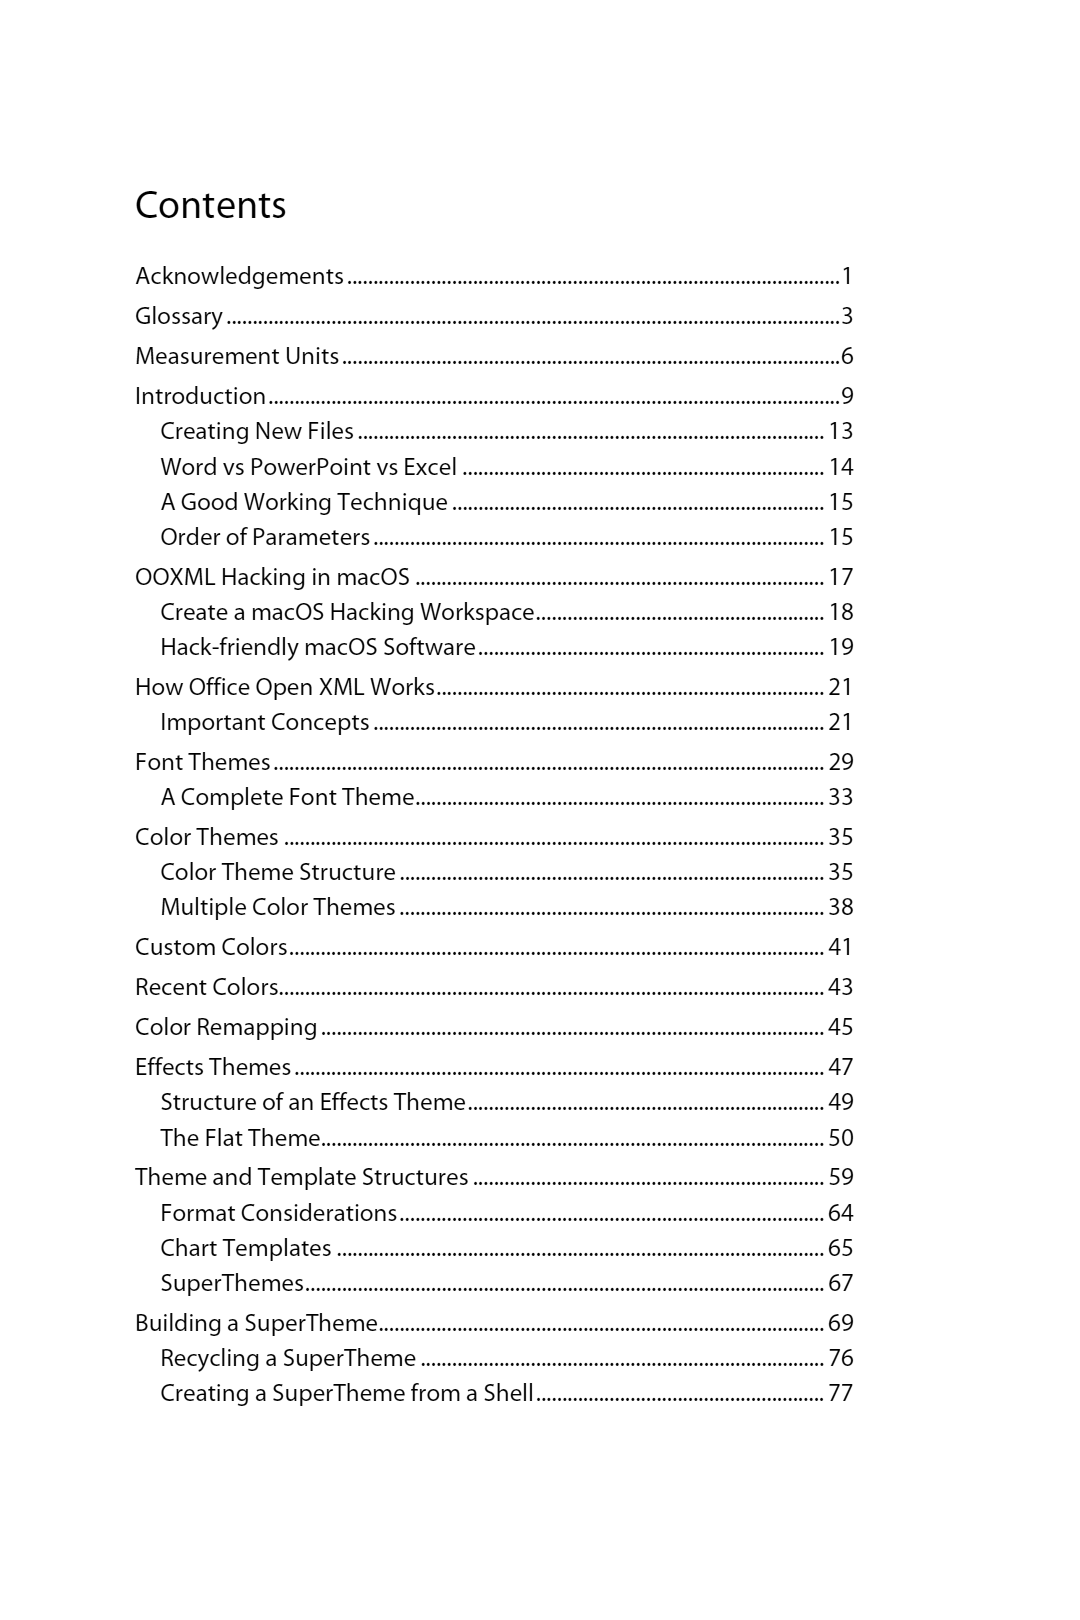
These look identical on the screen. The screen shot shows what they look like unselected (top) and selected (bottom). The Plain Text control is most similar to the Legacy Text form field. All the text has the same formatting and you can’t include other types of content other than text. By comparision, the Rich Text control allows selected text to be bold or italic or a different font. You can insert tables and pictures and even other Content Controls into Rich Text controls.
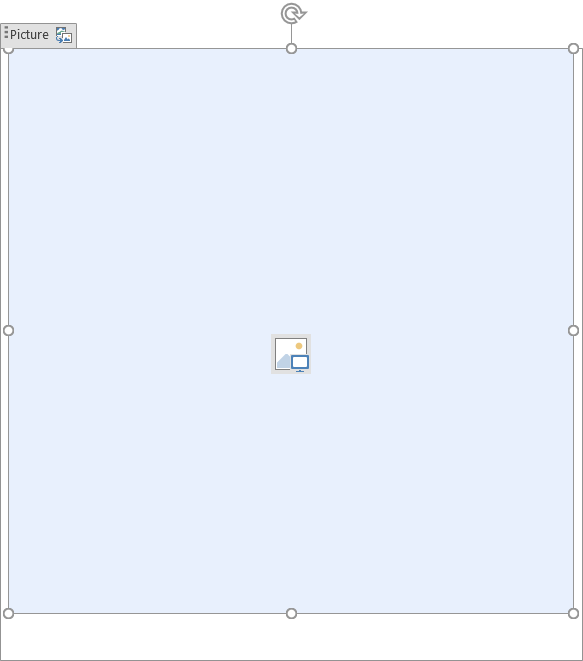
Picture
Finally! A true picture placeholder for Word! The picture can be set when the control is created. There are options to allow the user to replace it or not. Or it can be left blank (as shown) for the user to add a picture later. You can change the shape from a square using Picture Format>Picture Styles. This choice can also add a soft edge or other visual effects to a photo that the user inserts later.
It’s worth noting that Picture Content Controls only work as inline pictures. To float them and wrap text around them, you need to place the CC in a table cell or frame or some other object that allows text wrapping. These controls come in at 2″ square, but you can set numeric dimensions on the Picture Format tab. (Thanks to Timothy Rylatt for the tips!)
Building Block
This is the only Content Control that doesn’t work yet on a Mac. While Building Blocks in the Windows version of Word is the same technology as AutoText on the Mac, Microsoft hasn’t gone the extra mile to make it work on a Mac. The macro further down the page sets the control to work with AutoText (as you almost always should if your template is being distributed to others). But when you click on the control’s AutoText tab, a dropdown list of AutoText entries doesn’t appear like it does in the Windows version.
At least if your Windows client needs it in their template, you can create it on a Mac. AutoText works by grabbing content from the active document’s attached template. If you’re sending a template with AutoText content, the Content Control will find that. If you’re sending a document instead of a template, the Content Control will grab AutoText from the user’s Normal.dotm file.
Check Box
Similar to the Legacy Check Box form field, but with the added advantage that the filled symbol can be set to other symbols than an X. This control was added in Word 2010, so don’t include one for a client using 2007.
But still no radio buttons? Give me a break, Microsoft! Using elaborate VBA kludges, it’s possible to make a set of checkboxes operate like radio buttons with both Legacy and Content Control versions. But it shouldn’t be so hard!
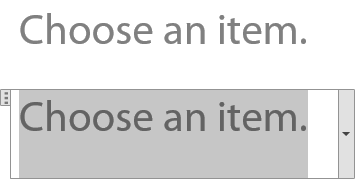
Combo Box and Drop-Down
Another similar pair of controls. The Drop-Down is most similar to the Legacy Drop-Down (which MS often refers to as a Combo Box, just to confuse everyone). The Drop-Down restricts users to choosing an item on the list, while a Combo Box allows a user to enter a value that is not on the list.
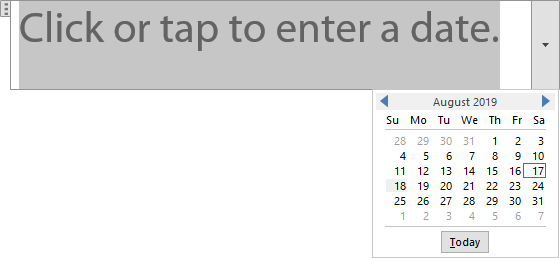
Date Picker
While Legacy Text fields have a date option, it’s only to enforce date formatting after a user tries to enter a date. The Date Picker Content Control is way cooler, it’s pops a little calendar for the user to choose a date visually. Handy!
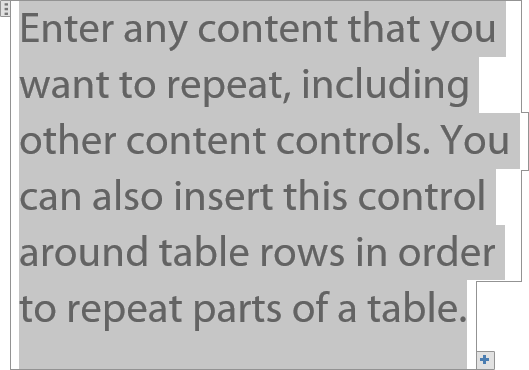
Repeating Section
…And the prize for longest prompt text goes to this control. Added to Word 2013, so it won’t work for 2007 and 2010 clients. Clicking on the plus sign in the bottom right corner duplicates the content. There are already a couple of ways to do this, so I think this is strictly for user convenience. Unlike the others, this control spans the page by default, probably because of the long prompt.
Group
No screen capture for this one, because it’s more of an operation than a control. Applying this to a selected set of Content Controls will group them together, so they can be copied as a unit. You can’t include a Rich Text control, which can also be used as a group. If you select controls, then get an error when grouping that a control is “partially covered”, it will usually be about the topmost control. Add a carriage return before, include it when you select, then run the Group macro.
Simple Controls from Keyboard shortcuts
Fortunately, the VBA object model for Word 2016 and 2019 for Mac includes Content Controls. If you’re creating forms for your own use, there is a simple way to create basic Content Controls on your Mac:
In Word, choose Tools>Customize Keyboard
Scroll Categories and pick All Commands
Scroll Commands and pick ContentControlCheckBox
Click inside the Press new keyboard shortcut field and type a key combination. Word will inform you if that combination is already in use. If there is no conflict, or an insignificant conflict, click on the Assign button. Finally, click on OK. The Control key is a good modifier, because all existing keyboard shortcuts with Control are duplicates of ones that also use the Command key.
Click on your document where you would like to see a checkbox, then use the keyboard shortcut. Viola! Instant checkbox!
Repeat the steps for the other Content Control commands. It’s not a bad idea to make a sample document with Content Controls and their shortcuts, for later reference. BTW, keyboard shortcuts are the only customization that can access Content Controls. Equivalent commands for the QAT and Ribbon haven’t been added as of this writing.
Content Controls for macOS: Complex Controls for Clients
The keyboard shortcuts are fine for plain vanilla controls. But they’re so basic, some are useless. Sure you can insert a Drop-Down or Combo Box, but they don’t have any items in the list and there’s no easy way to add them. What we need is more fine-grained control so we can set all the same options that a Windows user can. This is possible by inserting them using VBA.
If you never used macros in Word, start by making the Developer tab visible on the Ribbon. Choose Word>Preferences>View and check Show developer tab. The tab becomes visible when you close the Prefs panel.
On the Developer tab, click on the Visual Basic button (Word doesn’t run Visual Basic, but a very similar language called Visual Basic for Applications. This is VBA, not VB, but why would MS care about an accurate button title?). The VBA Editor opens. In the top left corner is a windows called Projects. If you have a fresh installation, you’ll only see Normal here. If you have Add-ins installed, there will be other project names. Select Normal.
From the macOS menu, choose Insert>Module. Call it ContentControls. A new module page is opened where you can insert macro code. Copy and paste the following code onto that page:
Sub AddRichTextCC()
  Dim oCC As ContentControl
  Set oCC = ActiveDocument.ContentControls.Add(wdContentControlRichText, Selection.Range)
  Set oCC = Nothing
End Sub

Sub AddPlainTextCC()
  Dim oCC As ContentControl
  Set oCC = ActiveDocument.ContentControls.Add(wdContentControlText, Selection.Range)
  With oCC
    .MultiLine = True
  End With
  Set oCC = Nothing
End Sub

Sub AddPictureCC()
  Dim oCC As ContentControl
  Set oCC = ActiveDocument.ContentControls.Add(wdContentControlPicture, Selection.Range)
  Set oCC = Nothing
End Sub

Sub AddBuildingBlockCC()
  Dim oCC As ContentControl
  Set oCC = ActiveDocument.ContentControls.Add(wdContentControlBuildingBlockGallery, Selection.Range)
  With oCC
    .BuildingBlockType = wdTypeAutoText
    .BuildingBlockCategory = "General"
  End With
  Set oCC = Nothing
End Sub
Sub AddCheckBoxCC()
  Dim oCC As ContentControl
  Set oCC = ActiveDocument.ContentControls.Add(wdContentControlCheckBox, Selection.Range)
  With oCC
    .Checked = False
    .SetCheckedSymbol CharacterNumber:=&HFE, Font:="Wingdings"
    .SetUncheckedSymbol CharacterNumber:=&HA8, Font:="Wingdings"
  End With
  Set oCC = Nothing
End Sub

Sub AddComboBoxCC()
  Dim oCC As ContentControl
  Set oCC = ActiveDocument.ContentControls.Add(wdContentControlComboBox, Selection.Range)
  With oCC
    .DropdownListEntries.Add "Choose an item.", value:=""
    .DropdownListEntries.Add "Item 1"
    .DropdownListEntries.Add "Item 2"
  End With
  Set oCC = Nothing
End Sub

Sub AddDropDownCC()
  Dim oCC As ContentControl
  Set oCC = ActiveDocument.ContentControls.Add(wdContentControlDropdownList, Selection.Range)
  With oCC
    .DropdownListEntries.Add "Choose an item.", value:=""
    .DropdownListEntries.Add "Item 1"
    .DropdownListEntries.Add "Item 2"
  End With
  Set oCC = Nothing
End Sub
Sub AddDatePickerCC()
  Dim oCC As ContentControl
  Set oCC = ActiveDocument.ContentControls.Add(wdContentControlDate, Selection.Range)
  With oCC
    .DateDisplayFormat = "MMMM d, yyyy"
    .DateDisplayLocale = wdEnglishUS
    .DateCalendarType = wdCalendarWestern
  End With
  Set oCC = Nothing
End Sub

Sub AddRepeatingSectionCC()
  Dim oCC As ContentControl
  Set oCC = ActiveDocument.ContentControls.Add(wdContentControlRepeatingSection, Selection.Range)
  With oCC
    .AllowInsertDeleteSection = True
    .RepeatingSectionItemTitle = "Repeating Section Item"
  End With
  Set oCC = Nothing
End Sub

Sub AddGroupCC()
  Dim oCC As ContentControl
  Set oCC = ActiveDocument.ContentControls.Add(wdContentControlGroup, Selection.Range)
  Set oCC = Nothing
End Sub
Use the Tools>Customize Keyboard command to assign these macros keyboard shortcuts. You can also add them to the Quick Access Toolbar. If you subscribe to Office 365 or have Office 2019, you can also add them to the Ribbon.
If you take a close look at the code, you’ll see there are additional lines on some that allow you to set options for that type of control. As one example, the Date Picker includes options for the calendar type, date format and date language. In use, you would alter these options to suit the client, then run the macro to add a control with those options set.
Content Controls for macOS: Setting the Options
Here’s where you can really customize the Content Controls. These are generic options that can be set for all Content Controls. Rather than bulk up each individual macro, here’s one macro to set the extra options. Set the options in code, select a Content Control that you’ve already inserted, then run the macro. If you’re inserting many controls that have a common setting, like .LockControl = True, add that line to the code for inserting the control to avoid extra steps.
Sub SetOptions()
  If Selection.Information(wdInContentControl) Then
    With Selection.ParentContentControl
      'Sets the appearance to the original bounding box look. For the newer tags look, use wdContentControlTags
      'If you don't need to change a setting, comment it out before running the macro
      .Appearance = wdContentControlBoundingBox

      'Sets the color of the control to a preset color
      .Color = wdColorWhite

      'Sets the Word Character style to use for the text formatting. This will fail if you use a Paragraph style or forget to create the style before running this. This does _not_ change the placeholder text appearance, just the entered text that replaces it.
      .DefaultTextStyle = "Big"

      'Sets whether the Content Control can be deleted or not. If the control has had .Temporary = True applied, you must reverse that property to True before applying this.
      .LockContentControl = True

      'Sets whether the contents of the Content Control can be deleted or not.
      .LockContents = False

      'Sets the placeholder text or prompt for the control
      .SetPlaceholderText , , "Default Text"

      'Sets the Content Control tag property
      .Tag = "Tag"

      'If this is set to true, the Content Control will be removed when the contents are edited.
      .Temporary = False

      'Sets the title of the Content Control. This appears on a tab above the control when it is activated.
      .Title = "Title"
    End With
  Else
    MsgBox "Please select a Content Control to change its options."
  End If
End Sub
Perhaps you need to create a date picker in a different language. Starting with the macro above for U.S. English dates, you can modify it to create a French date picker:
Sub AddFrenchDatePickerCC()
  Dim oCC As ContentControl
  Set oCC = ActiveDocument.ContentControls.Add(wdContentControlDate, Selection.Range)
  With oCC
    .DateCalendarType = wdCalendarWestern
    .DateDisplayFormat = "d MMMM yyyy"
    .DateDisplayLocale = wdFrench
  End With
  Set oCC = Nothing
End Sub
Utility Macros
The following macros perform essential functions that may only be occasionally required. First, a pair to toggle all Content Controls between the older Bounding Box appearance and the newer Tags look. The only control that currently displays as a tag in macOS is the Group Content Control. All others appear as plain text in a mysterious field. As a consequence, don’t use this setting for forms to be used on a Mac. Save it for Windows clients:
Sub BoundingBoxAppearance() 'Sets all Content Controls in the document to a bounding box appearance
  Dim oCC As ContentControl
  For Each oCC In ActiveDocument.ContentControls
    oCC.Appearance = wdContentControlBoundingBox
  Next oCC
  Set oCC = Nothing
End Sub

Sub TagAppearance() 'Sets all Content Controls in the document to the tag appearance.
  Dim oCC As ContentControl
  For Each oCC In ActiveDocument.ContentControls
    oCC.Appearance = wdContentControlTags
  Next oCC
  Set oCC = Nothing
End Sub
This macro deletes the existing list of a Combo Box or Drop-Down and replaces it with a new list.
Sub ReviseComboBoxOrDropDownList()
  If Selection.Information(wdInContentControl) Then
    If Selection.ParentContentControl.Type = wdContentControlComboBox Or Selection.ParentContentControl.Type = wdContentControlDropdownList Then
      With Selection.ParentContentControl
        .DropdownListEntries.Clear
        .DropdownListEntries.Add "Choose an item.", value:=""
        .DropdownListEntries.Add Text:="List Item 1", value:="1"
        .DropdownListEntries.Add Text:="List Item 2", value:="2"
      End With
    End If
  Else
    MsgBox "Please select a Combo Box or Drop-Down Content Control to change its list."
  End If
End Sub
Finally, one to ungroup a Group Content Control. Switch to Tag view to see Groups, they’re invisble in Bounding Box view. Don’t try to select all group items before ungrouping, it will generate an error. Instead, single-click anywhere inside the group:
Sub UnGroupCC() 'Ungroups a group control
  If Selection.Information(wdInContentControl) Then
    Selection.ParentContentControl.Ungroup
  End If
End Sub
Now you’re equipped to send your client top-quality fillable forms with the latest technology. So when your client asks if you can create Content Controls, instead of saying “Huh?”, you can reply confidently “No problem!”
Back at the dawn of time, when PowerPoint was first being programmed, a fateful and incorrect decision was made. Placeholder content would always appear in front of static content, regardless of how placeholders and other content were stacked on the layout. This has led to countless bald designers, from them tearing out their hair because there’s no way to place logos over photos.
The Locked Graphics Workaround
One way to circumvent this design flaw is to place a picture placeholder on the layout as usual. Then create a sample slide from it. Place the logo over the photo and lock its position in the XML. Here’s my article on how to do that: OOXML Hacking: Locking Graphics. This allows the user to replace the photo while keeping the logo in front.
The disadvantage is that you can’t create a new slide from the layout. Instead, the user must copy and paste the sample slide to create another one.
The Background Picture Fill Workaround
If the photo is a full-screen photo, there’s another method. This time, don’t place a picture placeholder on the layout. Instead, just place the logo there. In use, the user right-clicks on the background and chooses Format Background. On the Format Background task pane, choose Picture or texture fill, then click on the File button and choose the background photo. The logo will stay on top.
The disadvantage to this technique is you have to include instructions to the end user, who may never have used a picture fill previously. My thanks to Jaakko Tuomivaara of Supergroup Studios in the UK for this tip.
The Holey Placeholder Workaround
For simple logos, or logos contained in a simple shape like a circle or square, create a logo-shaped hole in the placeholder. Here’s a Windows-only version.
On the layout, create the picture placeholder.
Insert the logo as an EMF vector file, then ungroup it twice, confirming with PowerPoint that you want to do this. This changes it from a placed picture to a set of vectors embedded on the layout.
With the logo parts selected, hold the Shift key and click on the placeholder.
Fill the background, or a shape placed behind the logo hole, with the logo color.
If the logo is in a shape, you can use similar steps on both Windows and macOS computers. Using Mac command names: Place the logo over the placeholder, then draw a Shape exactly the same size as the logo, placed over the logo precisely. Select the shape and the placeholder, then use Shape Format>Merge Shapes>Fragment, then delete the shape to reveal the logo-sized hole in the placeholder. For some reason, Merge Shapes>Subtract works differently on a Mac, deleting both the shape and the placeholder, but Fragment still get the job done. Thanks to Ute Simon for suggesting this method in the comments.
A variation on this that can be more detailed is to place a copy of the logo above the placeholder. Then, shape-by-shape, use the logo over the placeholder with the Combine variant of Merge Shapes to knock holes in the placeholder. Then add colored shapes below the placeholder to “fill” the holes. If you have compound shapes (like the letter O or A), you’ll have to release the compound shapes, then connect the inner shape with the outer one. Here’s what the end result looks like in Illustrator.
Outside line connected to inside to simulate a compound shape
Logos Over Photos: The Placeholder Picture Fill Workaround
This works with any size photo, it doesn’t have to be full-frame like the previous hack. No copy and paste, no instructions required. I heard about this one from Joshua Finto (Make It So Studio in Austin, TX).
On the layout, insert a picture placeholder to hold the photo. Then add another placeholder on top, sized to exactly the same size as the logo. I use Online Image placeholders because they are rarely used, using a common placeholder type risks content being placed in it if you change layout types. Remove bullets, if there are any, and type a space character so no placeholder text appears.
In the Format Picture task pane, click on Picture or texture fill, then on the File button and fill the placeholder with the logo. Create a slide, place a photo and voila! The logo appears over top of the photo! After creating this, it’s wise to lock the placeholder in XML on that layout, to prevent distortion by the user playing with it. OOXML Hacking: Locking Graphics. EMF, SVG and transparent PNGs are all good logo formats for this application.
Microsoft maintains Feedback forums to collect feedback from users. I’ve created a suggestion there that the placeholder/shape stacking order on the layout should be respected on slides. Please add your vote here: Placeholders Should Not Pop to the Front. Perhaps we can persuade Microsoft to fix the mistake so we don’t need these time-wasting workarounds.
Thanks to my readers who have added some useful suggestions! Please read the comments for additional ideas and tips.
A bug in PowerPoint Online can wreck presentations edited there. This article describes the symptoms and how to do a notes page repair – if you use Windows. Mac users cannot fix this issue because of sloppy Microsoft programming in the macOS version.
PowerPoint Online can resize the Notes Master page of a presentation. It can also resize elements on the Notes Master, leading to a really wacky combination of large and small placeholders. Almost always, the page size is made much smaller, often into a thin but tall rectangle. The exact cause hasn’t been determined yet, but it may be caused by editing Notes. PowerPoint Online can’t display either the Notes Page or the Notes Master for a presentation, so this problem goes undetected until the presentation is downloaded and viewed in the desktop version. Do a quick Google search on notes page wrong size site:microsoft.com to see lots of examples.
There are three steps to a notes page repair, and it starts with an XML hack. Open up the presentation in BBEdit or OOXML Tools (macOS) or unzip it (Windows). Find the presentation.xml part. In human-readable form, the 13th line will be the Notes Master page size. This example shows the normal values:
<p:notesSz cx="6858000" cy="9144000"/>
The hack involves resetting these values to normal, then saving and closing, or rezipping the files. But that’s just 1 of 3 steps. The next 2 steps can be done in the program.
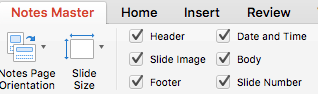
Open the presentation in PowerPoint, then choose View>Notes Master. Very likely there will be wrong-size shapes or missing elements. To fix this, uncheck, then recheck each of the 6 elements (Header, Slide image, Footer, Date and Time, Body and Slide Number). This restores them to the designed co-ordinates.
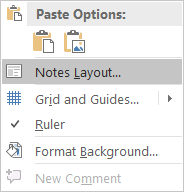
The third step notes page repair is to reset each Notes Page to follow the Notes Master. This is where the Mac version runs into trouble. In the Windows version of PowerPoint, open the Notes Page for each slide and right-click on the background. This is the context-aware menu you’ll see:
Click on Notes Layout, then on Reapply master. The Notes Page reverts to correct formatting.
Now let’s look at the same operation on a Mac. Right-click on the Notes Page and what do we see?
This is not a “context-aware” menu. This is exactly the same menu that you get if you right-click on a slide. The available commands make sense for a slide, not for a notes page. There is no option to reset the page to the Notes master. The Mac programming team got lazy and just reused the same menu.
As a result, Mac users can’t complete a notes page repair. They can’t reset the page back to the original format.
But wait! What’s that? I hear you say, you read about a macro that can reapply the Notes master. Yup, it’s here on Steve Rindsberg’s awesome PPTFAQ site: Reapply the Notes Master to each Notes Page in a presentation. Except that macro raises an error on Mac version of PowerPoint, because the control ID can’t be found.
Microsoft has f***ed this one badly. First, through the PowerPoint Online bug that creates this, and remains unfixed until the date of this post. Second, because of the sloppy “context-aware” menu programming. And third because they can’t provide PowerPoint for Mac with a complete list of controls in the VBA object model.
As a last resort, create a new blank presentation from the same template as was used for the original file. Then copy and paste the slides from the damaged deck into it. Thanks to Christa Barnes for this suggestion in the comments.
Since I first wrote this article, John Wilson in the UK has written a pair of Windows-only repair utilities to fix this problem. Here’s the page where you can download both, one to fix the Notes Master and another to reapply the master to the Notes Pages. Give them a try, it’s a little easier than revising the XML.
As always, if you’re new to this topic, please review the page about editing OOXML files. Mac users should also read XML Hacking: Editing in macOS. I value your feedback, please leave a comment about any concerns or questions.
Bad design decisions haunt our lives. One poor choice was Microsoft’s selection of the text baseline for vertical bullet alignment in PowerPoint. Bigger bullets move up, smaller bullets move down, without any control in the user interface. I’m sure you’ve seen this effect as you change bullet size relative to text:
Fixing Vertical Bullet Alignment with VBA
There are a couple of ways to fix this issue. One is to download and install this free Add-in by John Wilson of PowerPoint Alchemy: Bullets Move Up and Down. The VBA code behind this add-in looks something like this:
Sub fixBulletAlignment()
  Dim oDes As Design
  Dim oMast As Master
  Dim L As Long
  Dim oCust As CustomLayout
  Dim oshp As Shape
  For Each oDes In ActivePresentation.Designs
    For Each oCust In oDes.SlideMaster.CustomLayouts
      For Each oshp In oCust.Shapes
        If oshp.Type = msoPlaceholder Then
          Select Case oshp.PlaceholderFormat.Type
          Case Is = ppPlaceholderBody, ppPlaceholderVerticalBody, ppPlaceholderObject
            For L = 1 To oshp.TextFrame.TextRange.Paragraphs.Count
              With oshp.TextFrame.TextRange.Paragraphs(L).ParagraphFormat
                .BaseLineAlignment = ppBaselineAlignCenter
              End With
            Next L
          End Select
        End If
      Next oshp
    Next oCust
  Next oDes
  MsgBox "Masters and layouts fixed", vbInformation, "PowerPoint Alchemy"
End Sub
When this runs, it adds an over-ride to the text level definitions on each slide layout that has multi-level text (any layout containing a Content or Text placeholder).
This is adequate for most purposes. With correctly aligned bullets, we now get this effect when we change the bullet size:
There are a couple of downsides to the VBA approach:
You have to remember to apply it to each presentation or template.
If you add a new layout, or add a new text or content placeholder to an existing layout, you’ll have to re-run the macro.
Table text and text box text does not benefit, their bullets will still be wonky.
Fixing Vertical Bullet Alignment with XML Hacking
With XML hacking, we can fix this problem once and never have to think about it again. Start by unzipping a new blank template, then editing ppt\slideMasters\slideMaster1.xml. There are 3 sections to be edited: p:titleStyle (for all title placeholders), p:bodyStyle (for all text or content placeholders) and p:otherStyle (for table text).
The editing is the same for all sections: for each a:lvlXpPr section, where X is the level number, add fontAlgn=”ctr” to the definition. Here’s what it looks like before…
There are 19 level definitions in slideMaster1.xml to change. When you’re done that, open ppt\presentation.xml and make the same edit to the 9 levels of the p:defaultTextStyle section that controls formatting for text boxes and notes and handout pages.
When you’re done, rezip the XML files and rename the template blank.potx. Place it so it works as your default template, here’s an article from Steve Rindsberg with the details for each Office version. For PowerPoint 2016 and 2019 for Windows, follow the PowerPoint 2013 directions. For 2019 for Mac, use the Mac 2016 directions: Create your own default presentation.
Now that this is set in your default template, every new file created when PowerPoint opens will have the correct vertical bullet alignment. Please note that in PowerPoint for Windows, if you choose File>New>Blank Presentation, this autogenerates a new file that is not based on your default template. Such a file will have incorrect vertical bullet alignment.
Groups of workers usually use the same templates. But it can be time-consuming to keep everyone updated when templates are installed separately on each desktop. Instead, you can implement shared workgroup templates with a feature already built into Office.
Shared Workgroup Templates – Multiple Uses
Every desktop version of Office, Mac and Windows, includes a Workgroup templates option that allows you to set a network share as a templates folder. Templates on this share are instantly available to all users, making updates and revisions a breeze. Automatically, everyone in the office is using the same version. As long as template names remain identical, then old Word documents automatically attach themselves to the new template.
While you can only set the Workgroup Templates location in Word, once you make the change there, it also applies to PowerPoint and Excel.
The Workgroup templates network share can serve more that just templates. With some additional subfolders, it can be a source for Document Themes, including custom SuperThemes, it can hold collection of Font and Color themes. These additional files don’t show in the File>New dialog. Theme files display under the Themes dropdown, theme colors under the Colors dropdown and theme fonts under the Fonts dropdown.
Shared Workgroup Templates – Setup
To set up shared workgroup templates, first create the network location and ensure it’s accessible to all in the office without a signin. Each computer should connect to the share automatically on restart, so users don’t have to remember to manually connect before creating a new document. Create subfolders with the following names for othe file types you want to support. Document Themes for themes, with subfolders for Theme Colors and Theme Fonts. All versions of Office expect exactly the same file structure.
If the office uses Group Policies to install and configure software, you can use that feature to add the Workgroup Template location to each user installation. If you’re using “sneakernet” for configuration, here’s how to do it manually. All Office suites use a setting in Word to set the location for all the other programs
Office 2010, 2013, 2016 and 2019 for Windows
In Word, choose File>Options>Advanced.
Scroll down to the General section of Advanced and click on the File Locations… button.
Select the Workgroup templates line, then click on the Modify button.
In the dialog that opens, enter the path to the network share in the Folder name field, or use the window controls to navigate to the folder. Select the folder and click on OK. OK all the way out and close Word
Office 2007 for Windows
In Word, click on the Office button, then on Word Options, then on Advanced..
Scroll down to the General section of Advanced and click on the File Locations… button.
Select the Workgroup templates line, then click on the Modify button.
In the dialog that opens, enter the path to the network share in the Folder name field, or use the window controls to navigate to the folder. Select the folder and click on OK. OK all the way out and close Word.
Office 2003 and earlier for Windows
In Word, choose Tools>Options and click on the File Locations tab.
Select the Workgroup templates line, then click on the Modify button.
In the dialog that opens, enter the path to the network share in the Folder name field, or use the window controls to navigate to the folder. Select the folder and click on OK. OK all the way out and close Word.
Office 2016 and 2019 for Mac
In Word, choose Word>Preferences>File Locations.
Select the Workgroup templates line, then click on the Modify button.
In the dialog that opens, use the window controls to navigate to the folder. Select the folder and click on Open. OK out and close Word
Office 2011 and earlier for Mac
In Word, choose Word>Preferences>File Locations.
Select the Workgroup templates line, then click on the Modify button.
In the dialog that opens, use the window controls to navigate to the folder. Select the folder and click on Choose. OK out and close Word
Shared Workgroup Templates in Use
Here’s how to access Workgroup templates in Office programs
Office 2016 and 2019 for Windows
Choose File>New.
Click on Custom.
Click on Workgroup Templates, select a template, then click on Create.
Office 2013 for Windows
Choose FILE>New.
Click on SHARED.
Click on a template.
Office 2010 for Windows
Choose File>New>My Templates.
On the Personal Templates tab, select a template, then click on OK. This tab also shows local templates on the user’s computer.
Office 2007 for Windows
Click on the Office button, then on New.
Click on My templates…
Select the My Templates tab. Workgroup templates are displayed along with local templates in the same pane.
Office 2003 and earlier for Windows
Click on File>New. The New Document pane opens at the side of the window.
On the New Document pane, click on On my computer…
Select a template from the General pane and click on OK. This pane shows a mix of local and workgroup templates.
Office 2016 and 2019 for Mac
Choose File>New from Template…. The Document Gallery opens
In the upper left corner, click on the Work link. This link only appears when you have a Workgroup Templates location set in Preferences.
Select a template, then click on Create.
Office 2011 for Mac
Choose File>New from Template. The Document Gallery opens.
Click on Workgroup Templates in the left-hand TEMPLATES list..
Select a template and click on Choose.
Office 2008 for Mac
Choose File>Project Gallery. The Project Gallery opens.
Click on My Templates in the left-hand Category list..
Select a template and click on Open. This window will show a mix of Workgroup and local templates.
Shared Workgroup Templates – Shortcomings
In addition to templates and themes, a local templates folder also serves custom Chart and SmartArt templates. Neither of these formats is supported by Workgroup Templates, so those templates must still be installed locally on each user’s computer.
Having worked with many great designers, I see that they try to create variety in chart appearance rather than uniformity. So what if there was a way to have make a chart layout with the colors in a different order? This could give you layout color variations while sticking to the branding guidelines. Well, I have a solution for you, but you’re gonna have to hack some XML!
Normally, every layout under a slide master has only 1 color theme. You’re mostly stuck with those 10 colors in a fixed order. In my earlier article about Great Color Themes, I explained how the sequence of colors determines the color order of charts.
But during some recent research, I started reading about the <p:clrMapOvr> XML element. This can be applied to a slide layout to rearrange the color theme. With Accents 1 to 6 in a different order, charts can acquire a whole new look. Here’s how it works.
Layout Color Variations with clrMapOvr
At the end of most layouts, you may have seen this XML:
This tells the layout that it should use the standard color mapping as defined in the theme. We would think of this as the default or normal set of colors. But what if we want to alter this sequence? We can assign each color theme value to a different task. If you import a PowerPoint 2003 or older deck, this gets generated automatically to keep the deck looking as expected.
This reverses the order of accent colors from the master, giving charts, fills and shapes a whole new look for the slides based on this layout.
We used to tell clients “Sorry, we have to set the color order to match only one of your designed charts.” Now we have a different message: “Different chart color sequences? No problem. Just use a different layout!”
If XML hacking doesn’t interest you, Brandwares can do it for you. We’re a full-service template creation service for all Office programs. Email me at production@brandwares.com with your project details.
Legacy Slides – Making It Work the Way You Think It Should Work
Here’s an all-too-common scenario. An organization has a library of presentations built up over the years, full of valuable content. Time passes and a branding update becomes inevitable, to keep the corporate look contemporary. A designer is hired, a new template created and distributed. Users create new decks and start pasting in old slides. Chaos ensues: the formatting is all f***ed up! It could be something minor, like regular text changing to bold. But much more often, old formatting gets pasted in, and in Slide Master view you start seeing unwanted layouts, often with names preceded by numbers like 1_Title and Content. What went wrong?
PowerPoint has several requirements for pasting to work as expected. When you paste in old slides, and you want them to map to your new slide layouts, they must meet all 5 of these criteria:
The slide layout name must be the same. This can be set in Slide Master view.
The slide layout type (as set in XML) must be the same. If you copy an existing Title Slide layout, it will retain the layout type. But if you delete all Title Slide layouts, then realize you made a mistake, you’re in trouble. It’s possible to recreate a built-in slide layout by running a VBA macro:
Sub RestoreLayout()
  With ActivePresentation.Slides
    .Add(.Count + 1, ppLayoutObject).Delete
  End With
End Sub
The number of placeholders must be the same. When there is a different number of placeholders on the slide being pasted, PowerPoint goes mental and will reassign content randomly.
The types of placeholders must be the same. If a user is pasting a Microsoft-compatible Title and Content slide, PowerPoint is looking for:
1 Title, 1 Content, 1 Date, 1 Footer and 1 Page Number placeholder. No more, no less. If your old template layout has only a Title and Content placeholder, your new template must have the same.
For corresponding placeholders in the old and new layouts, the idx number must match. Title placeholders don’t have idx numbers, because there is only one of them on a slide at a time. The idx numbers tell PowerPoint which placeholder should receive information from a particular placeholder in the old layout. This allows you to have several of the same type of placeholder on a layout and still have PowerPoint map content correctly among them.
This simplest way to guarantee that all these criteria will be met is to not create a template from a brand new file. Instead, reformat the old template to the new branding, taking care not to delete or rename any layouts (you can add new ones), and not to add or delete any placeholders on the existing layouts.
Legacy Slides – Another Possible Hiccup
An additional wrinkle can appear if an embedded image is included, perhaps for a logo. Then the XML will include a line line this:
<a:blip r:embed="rId2">
rId numbers are used by the _rels file that corresponds with the layout to tell PowerPoint where to find the logo. If the rId number is wrong, PowerPoint will show an empty box with the text The picture could not be displayed. Of course, you could just replace the image if you see this error during file construction.
Static pictures, graphics, text boxes and shapes placed on the layout make no difference to layout mapping. Add them, remove them, they won’t stop PowerPoint finding the correct layout.
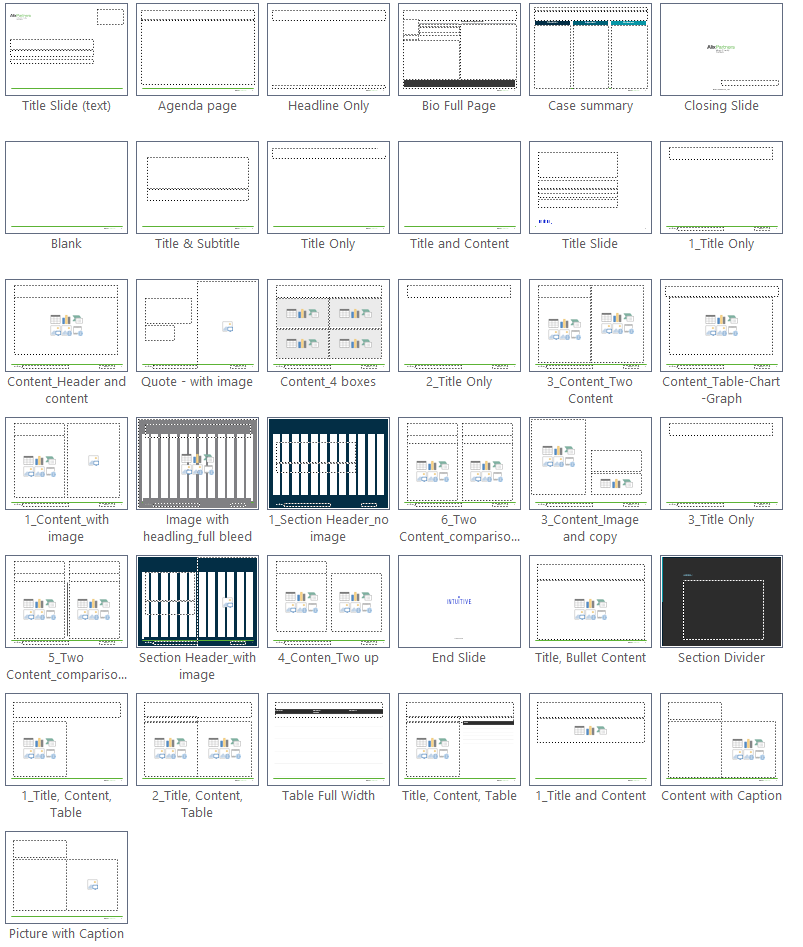
If a pasted slide does not meet all of the above criteria, PowerPoint imports the slide layout from the old deck, prepending it’s name with 1_, if it’s the first time it’s importing that layout. Very quickly, the client’s deck is polluted with multiple spurious slide layouts. When face with choices like Title and Content, 1_Title and Content, 2_Title and Content, 3_Title and Content, the user will simply give up trying to decide which one to use. Branding goes down the drain.
After 3 pastes from “designer” decks, this is what your client is struggling with:
For maximum legacy compatibility, new templates you create for a client should include the slide layouts and placeholders of previous templates they have commissioned. Often it’s feasible to segregate these using different slide masters, one for each previous template they have used. Each slide master includes exactly the same layouts and placeholders used in a previous version, but with the branding updated to the new look. Then in the receiving template, the user is instructed to paste immediately after a slide based on an earlier version. This method can reduce the user’s pain of having to follow your shiny new template.
In a workflow where PowerPoint files are converted to Google Slides and back, none of the above will work. The XML created by Google is a mess and pasted slides will inevitably bring their non-standard Google layouts with them. There is no fix for this other than a custom VBA conversion macro.
We have years of expertise in this area and can either assess your template for legacy slide compatibility or create a template or theme for you that will work seamlessly with your old files. We’re here to help! Contact me at production@brandwares.com.
Free Control Control Add-in for Word for Mac
Subscribe to the Best Practices blog and get a free copy of our new Control Control add-in. This is the easiest way to create the same modern form controls that are in Word for Windows. Enter your real email and hit Subscribe in the right-hand column of this page. You’ll receive the add-in and installation instructions within 3 days.