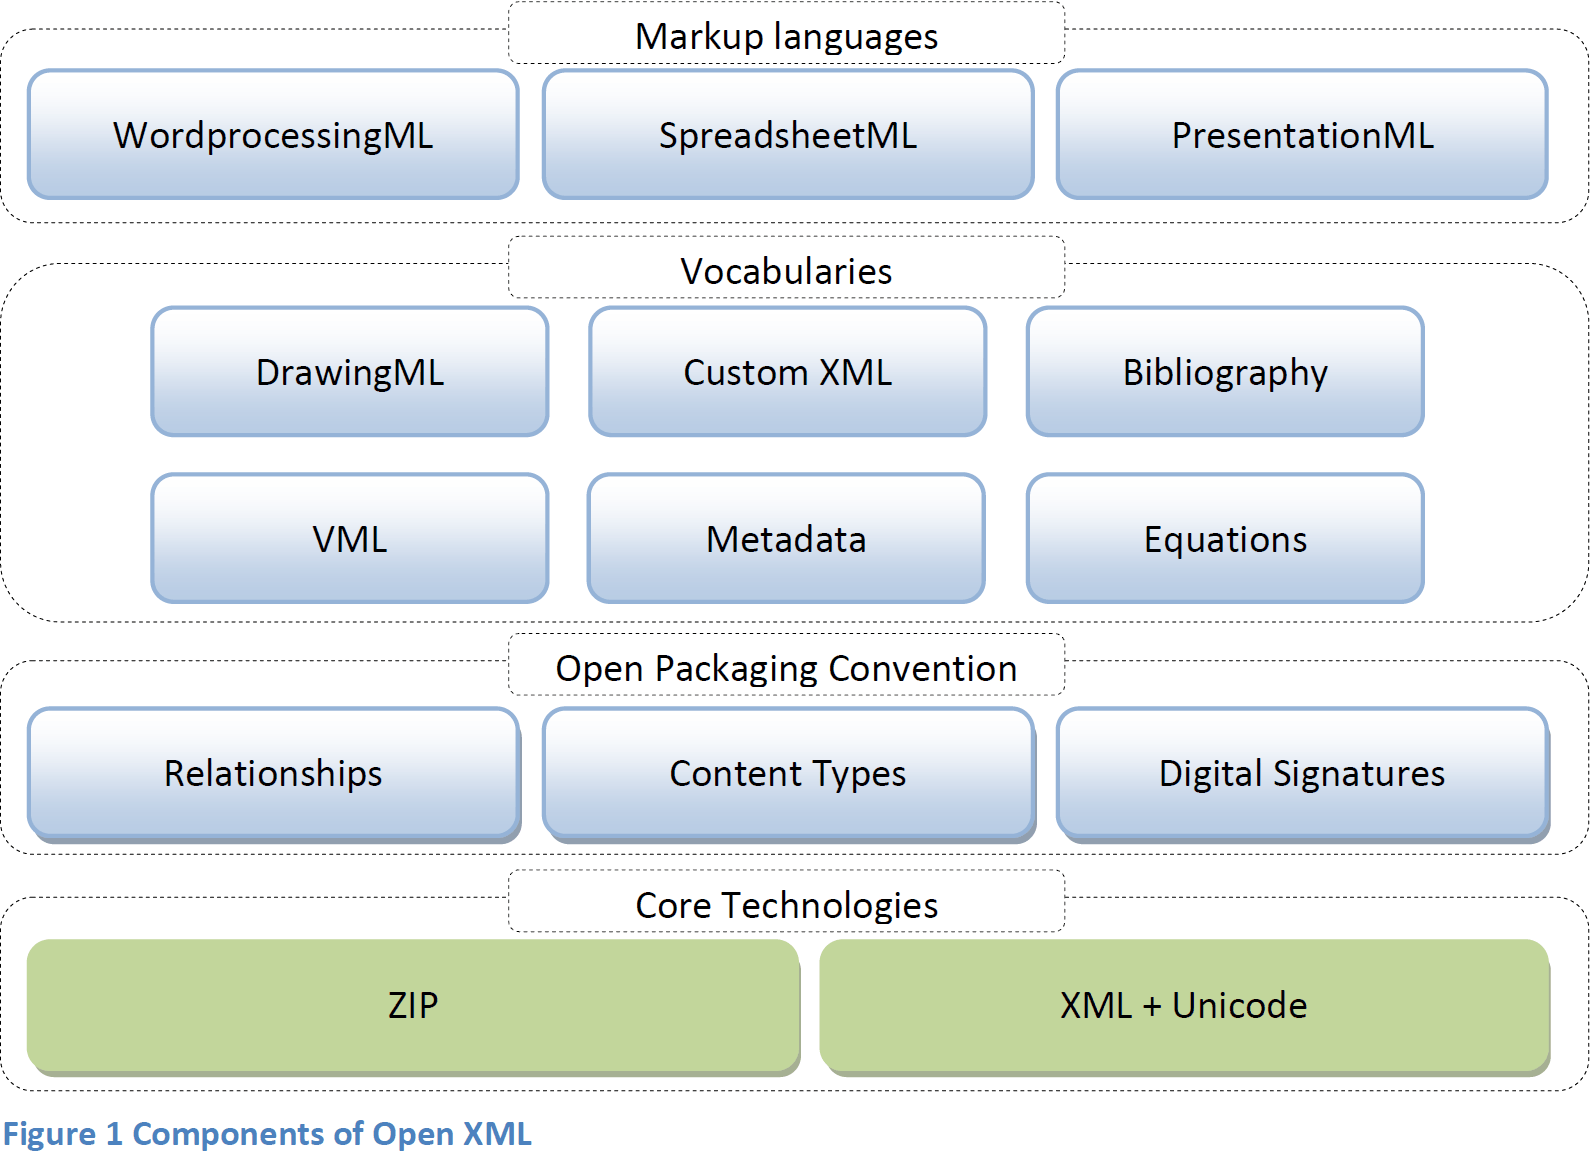
There are more AutoShapes in Office than appear in the user interface. Over time, Microsoft has quietly added to the collection stored in Office. Many of the more recent shapes are used in SmartArt files, while others have no current use that I can detect. But for anyone who hacks XML or codes VBA will find this week’s download or every autoshape a useful reference.
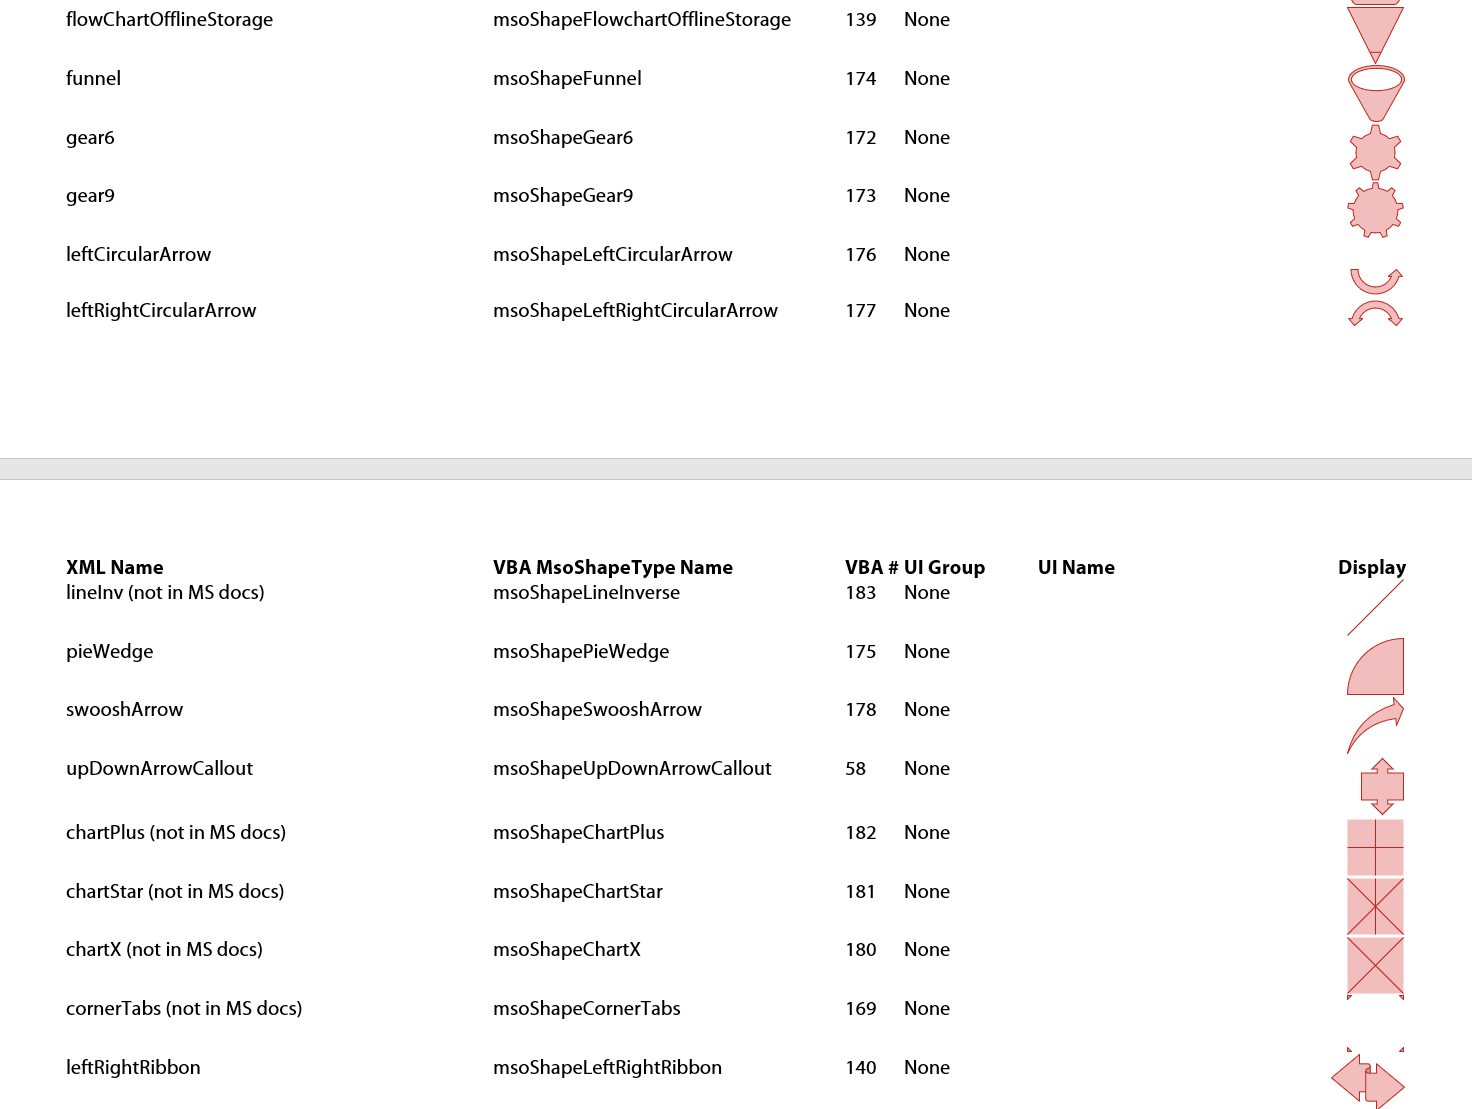
These are all the shapes that can be used in a piece of SmartArt. This is a deep topic: SmartArt XML is a programming language with a Frankenstein syntax. But the starting point for any language is to get the names right. SmartArt and VBA both reference the AutoShapes collection in Office, but they use different names for the same objects. Many of the same shapes are seen in the Shapes dropdown of Office programs, but those names are also different. The main source of the VBA names are from this page: MsoAutoShapeType enumeration (Office), while the XML names come from this out-of-date listing: SmartArt AutoShapes.
So, for my own sanity, I created a Word document showing an example of each shape, along with it’s name in XML, in VBA and in the user interface. This has smoothed out my workflow, and it may help you as well.
For any non-interface shapes, you can insert them into a document with code analogous to this. For PowerPoint:
Sub MakeShape()
  ActivePresentation.Slides(1).Shapes.AddShape msoShapeTrapezoid, 24, 24, 144, 144
End Sub
Change the bolded word to the shape name in the VBA MsoShapeType Name column.
Some shapes have specialized VBA commands, like callouts:
Sub MakeShape()
  ActivePresentation.Slides(1).Shapes.AddCallout msoCalloutTwo, 24, 24, 144, 144
End Sub
Callouts led me to a discovery about legacy versions. msoCalloutOne gives exactly the same result as msoCalloutTwo in current versions of Office.That seemed odd, so I ran the same macro in PowerPoint 2003 (I still have it installed for its macro recorder). In that version, msoCalloutOne creates a callout with a vertical leading line that can be moved up and down, but not at an angle. Presumably, MS found that useless and deprecated it.
Download the Word document showing every autoshape here.